Gibson Style Banjo Binding

Instruction by Richie Dotson


You first need to know that the frets were installed and filed flush to the sides of the fingerboard.  The binding was then installed using Duco cement and masking tape.  The banjo binding is slightly taller than it needs to be therefore overhanging the tops of the frets by a fraction as well as running below the bottom of the fingerboard.  This is a must when installing most binding.  The binding was allowed to set up a full 24 hours at room temperature before the tape was removed and the shaping started.

binding001

binding002

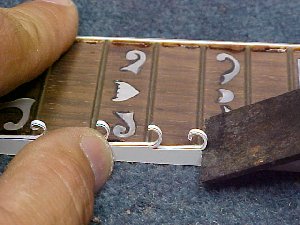
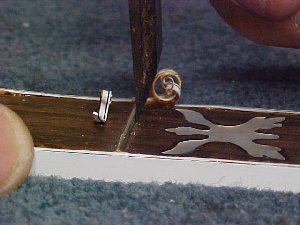
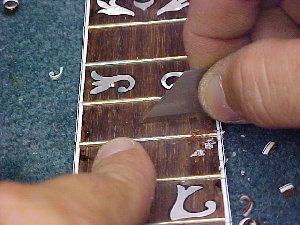
    I use a very sharp 1/2″ wood chisel bevel side down and take off only a tiny amount of binding at a time.  About 1/32″ is plenty but the amount you can safely remove without damage will depend on the rigidity of the binding you are using, the temperature and how sharp your chisel is.  The material should be taken off toward each fret and extra care should be taken on the ends.

The binding will start to gather and curl up at the edges of the frets and the chisel should be used with the flat side up in order to trim the excess as you go.  Stay off the fret when you perform this step.

binding003

binding004


binding005

binding006


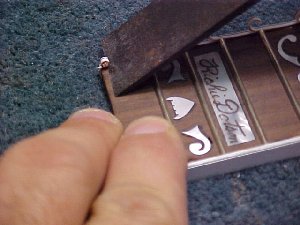
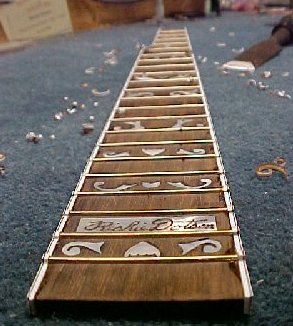
After trimming each fret the binding starts to take a rough shape.  This is quite tedious work and should be done in a well lit place.  Do not be in a hurry when shaping the binding.  It will show in the end if you do.


binding007 binding008


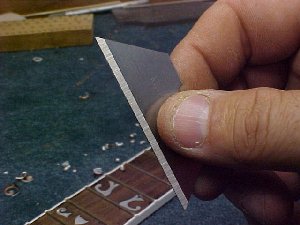
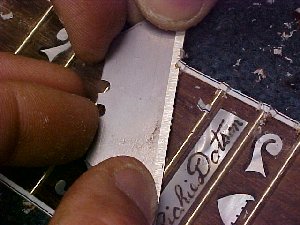
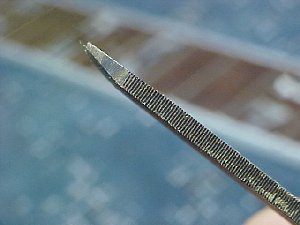
Once the whole fingerboard is roughed in grab a brand new razor blade such as this box cutter blade or a new safety razor blade.


binding009 binding010


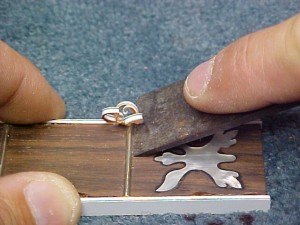
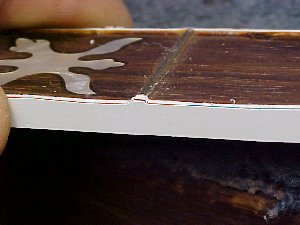
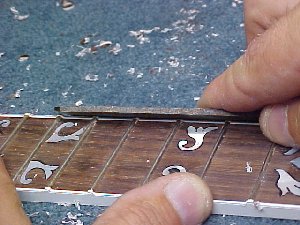
You can see the blade is used flat against the binding and the fingerboard.  You shouldn’t overdue it here for obvious reasons but the result you will get from this step is a bit more refined than the chisel as you can see.

binding011 binding012

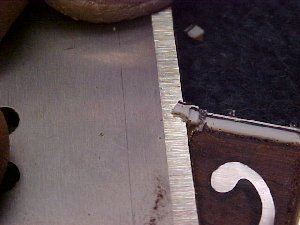
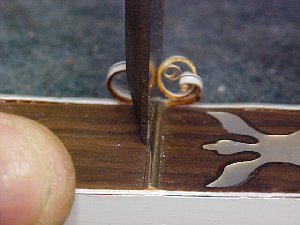
After the binding has been leveled with the fingerboard, the blade you are using can be laid across a couple of frets therefore leveling it in order to gently remove the material remaining above the plane of the frets.

binding013 binding014
Carefully remove the material from the side of the fret with the blade as well.  Use a 45 degree angle to rough in the fret profile in the binding.  The next step will be easiest if the smooth mill file you are using is beveled.  I beveled this one on the bench sander using 80 grit paper.
binding015 binding016
Keep the file at a 30 degree angle to the binding and not the frets as you wouldn’t want to ramp them too much.  File only in a forward motion and only as much as it will take to achieve the angle between the level plane of the fingerboard and just outside the end of the fret on the binding.  Then switch to 220 grit sandpaper.
binding017 binding019

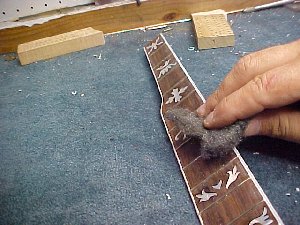
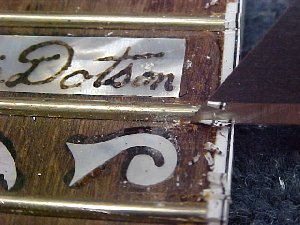
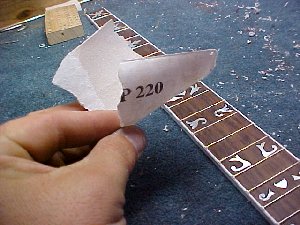
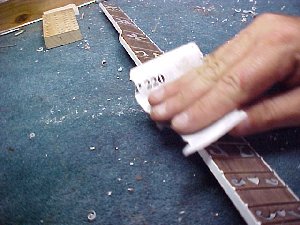
Using the 220 grit sandpaper, lightly sand over the edges of the binding then follow up with 0000 steel wool to finish off the job.

binding020

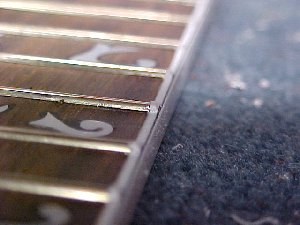
This is a close up of the finished product.  This one turned out really well.

I hope you have enjoyed this series.

Richie Dotson 12-26-03