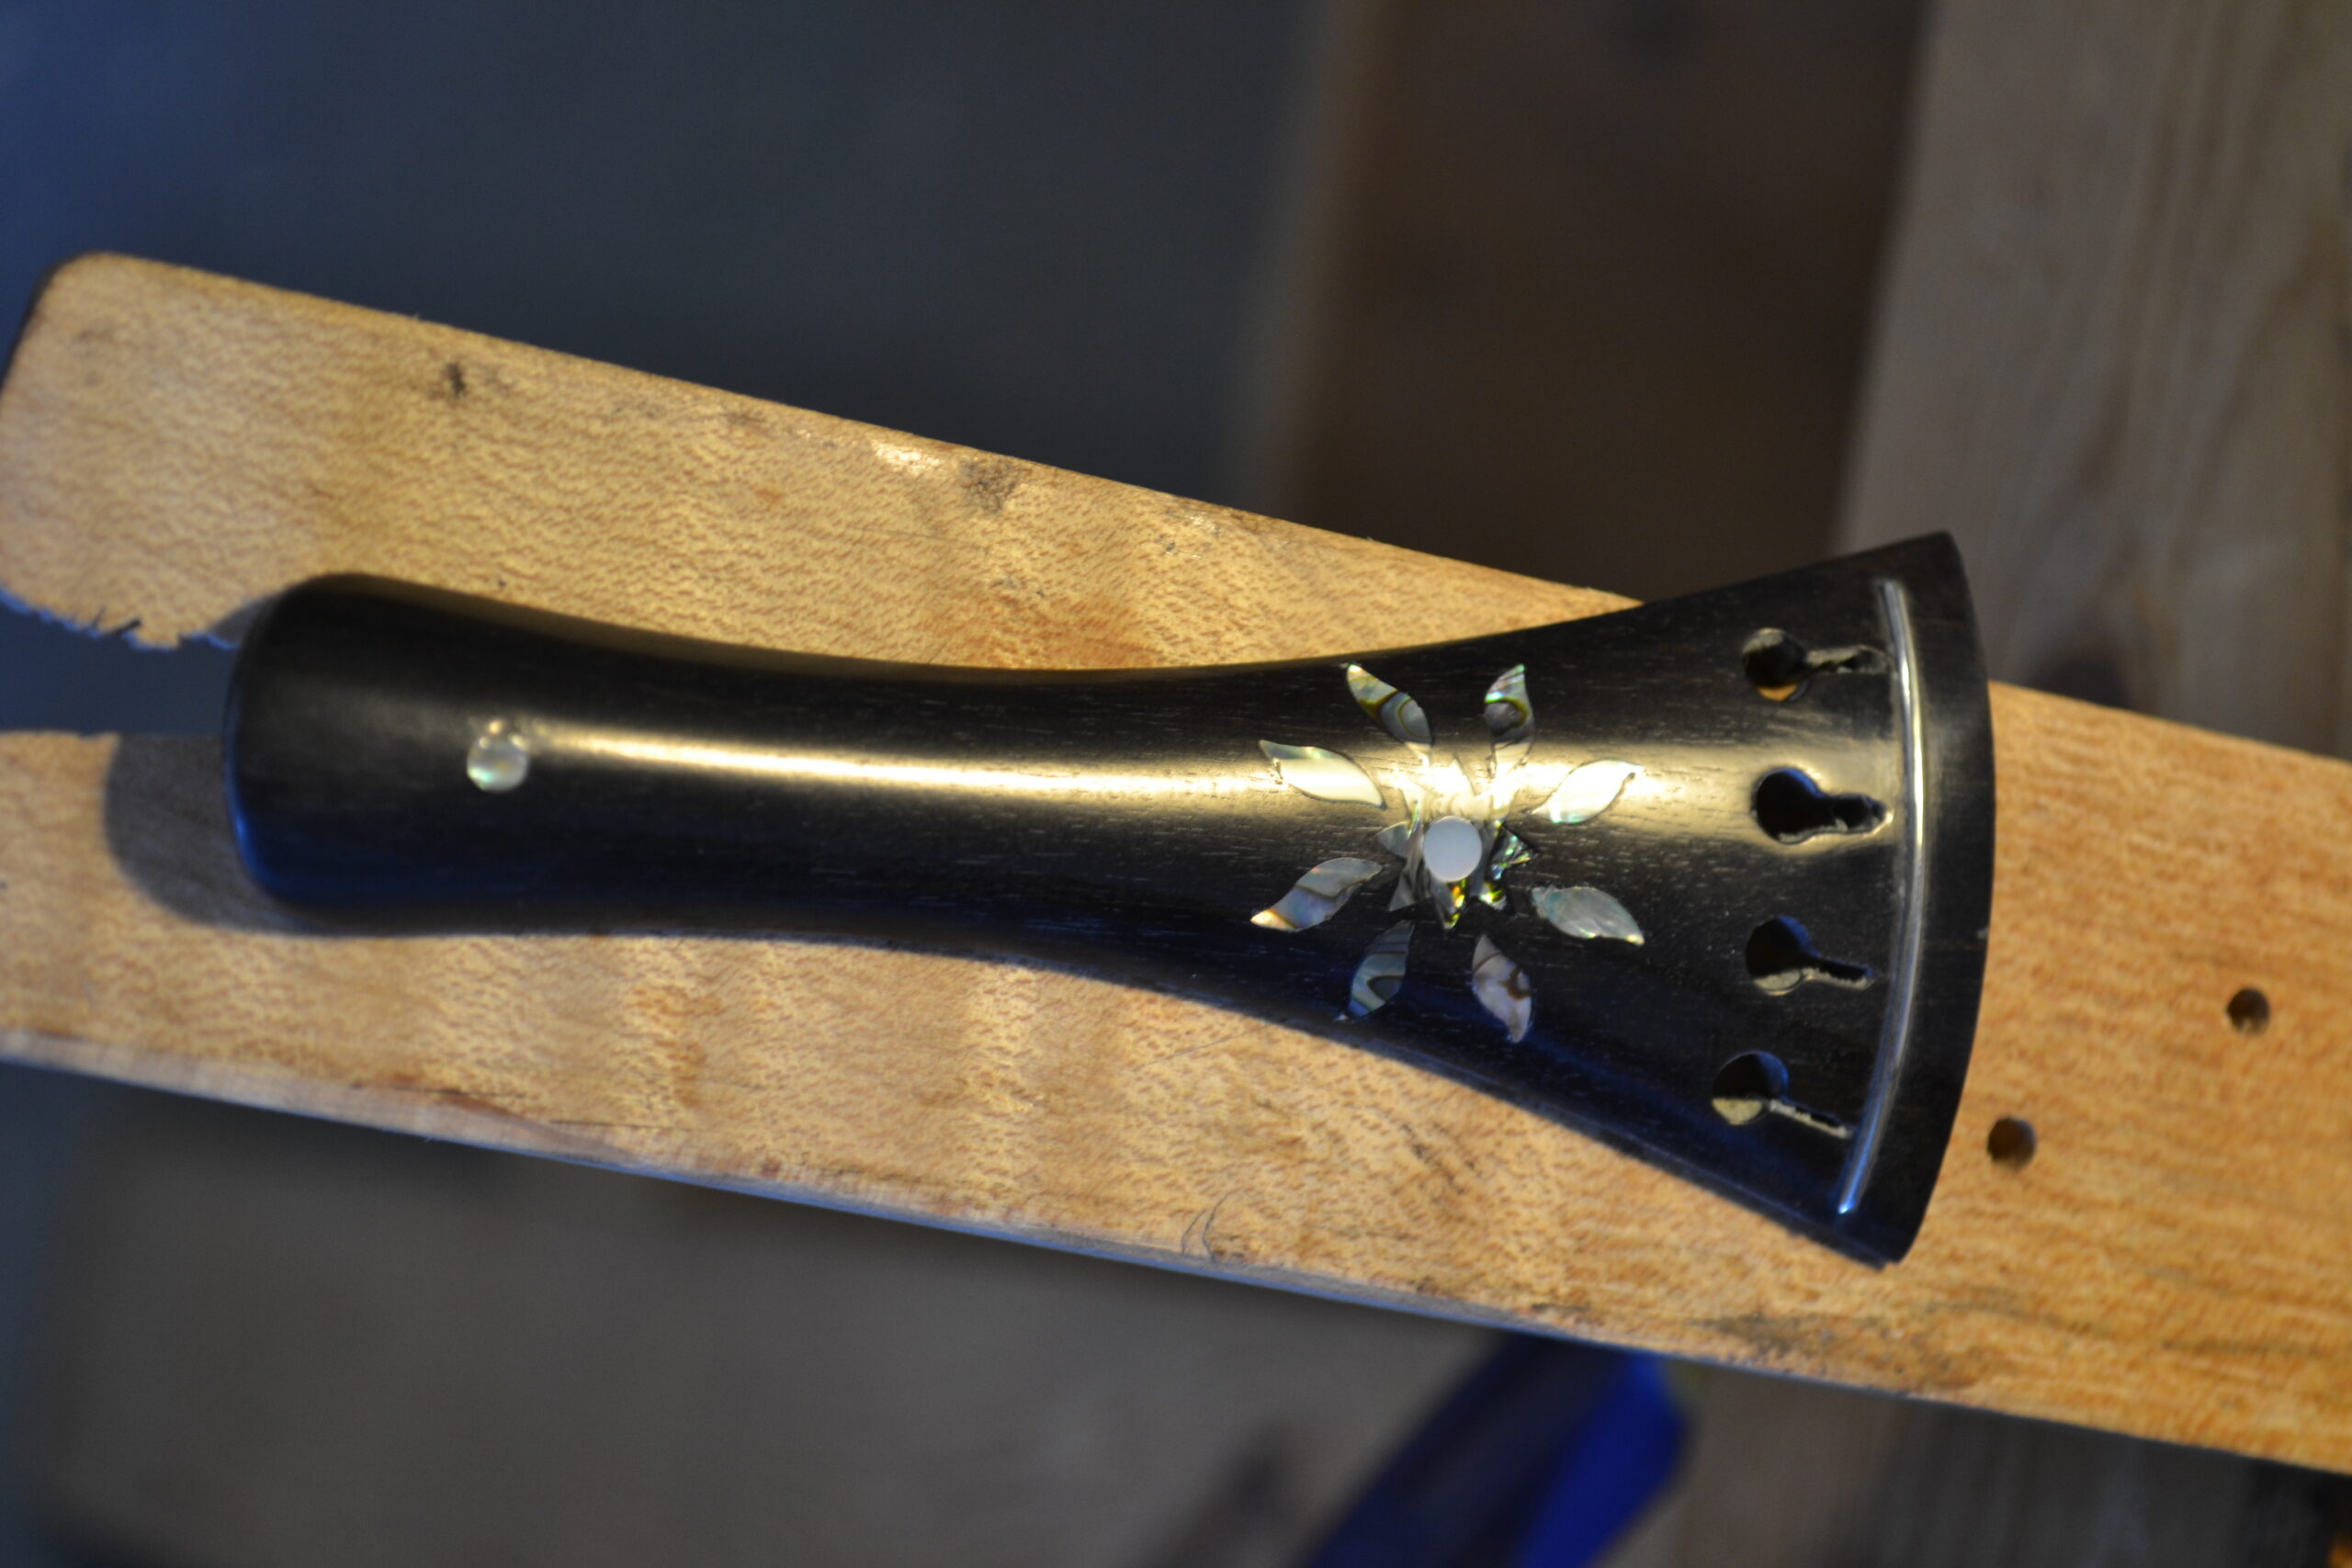
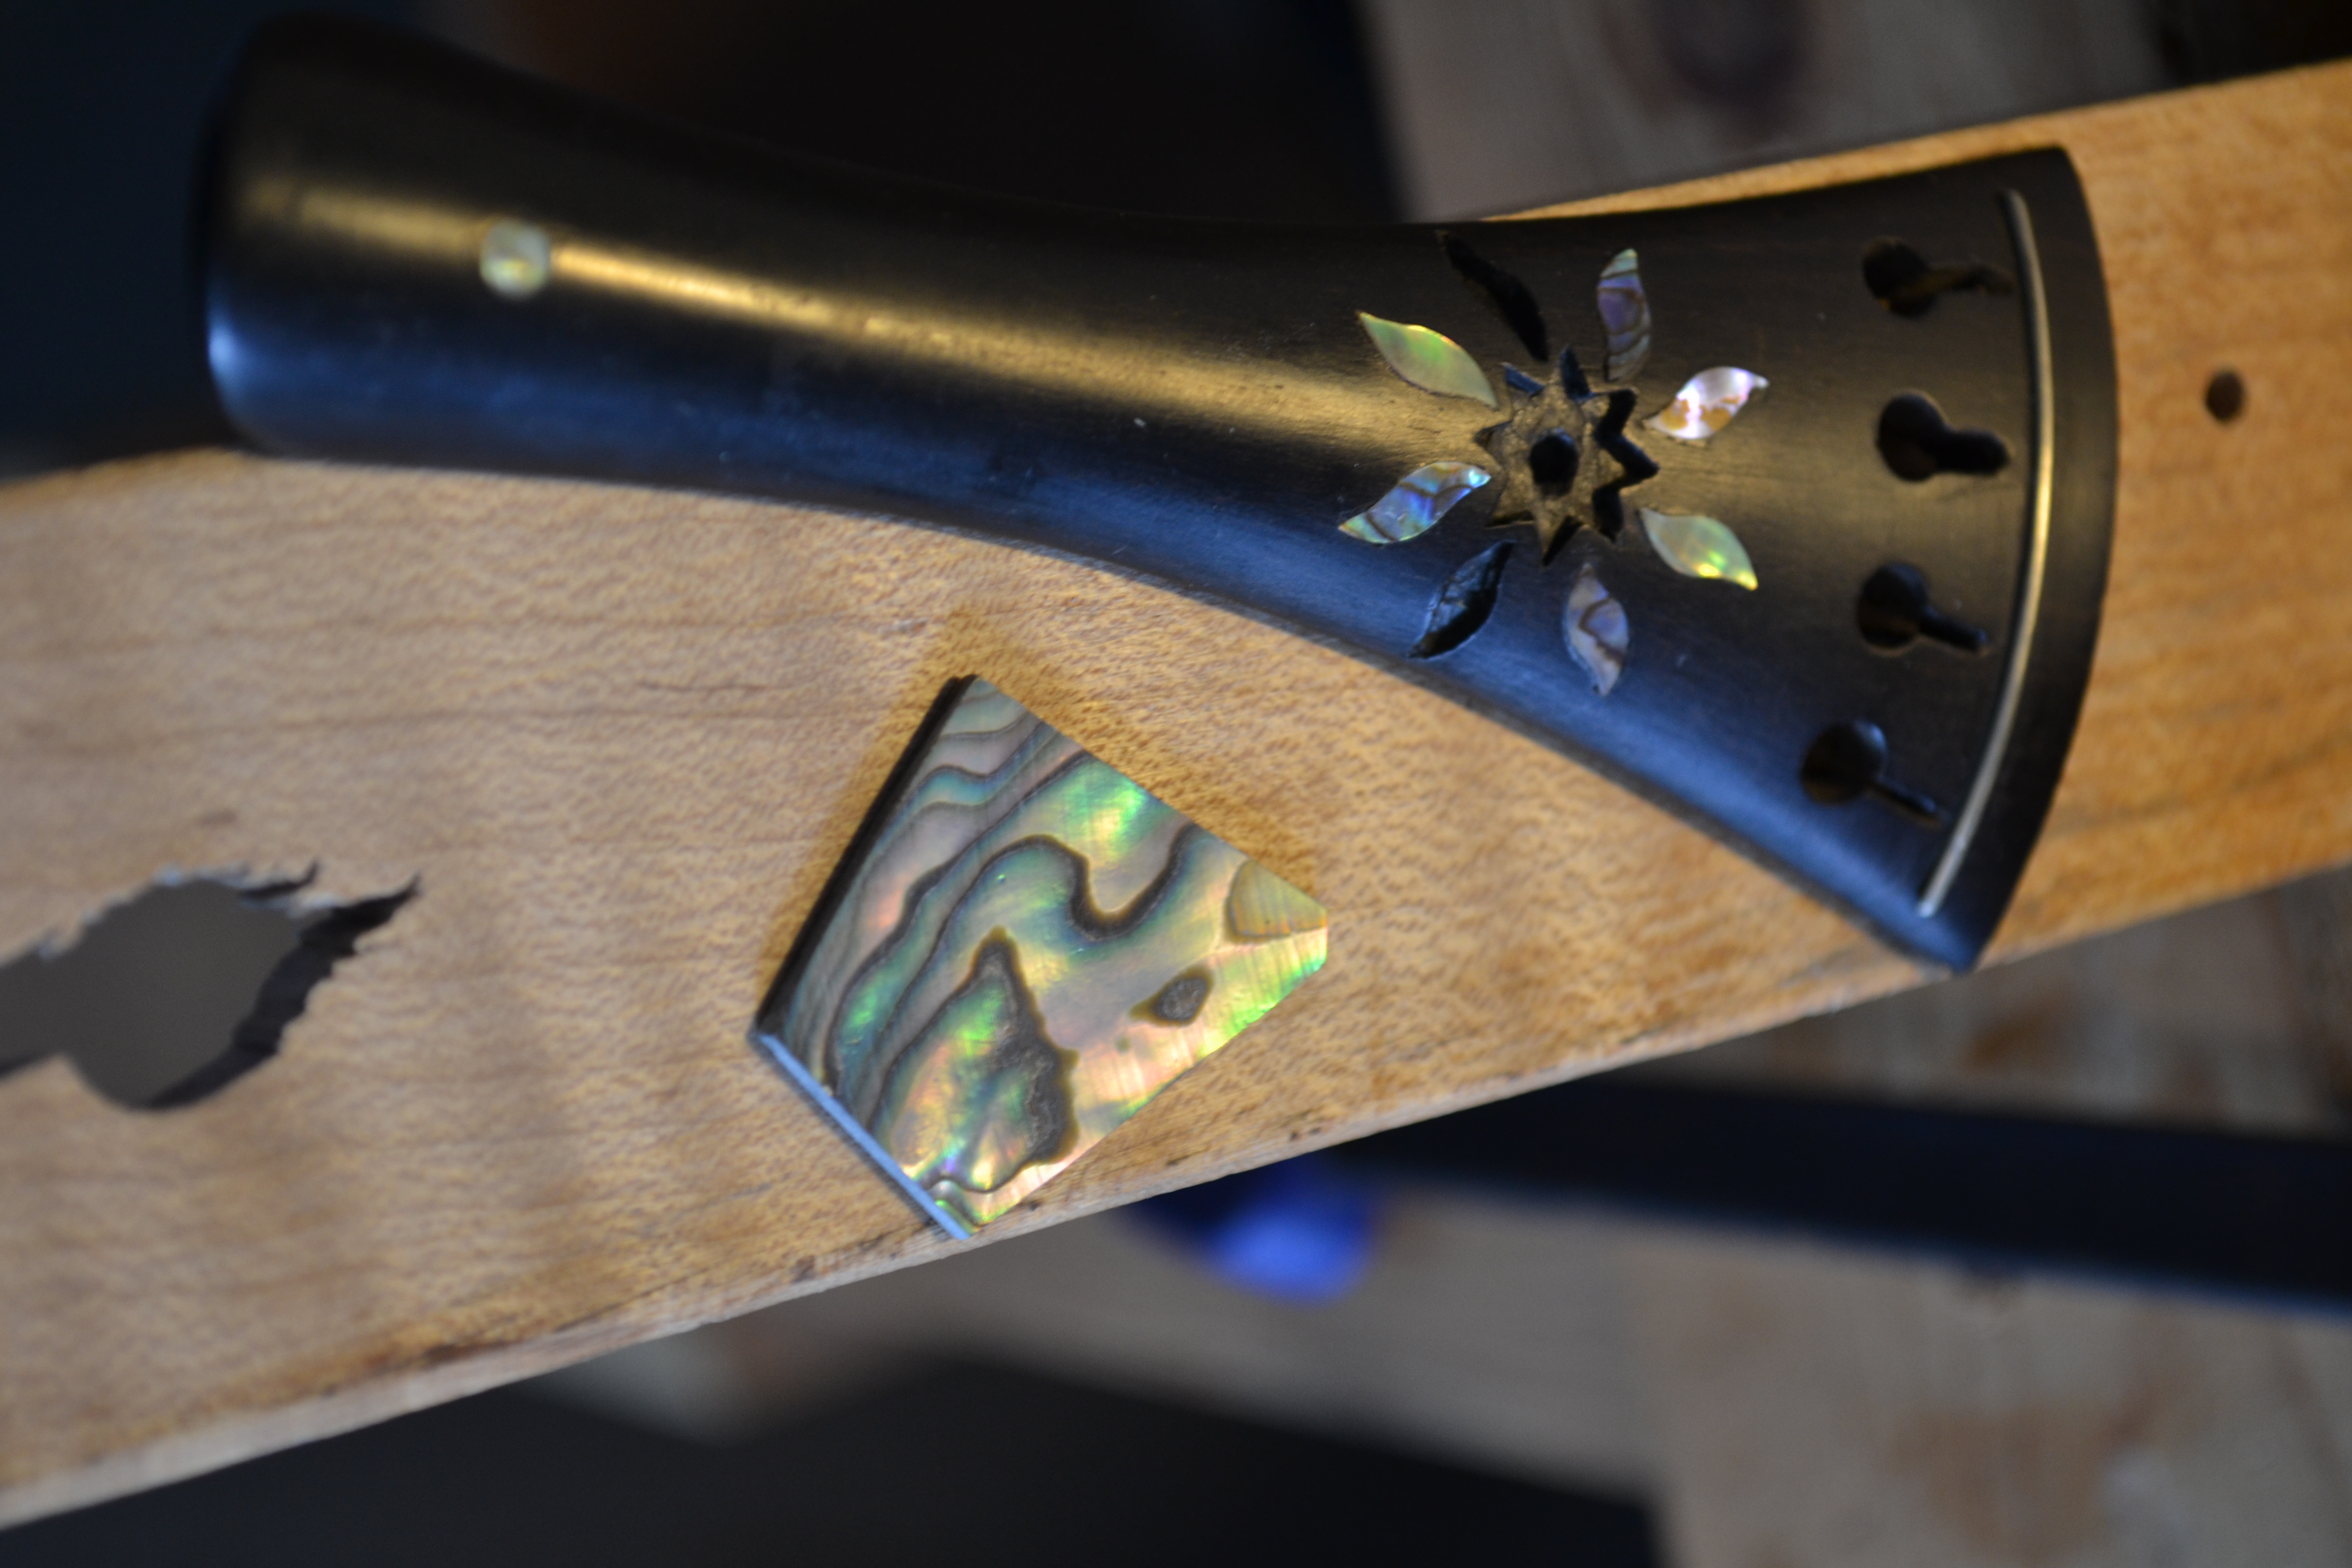
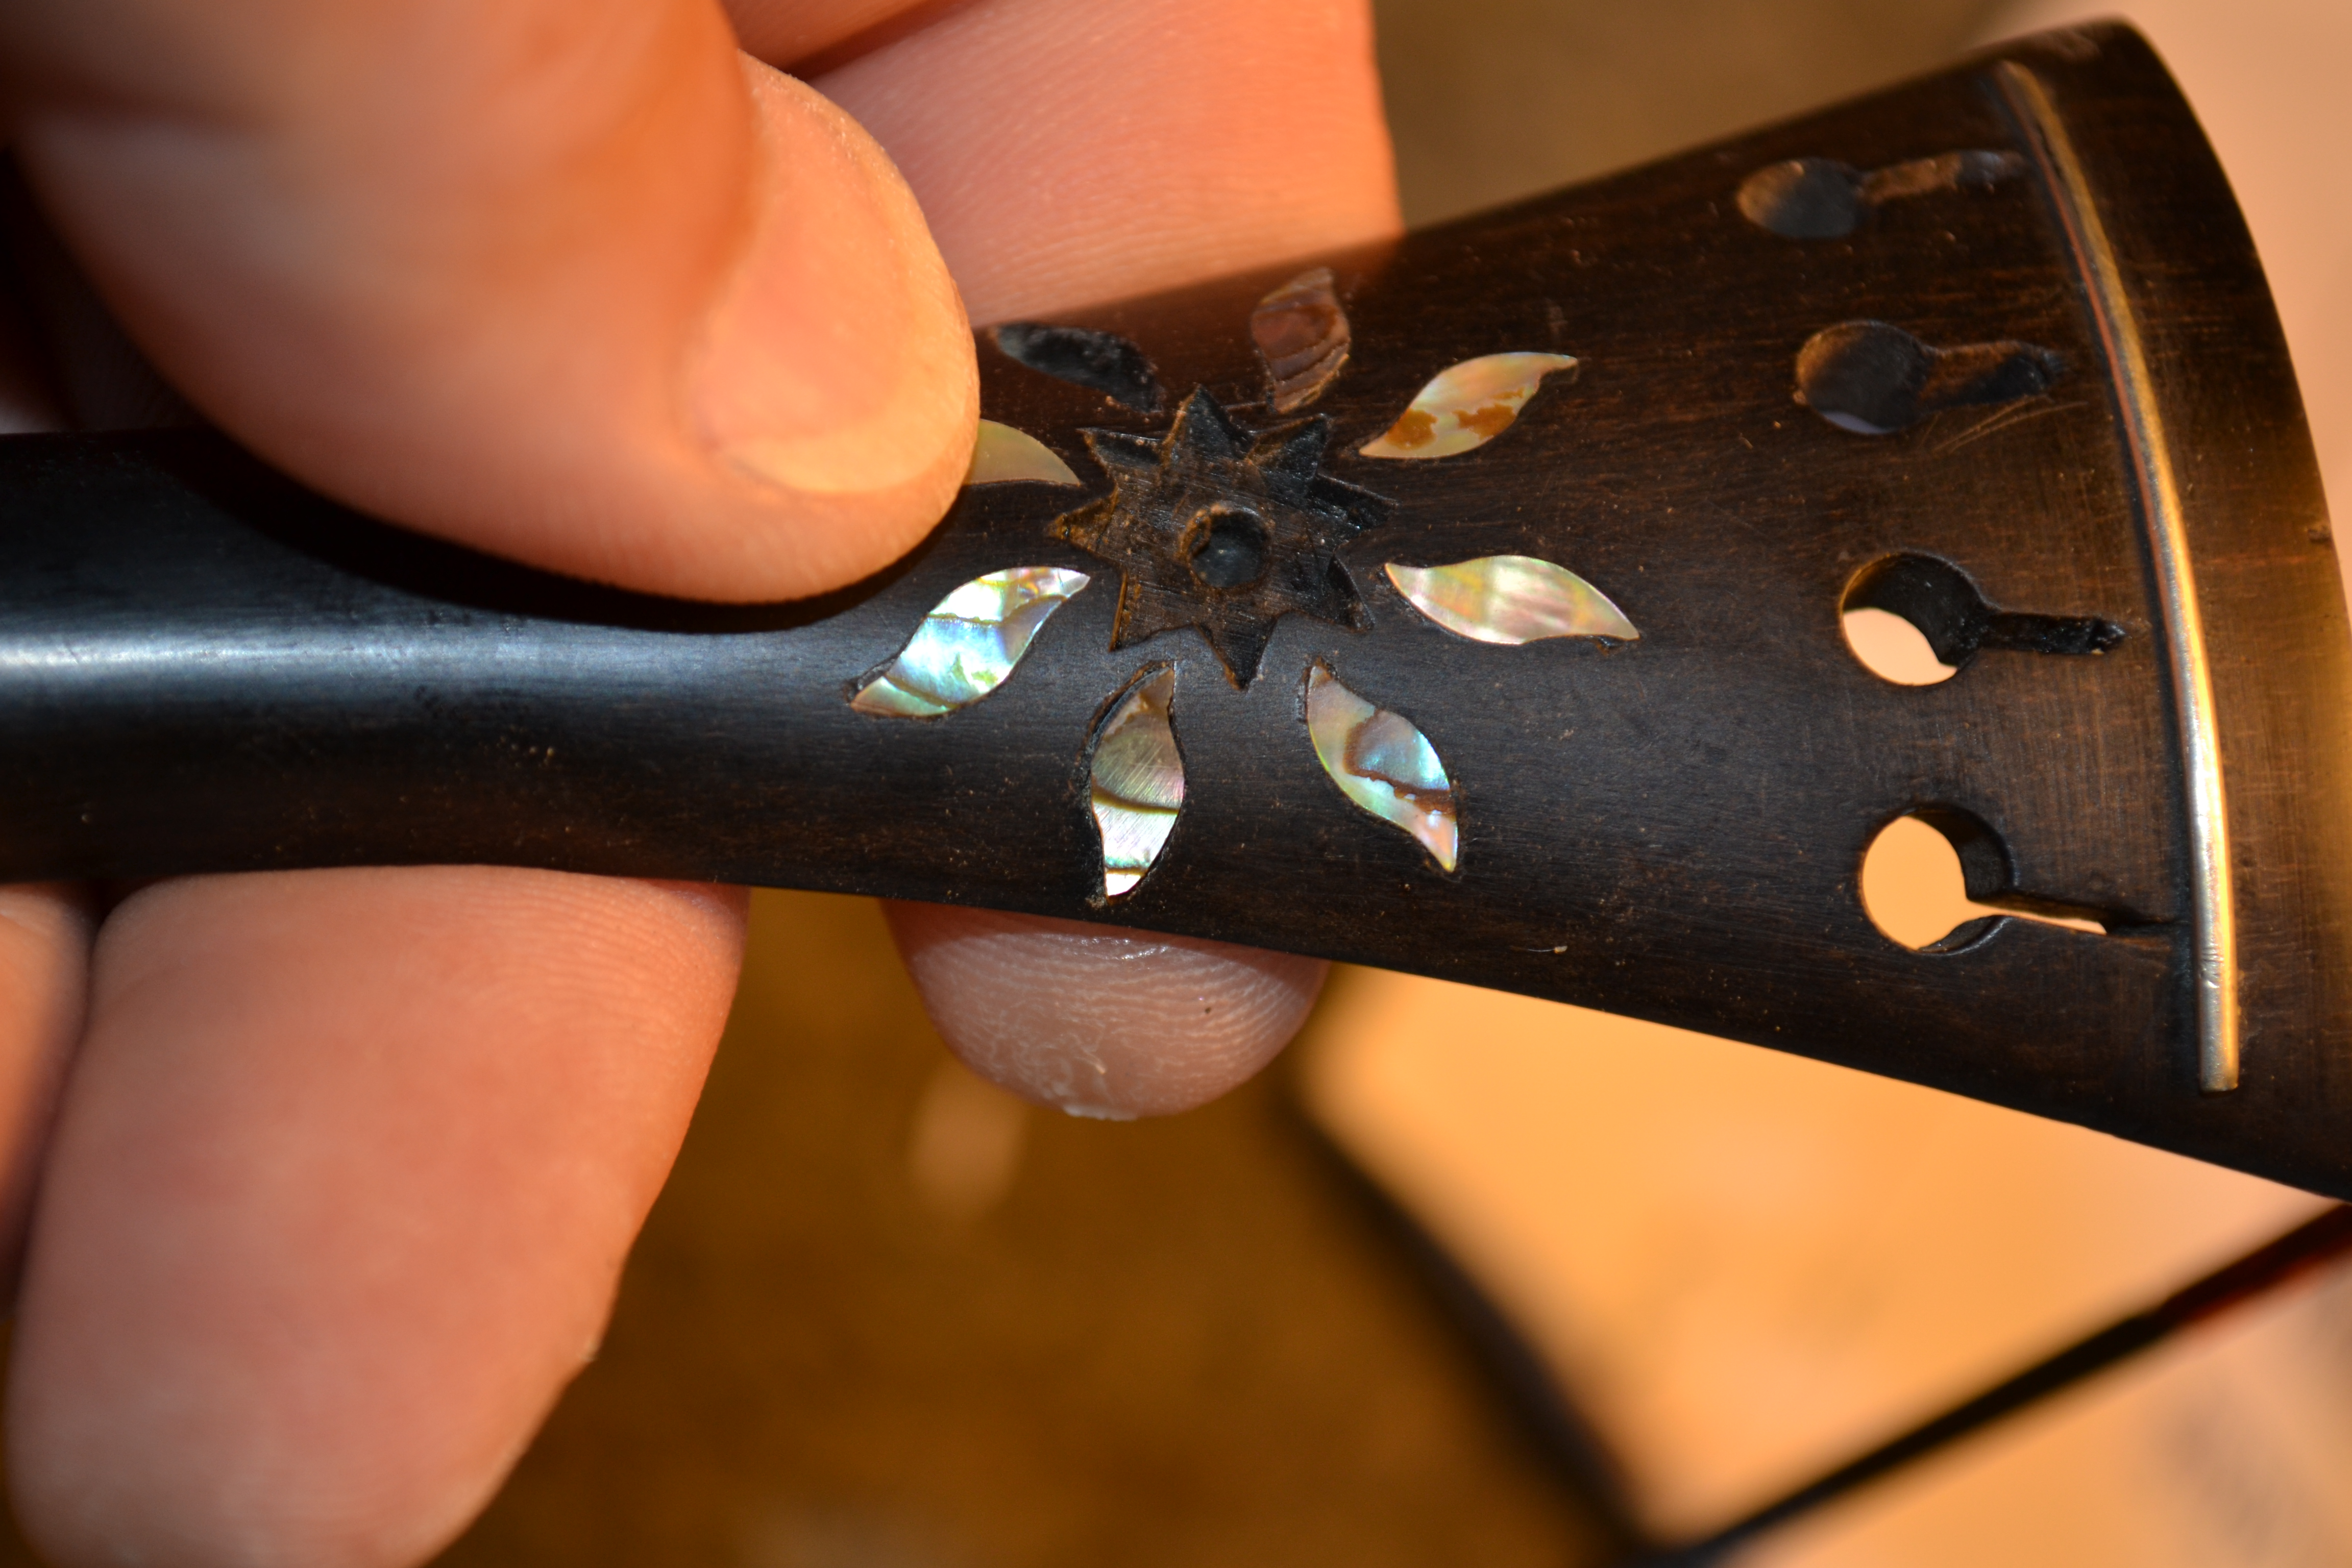
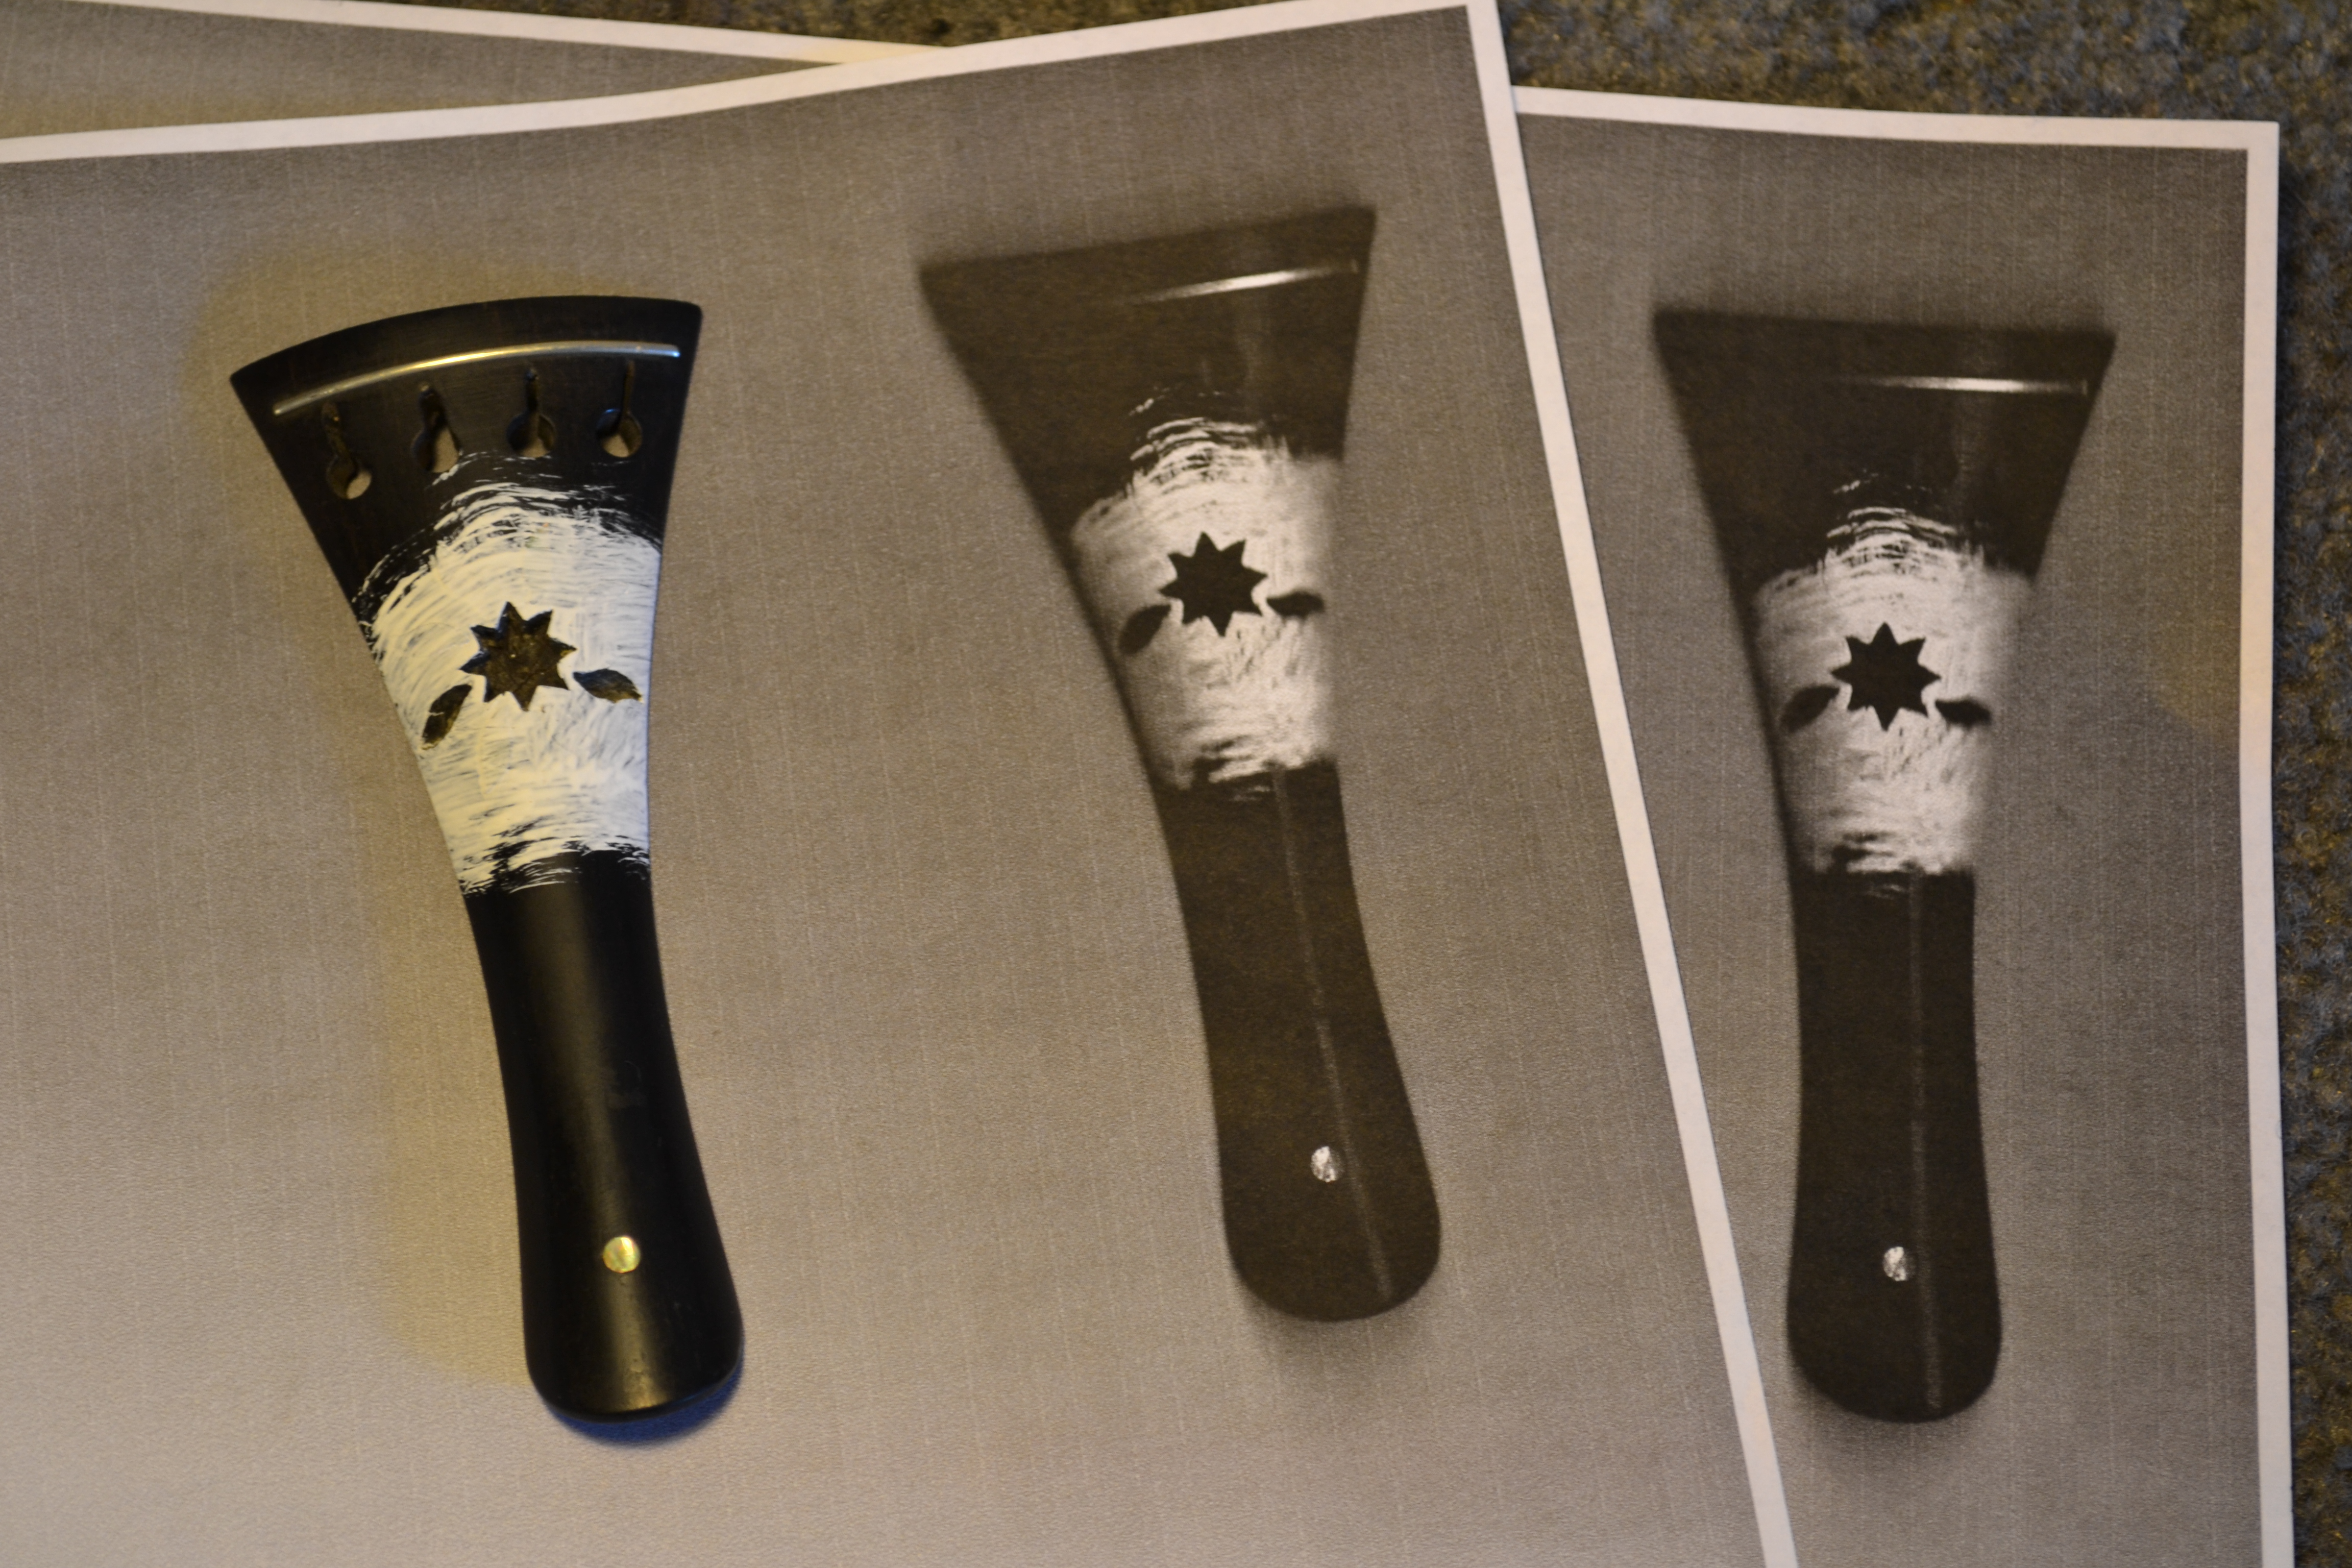
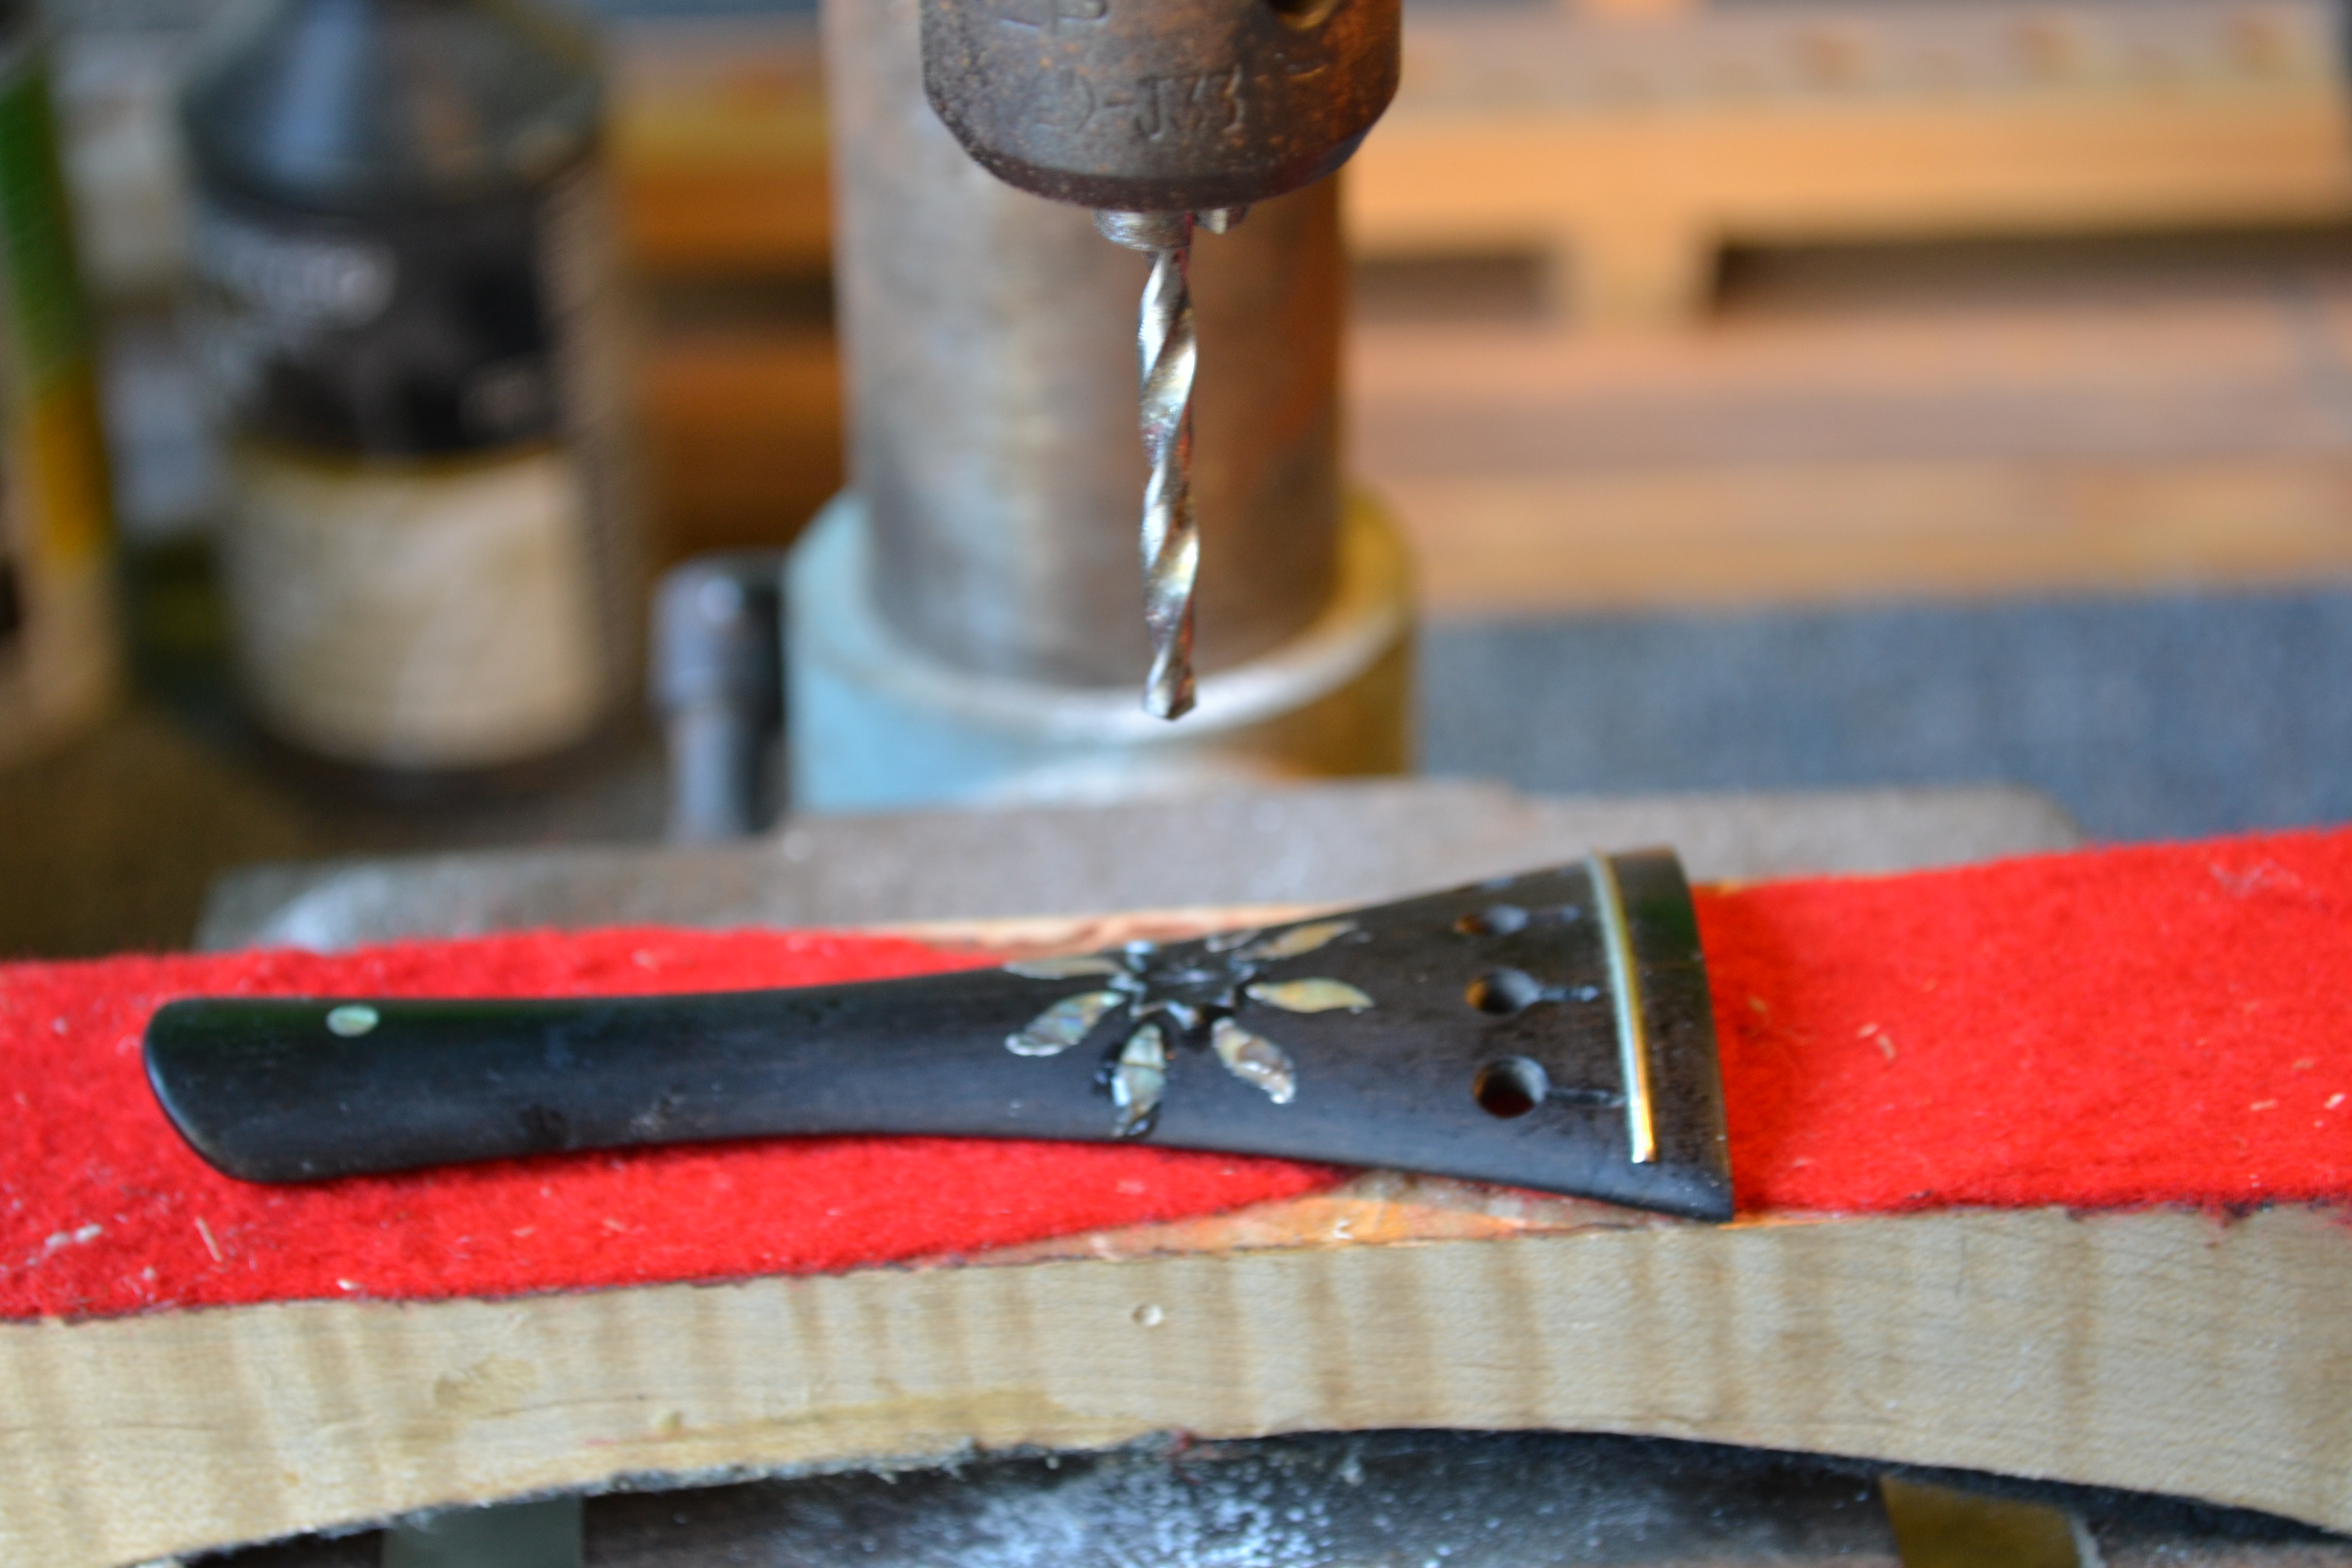
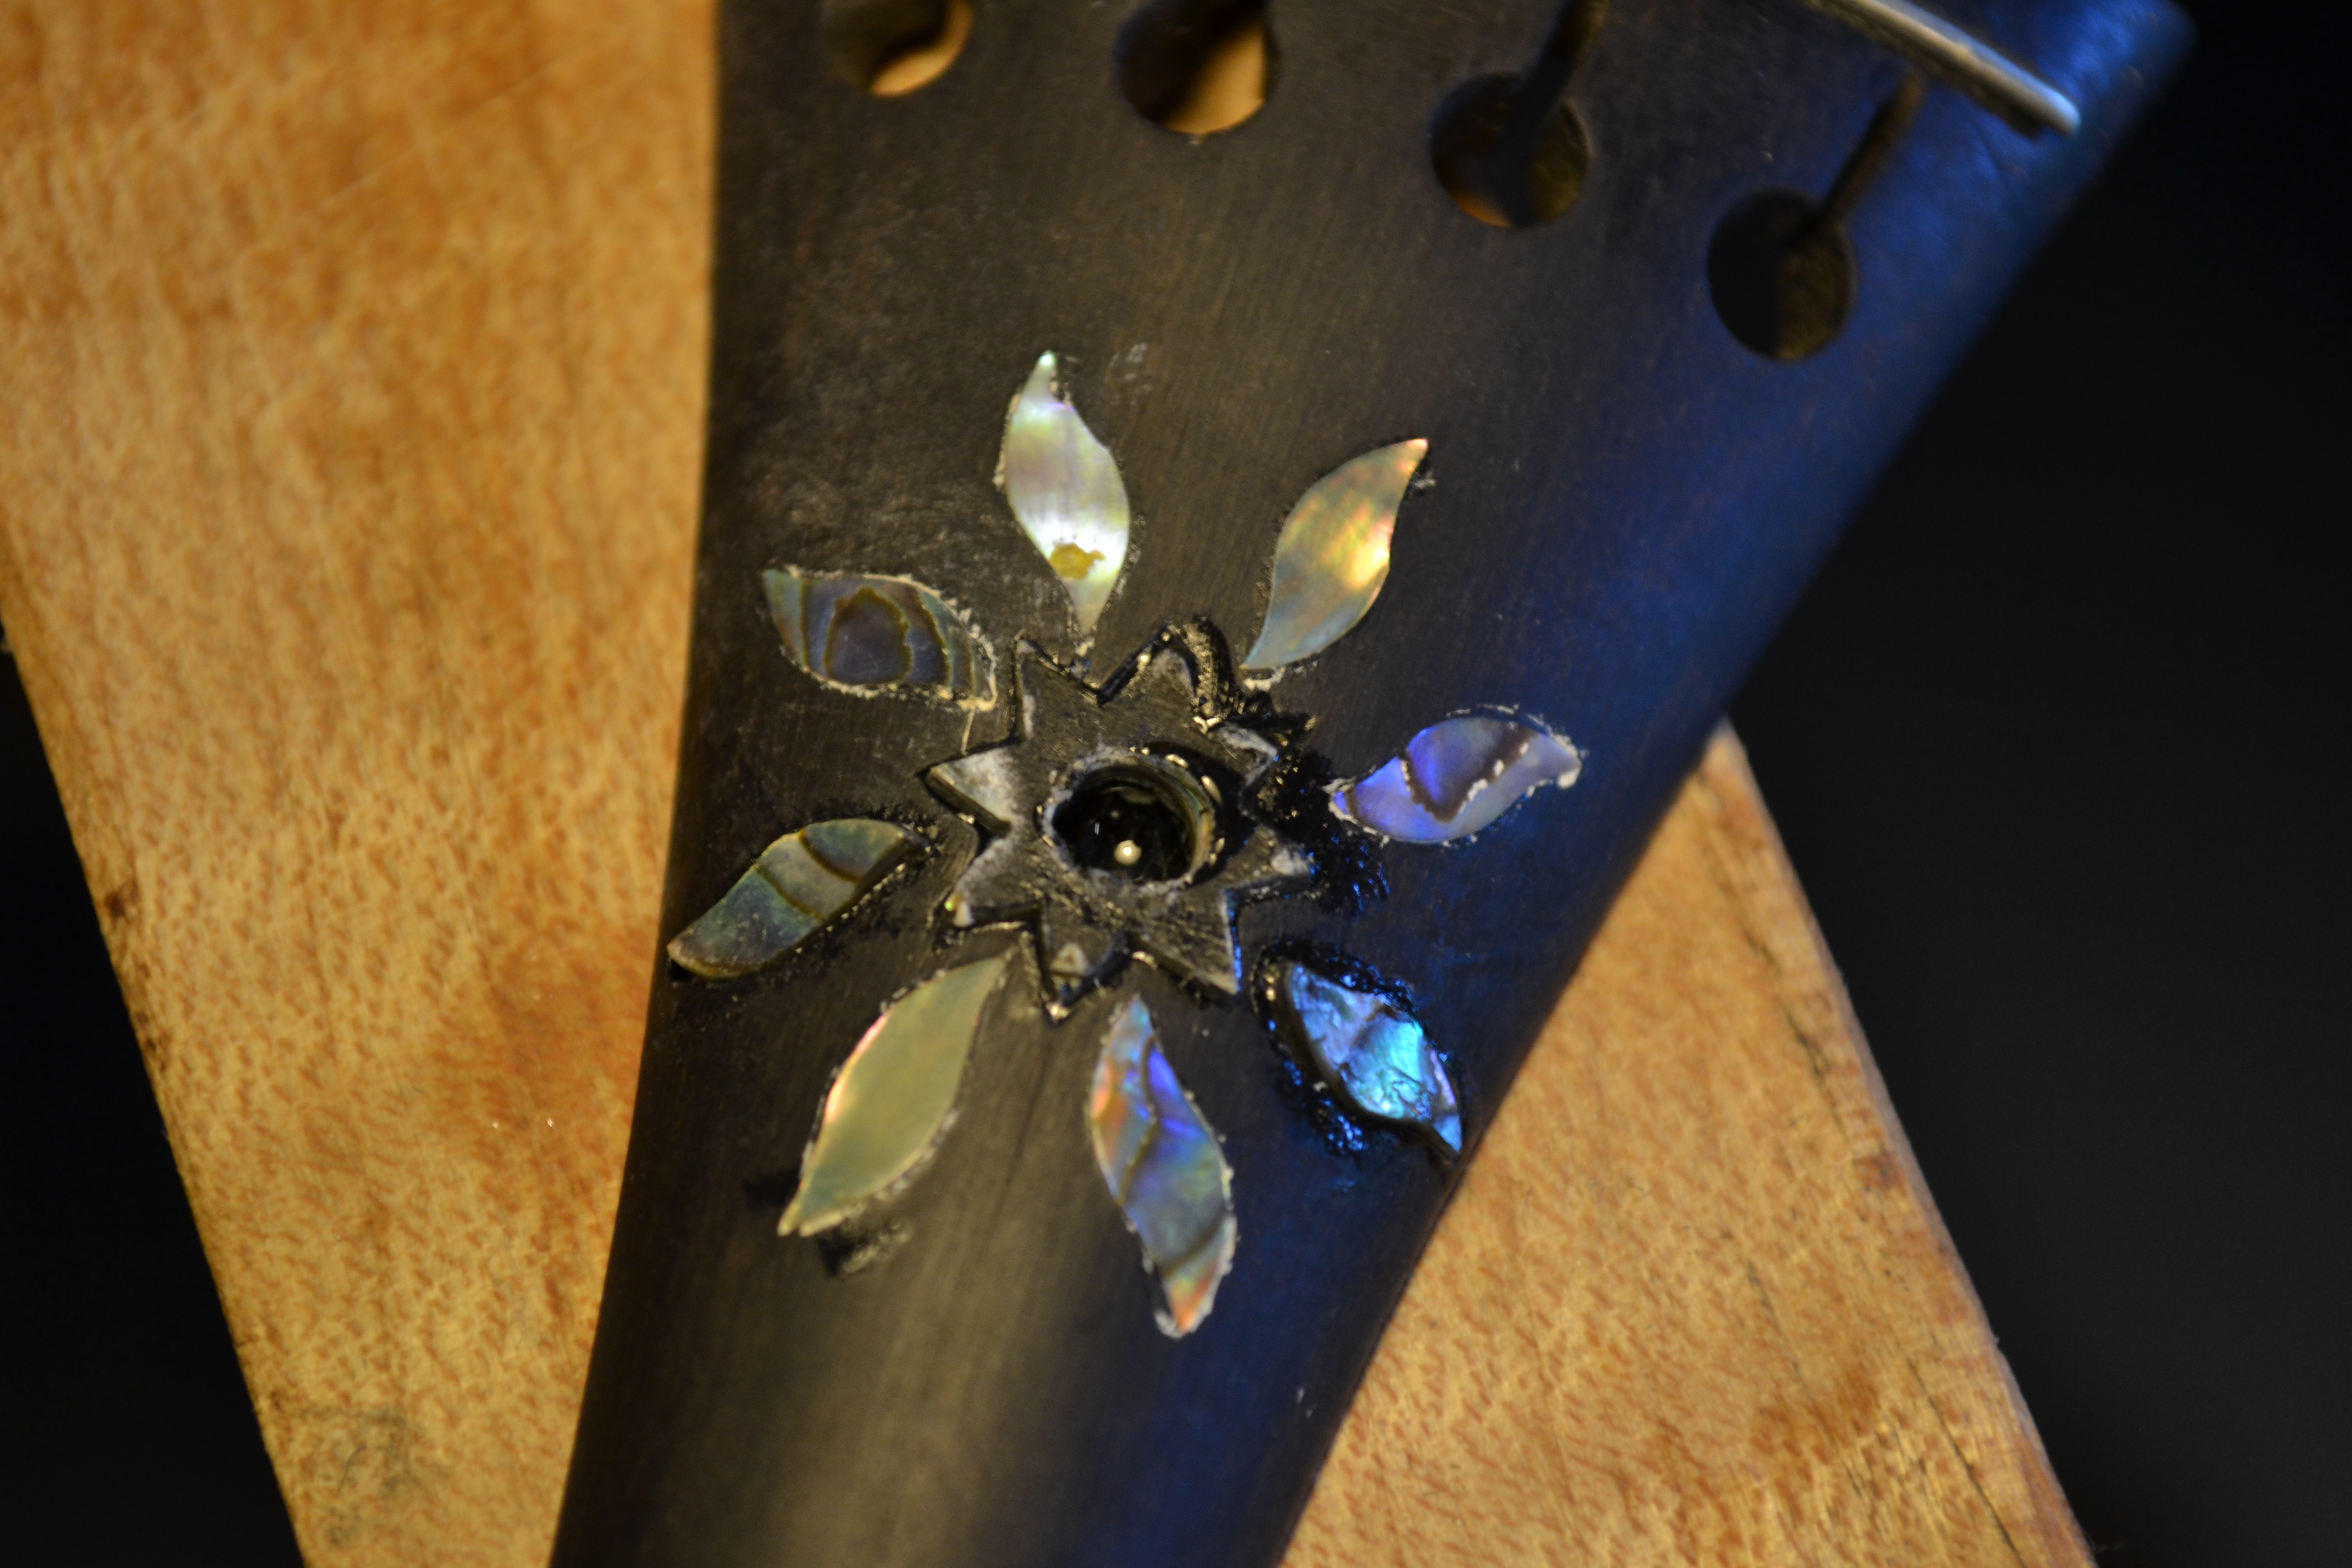
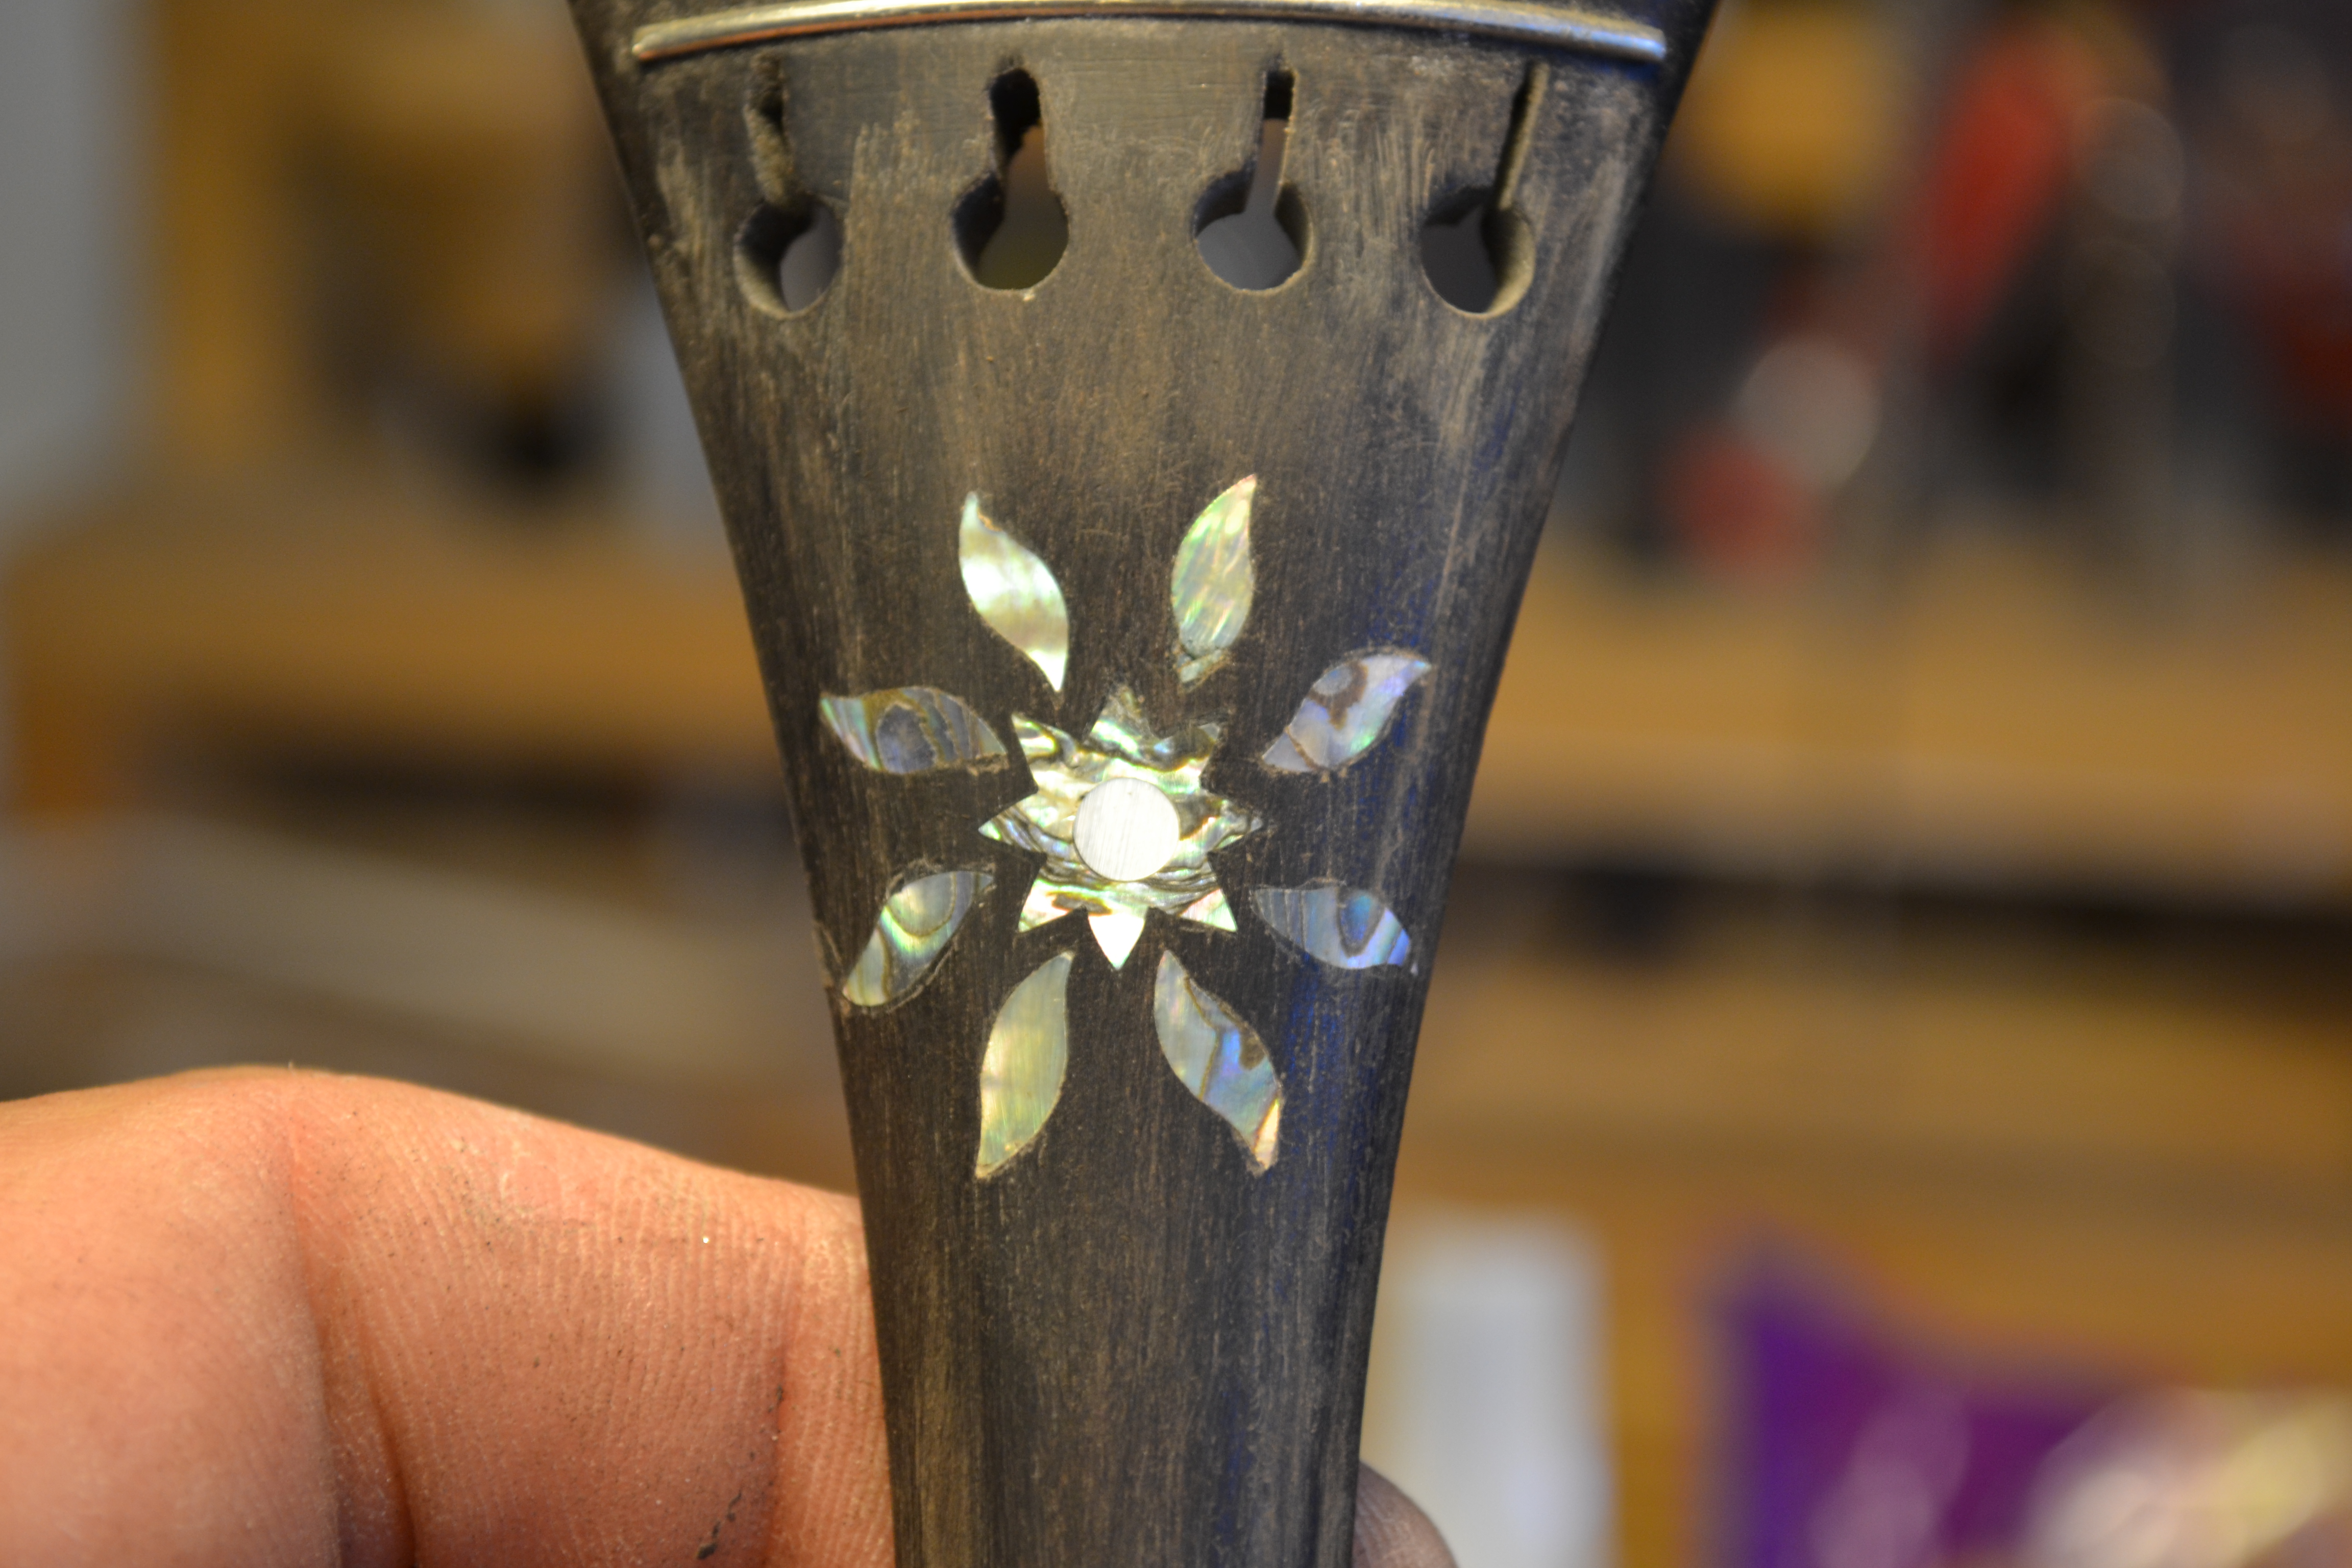
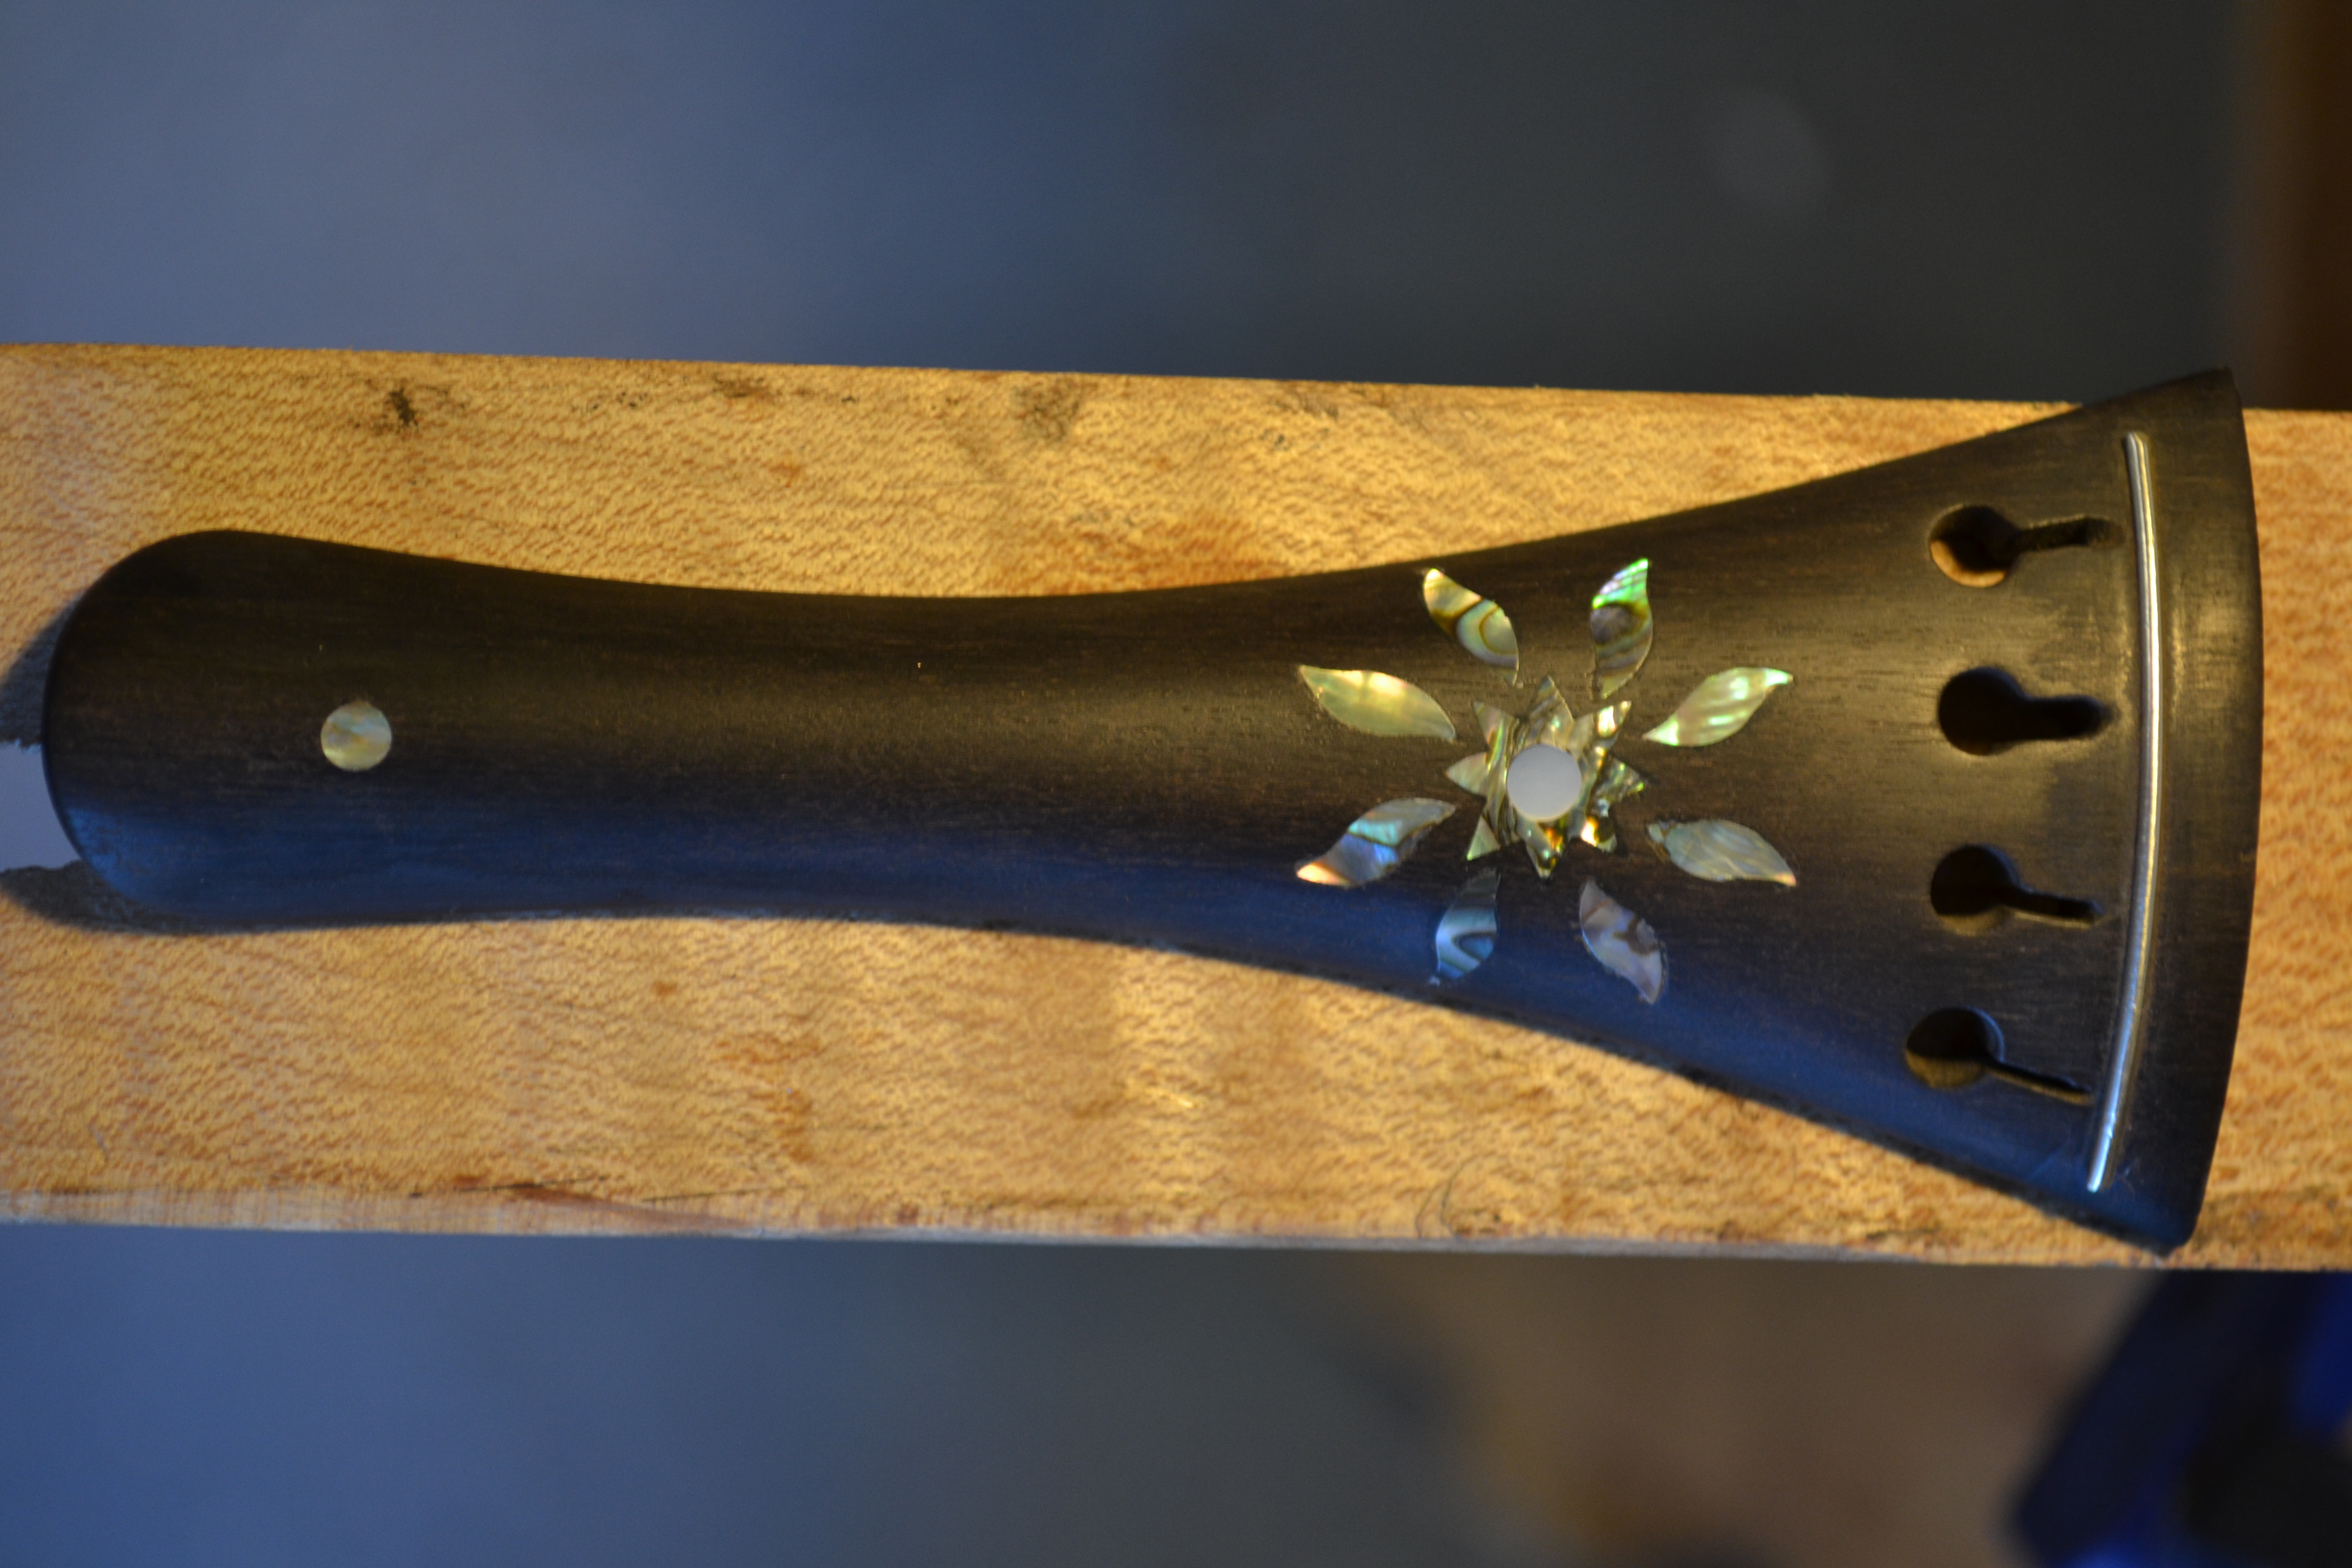
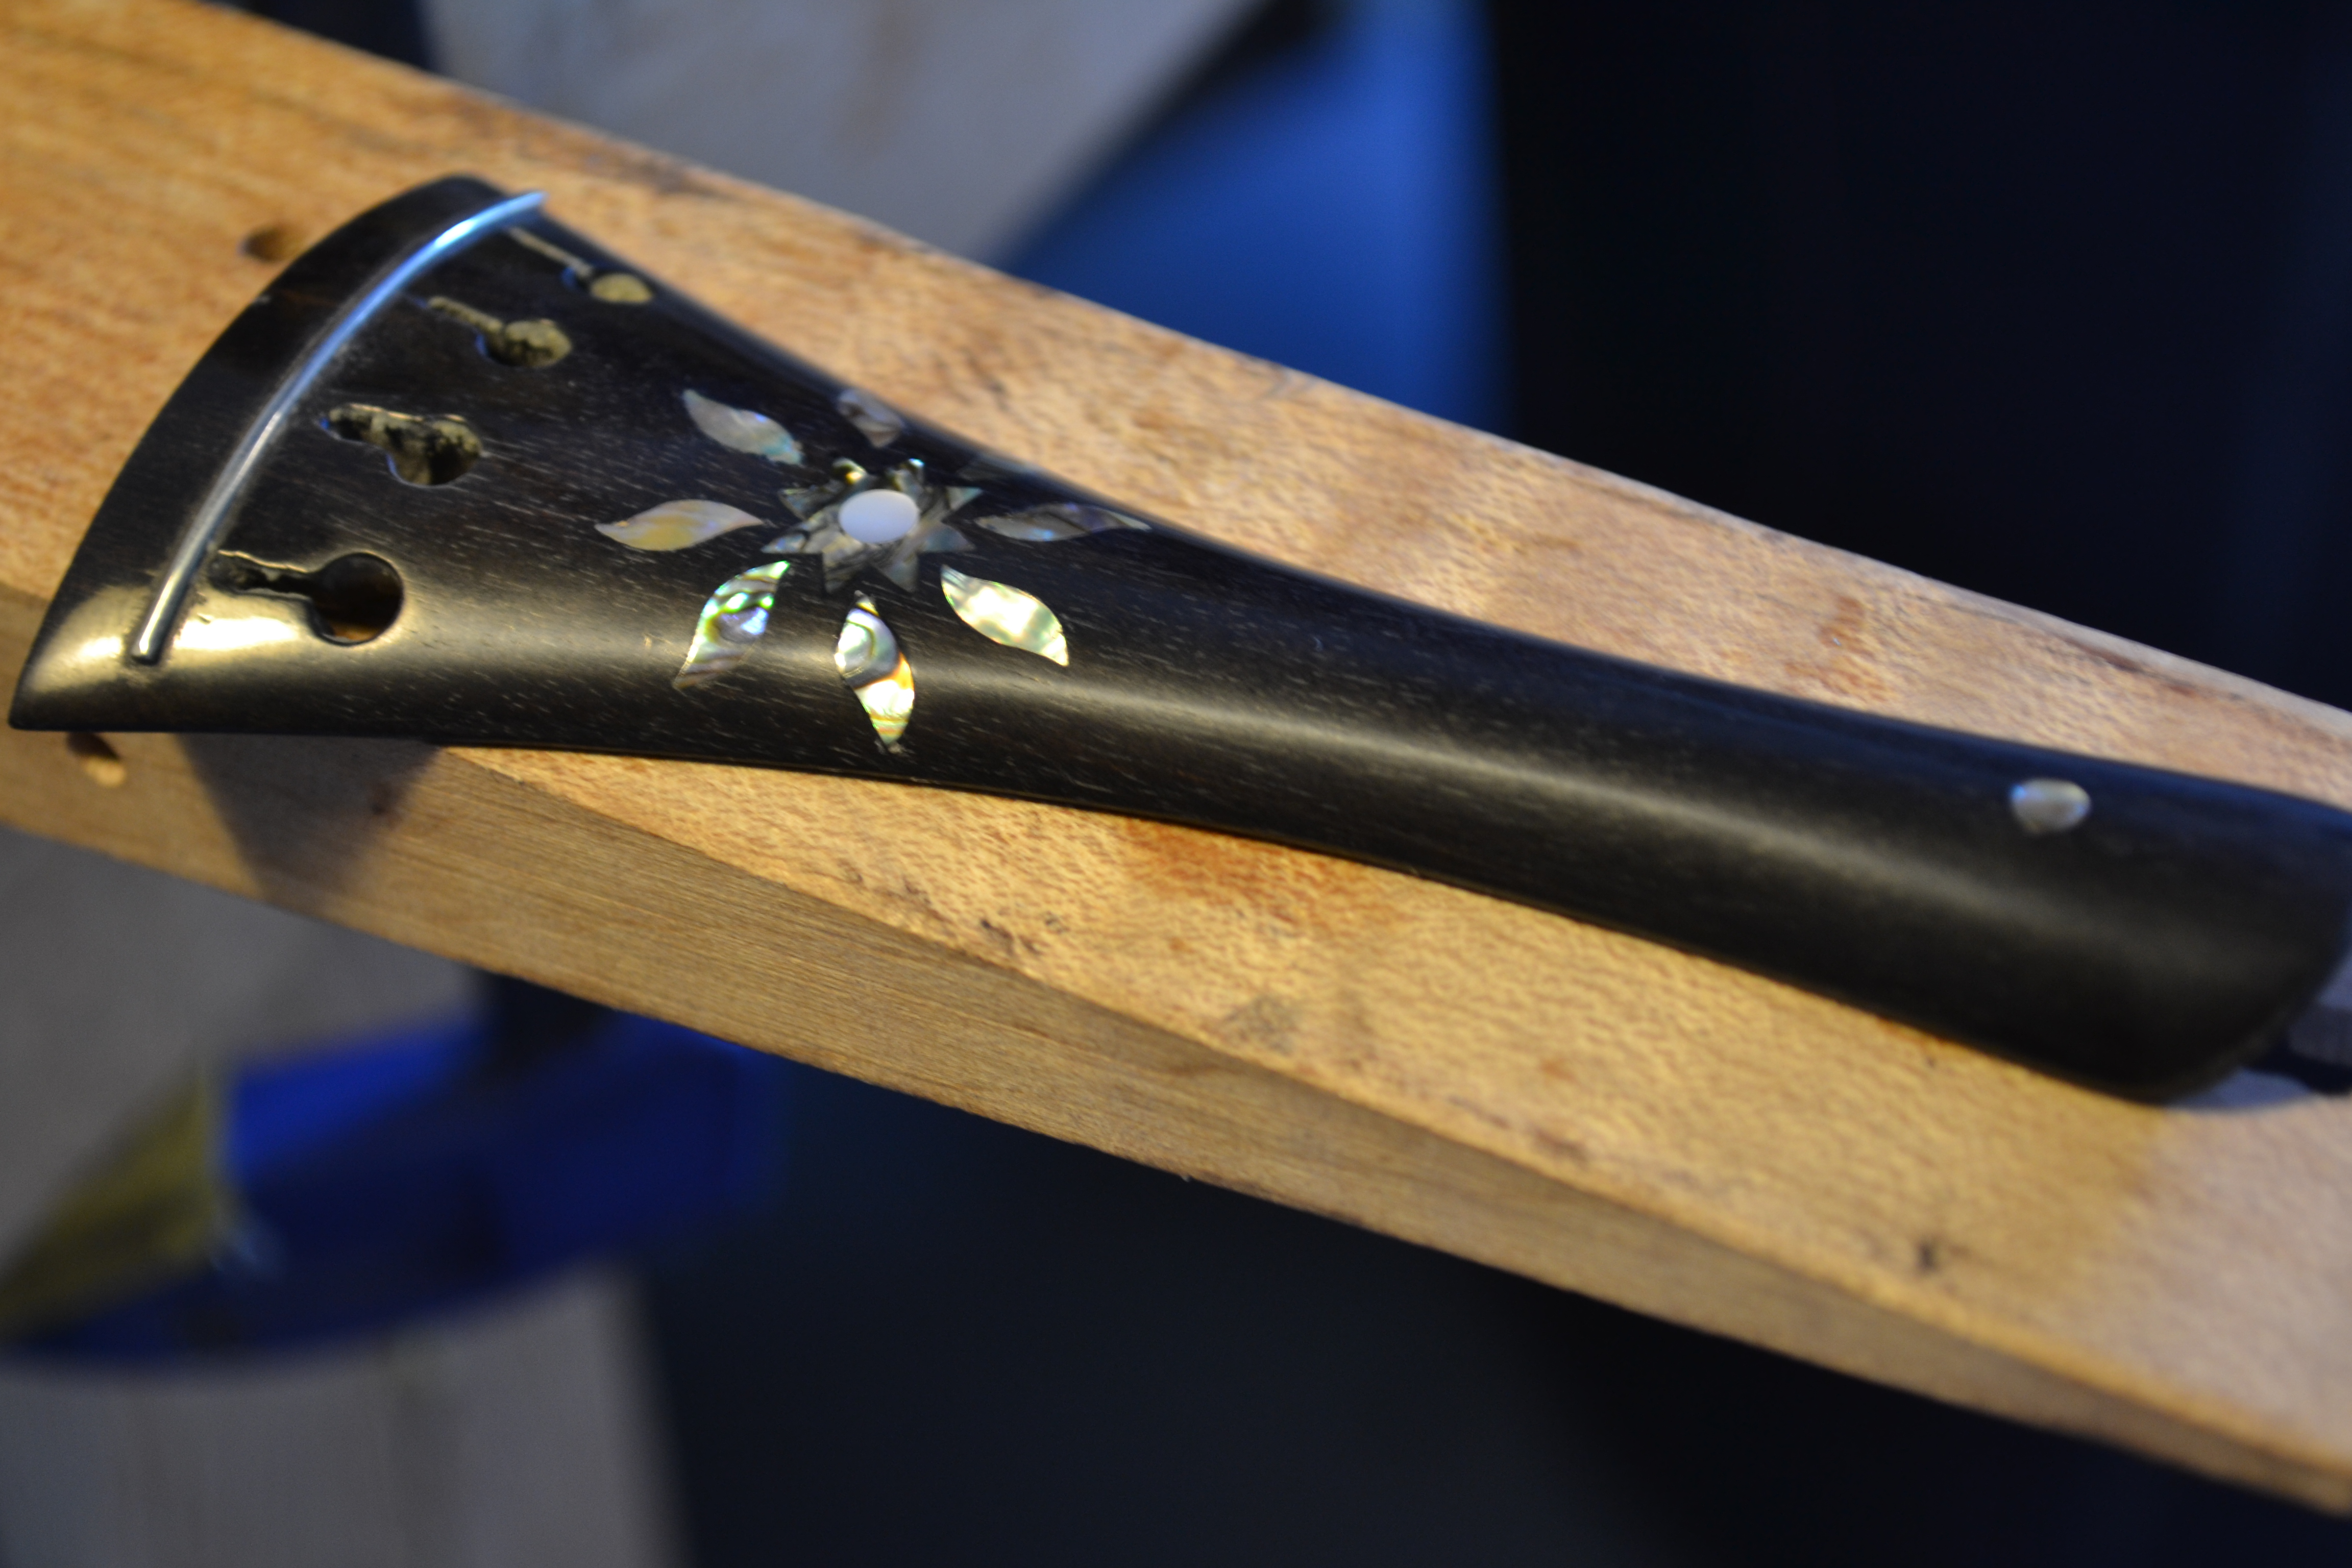
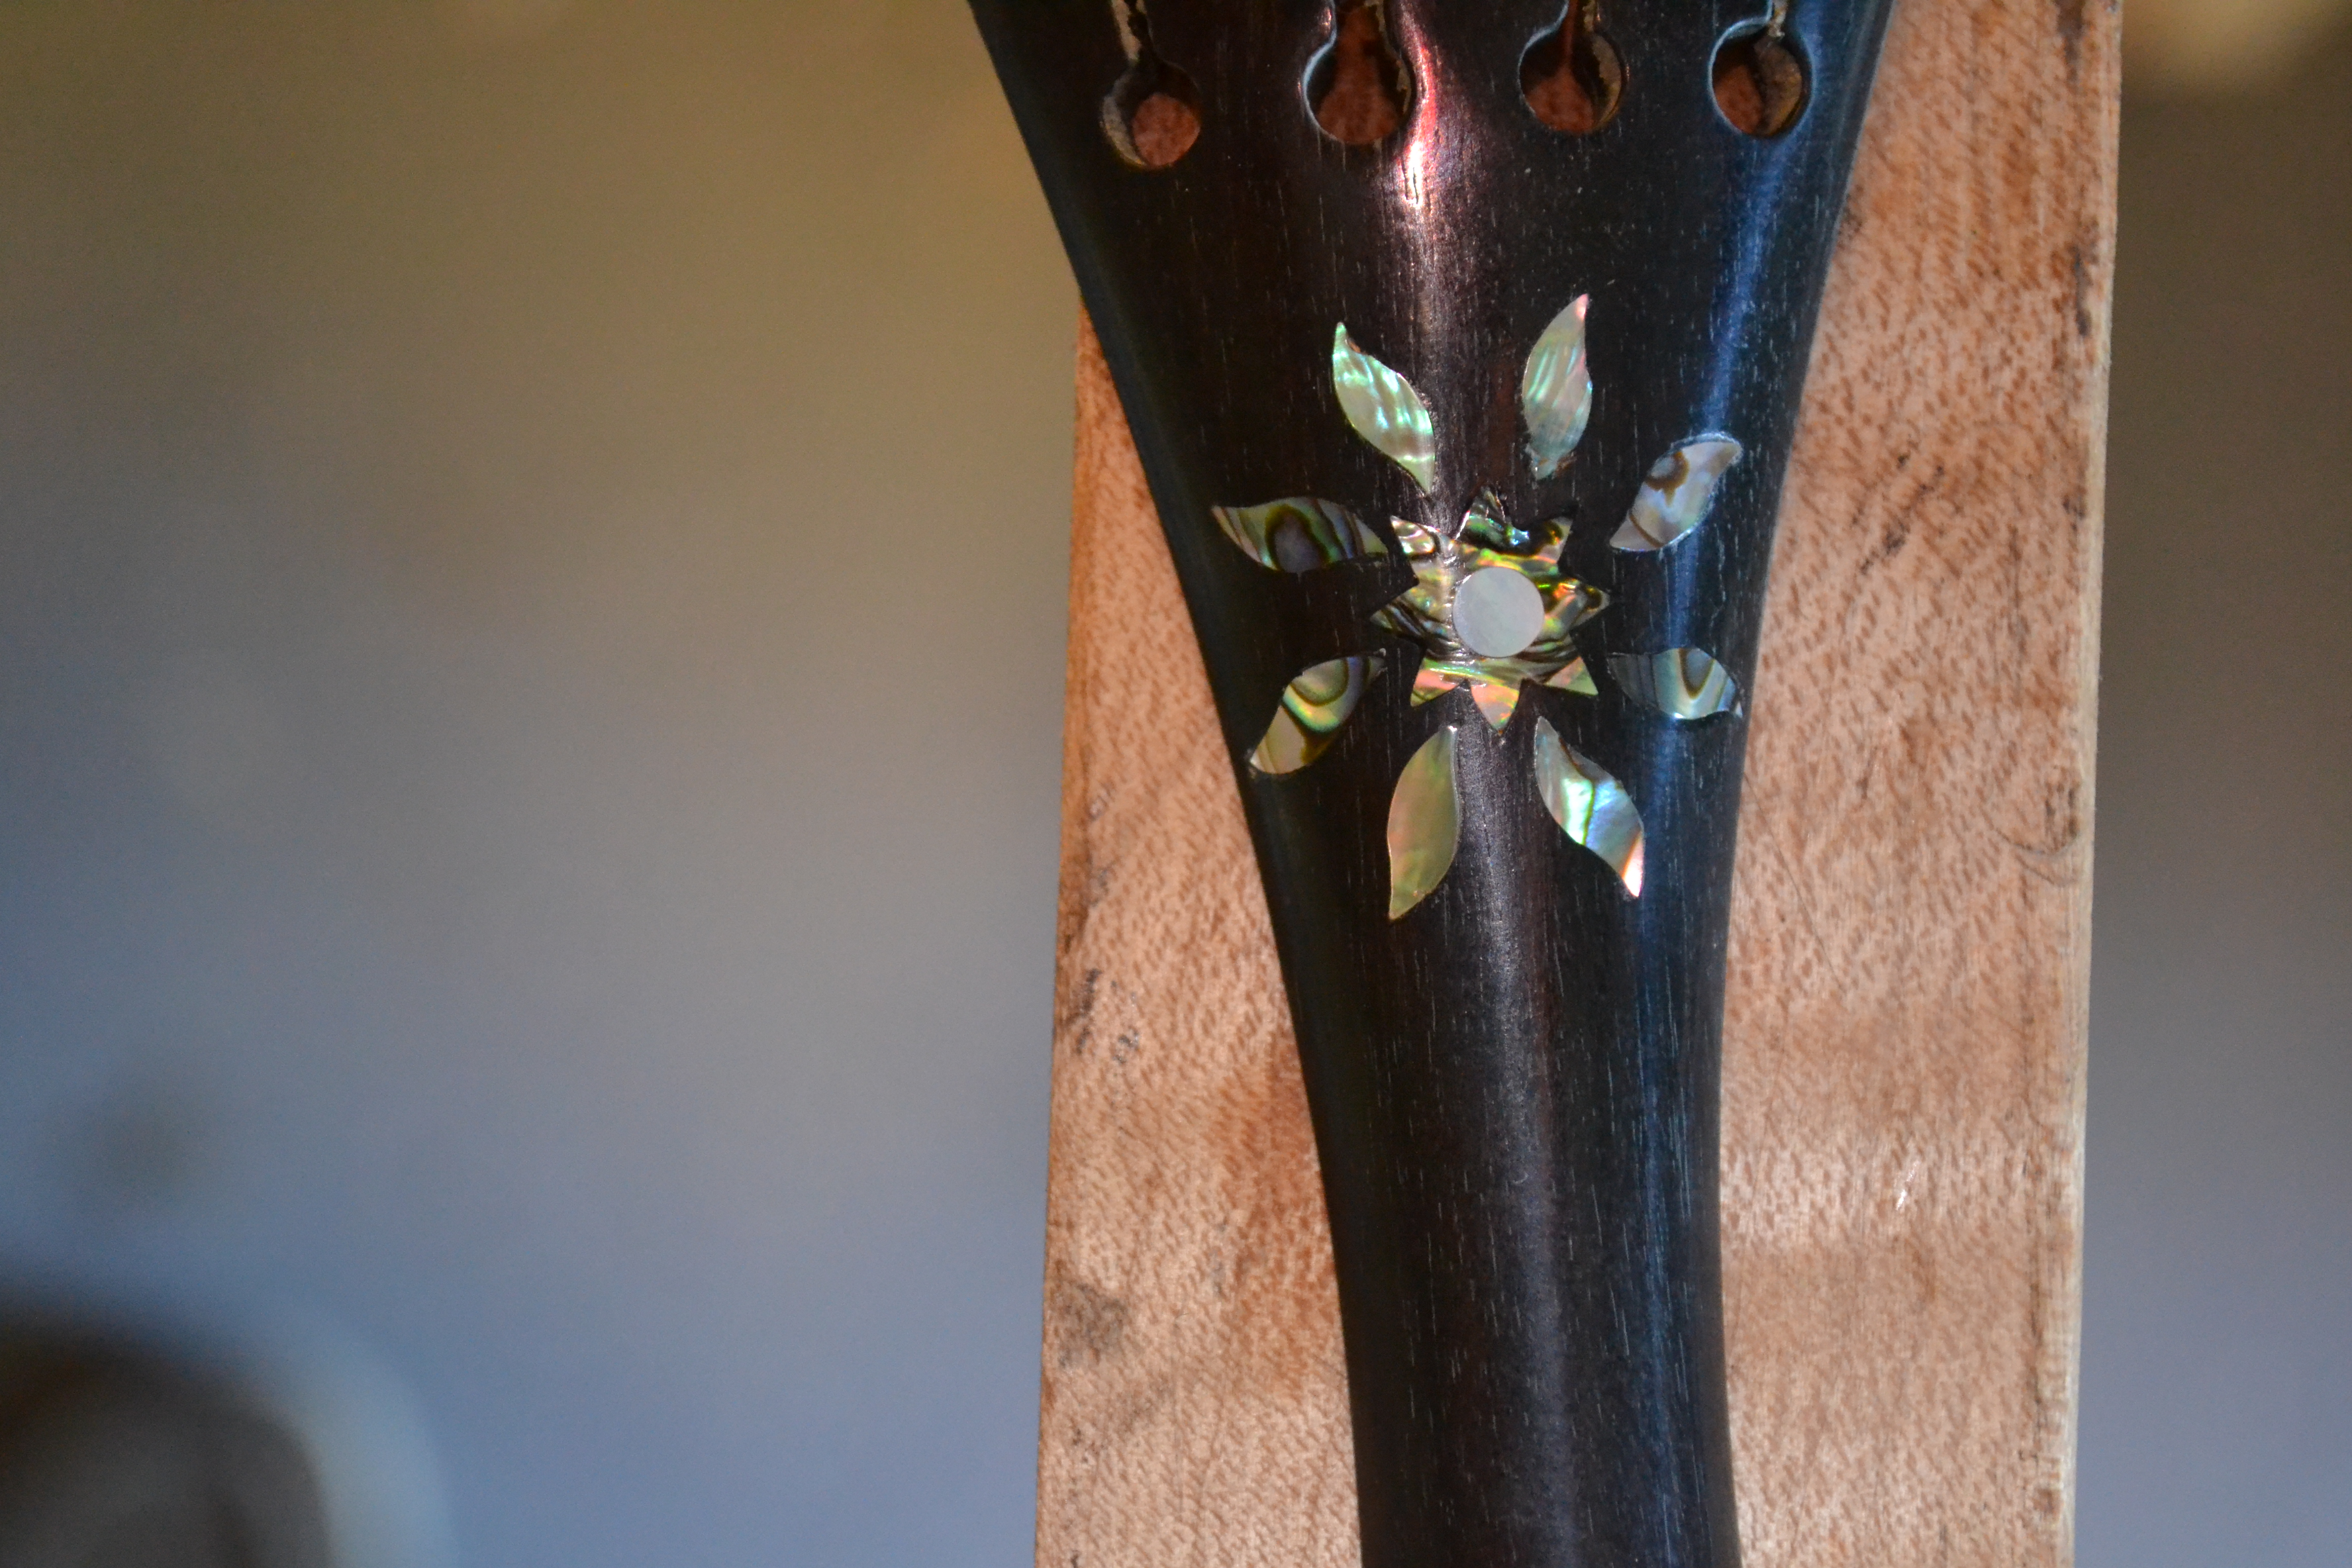
This violin tailpiece was a beautifully crafted and inlaid piece that was missing some of the abalone shell pieces. The biggest trick to performing a delicate job like this one is to do it so that upon close inspection, the observer can’t tell that the pieces that were made to replace the missing ones are not original.
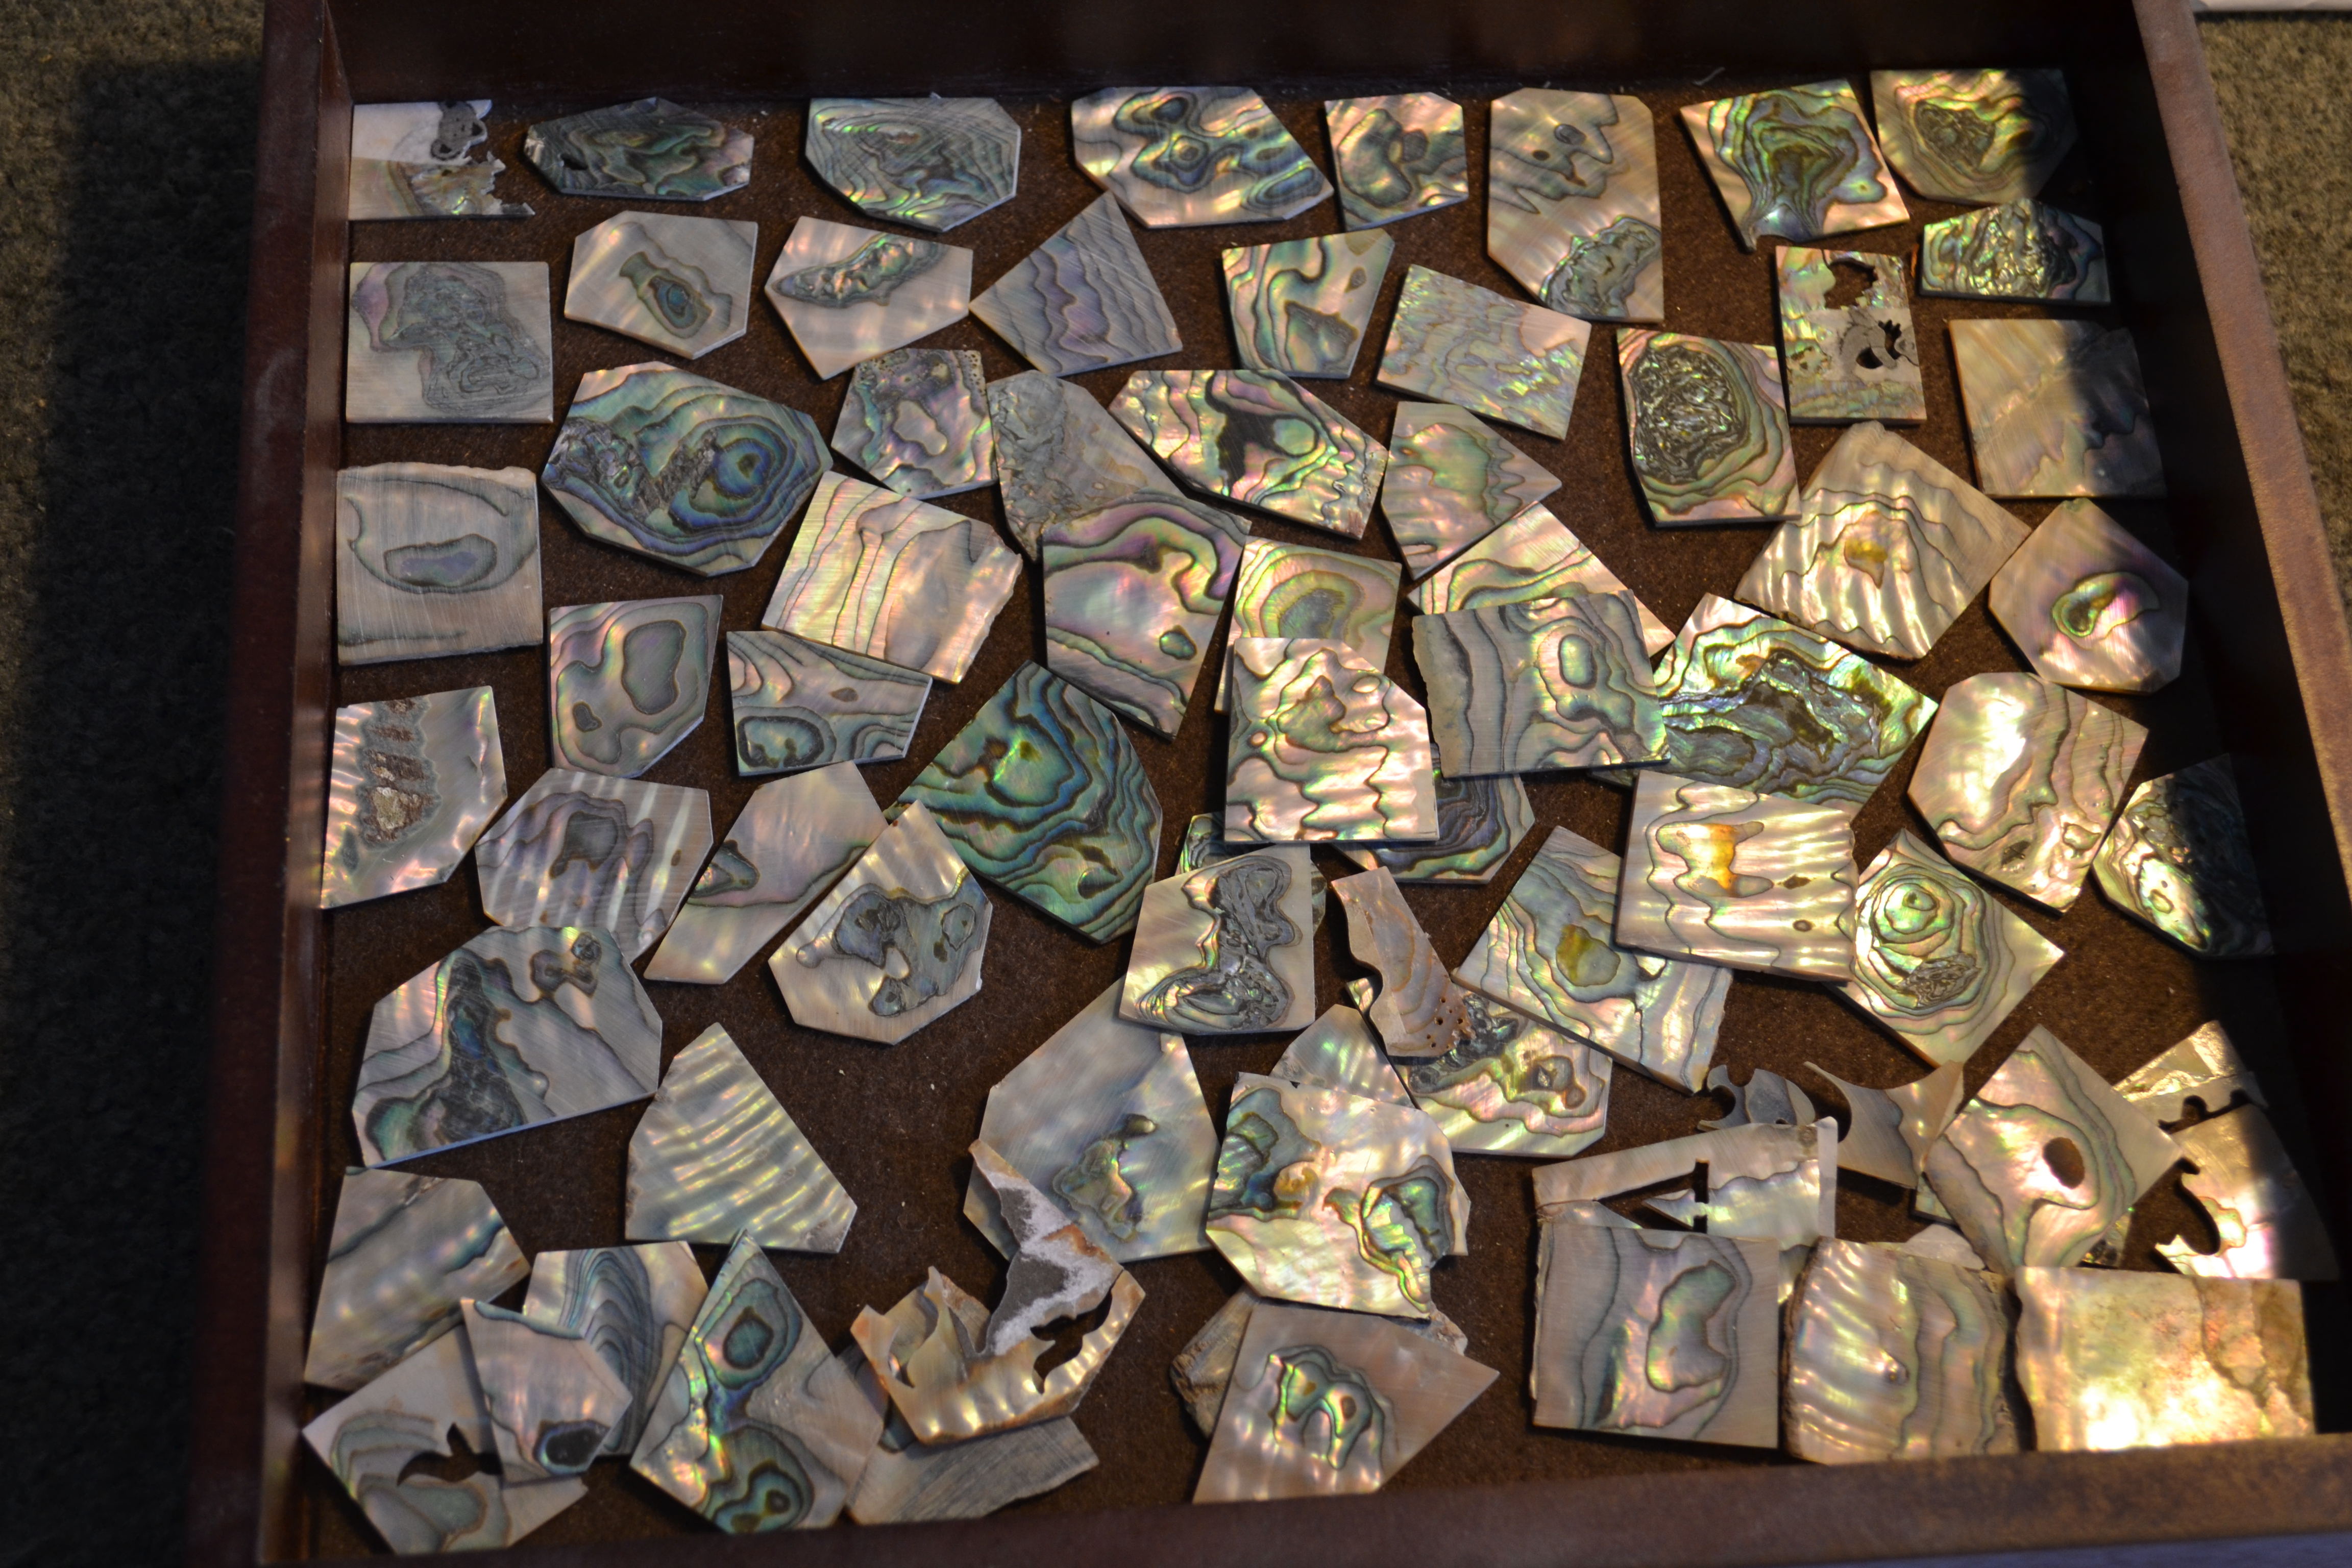
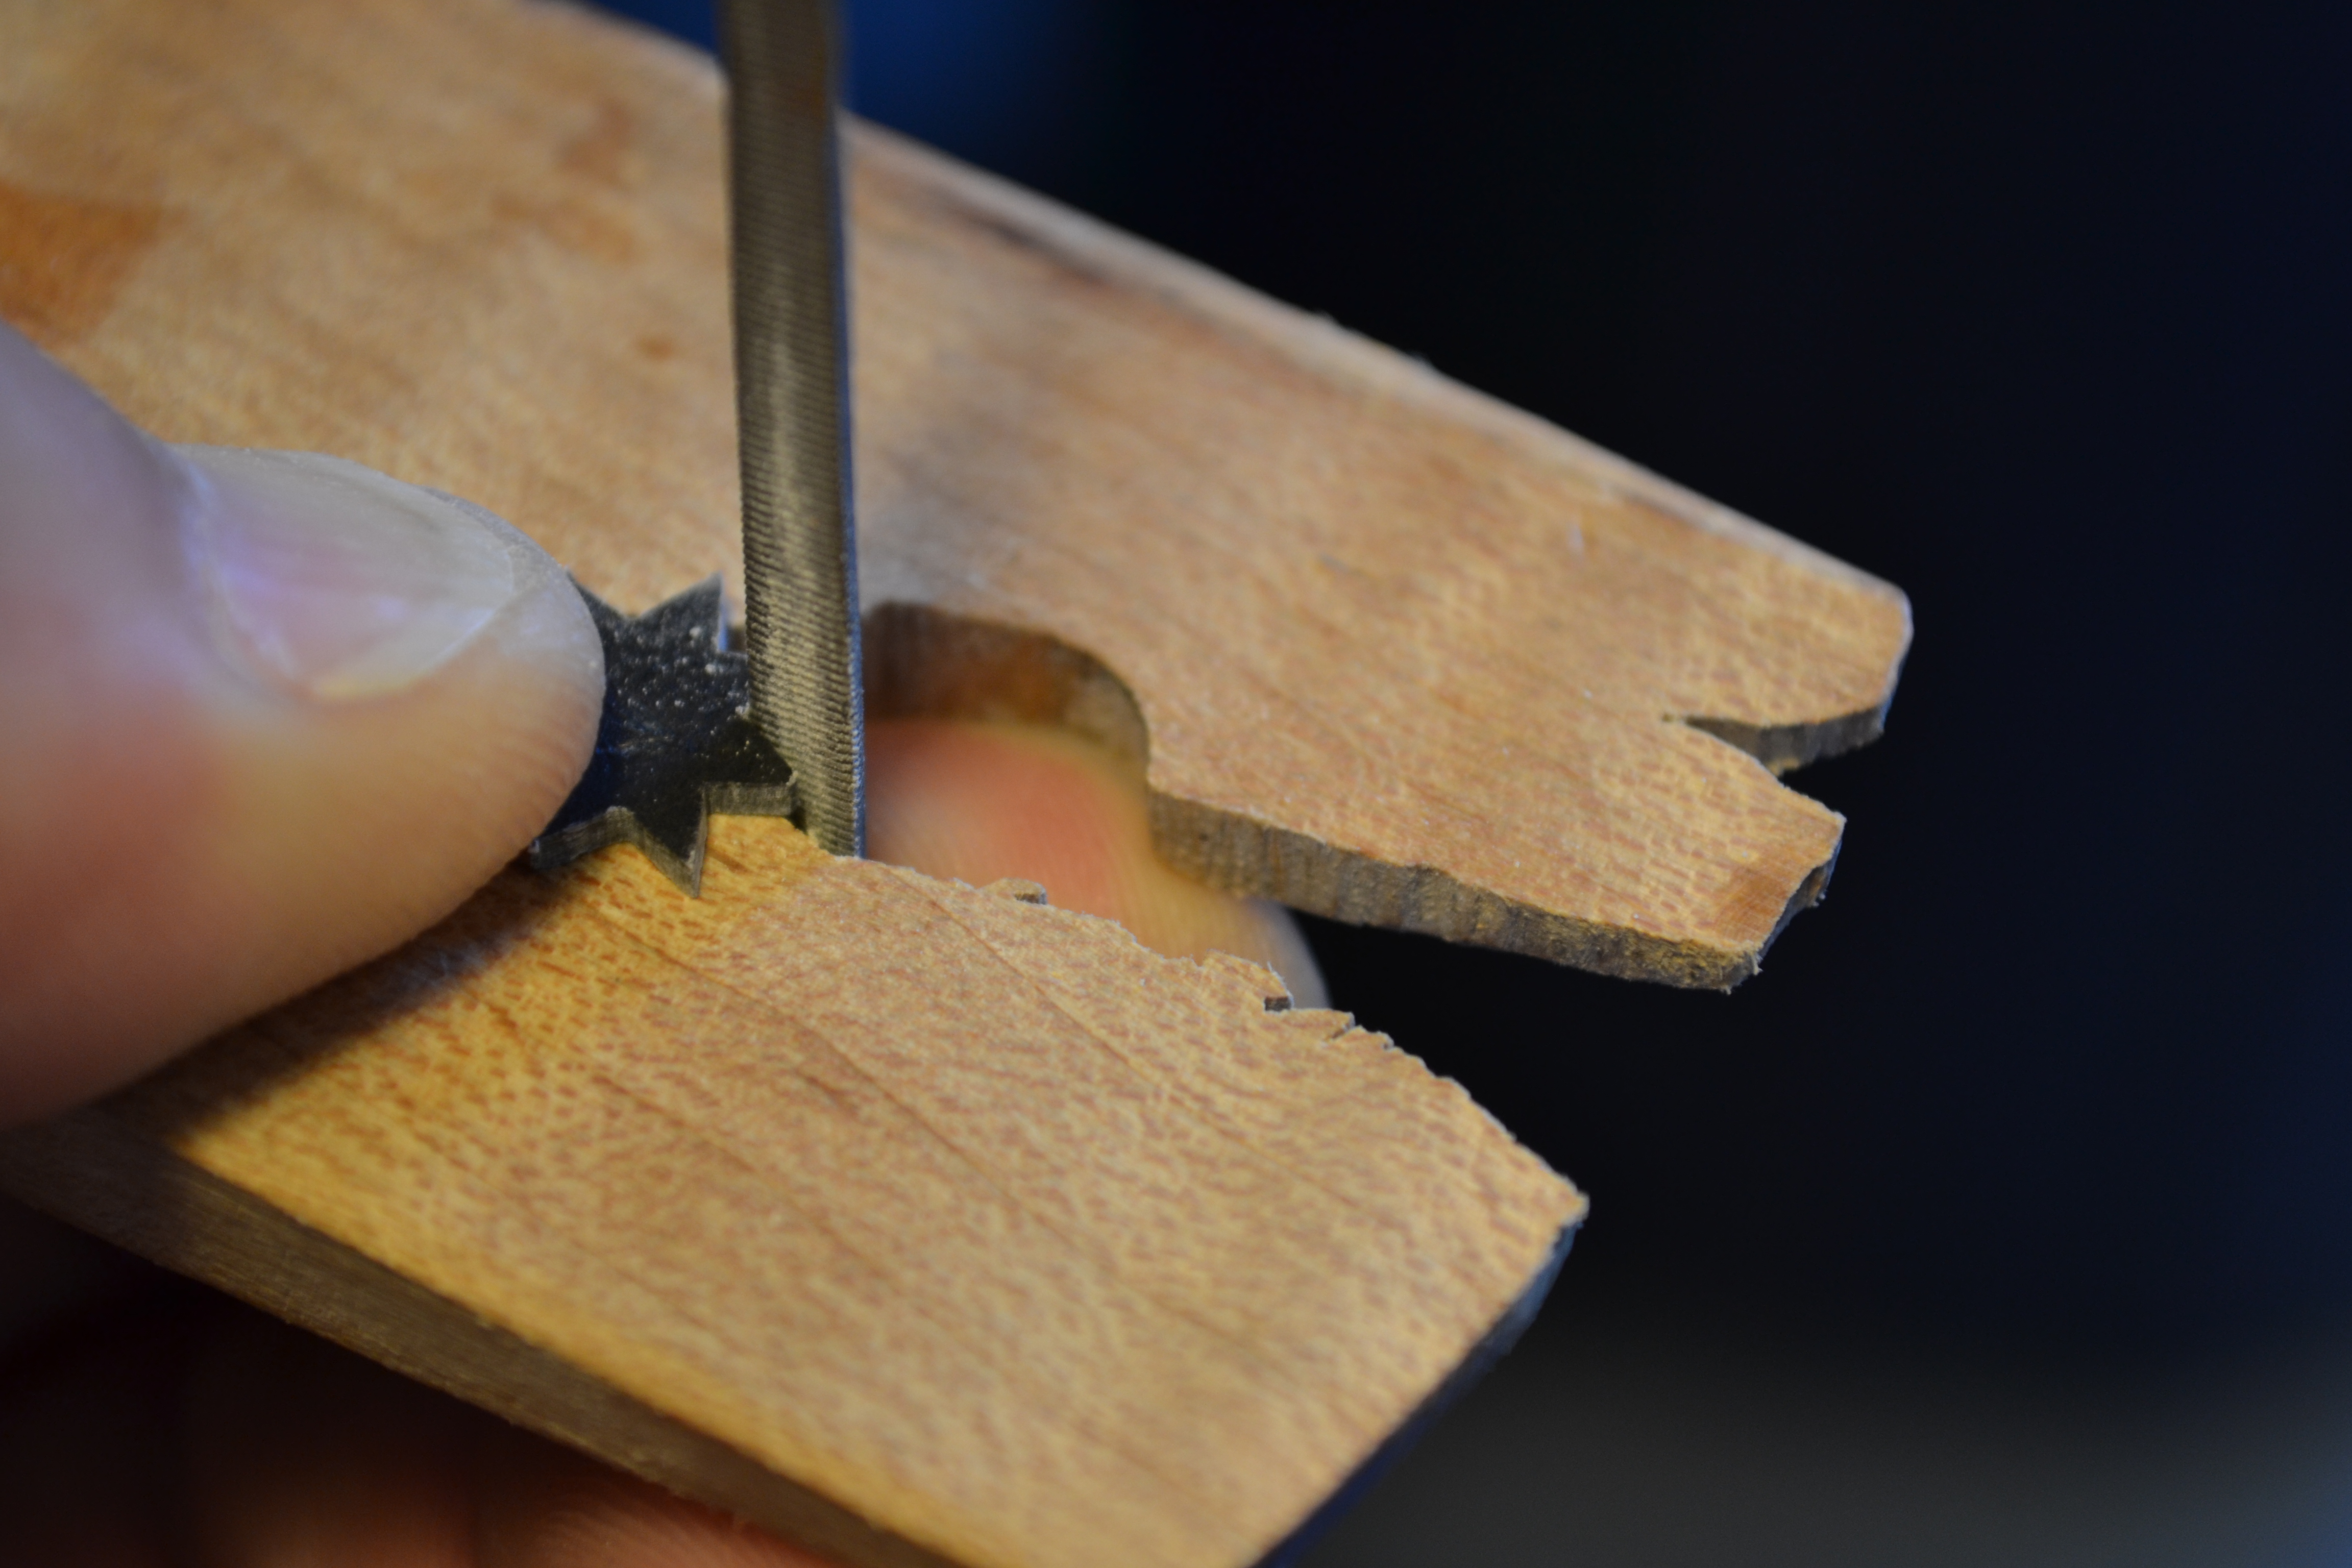
Having material on hand that you can chose from is important. Pulling a piece of abalone at random will not work for this project. I had to select a piece that looked convincing. A piece that looked like the other pieces.
Click on the pictures for a larger view
 |
 |
 |
 |
 |
 |
 |
 |
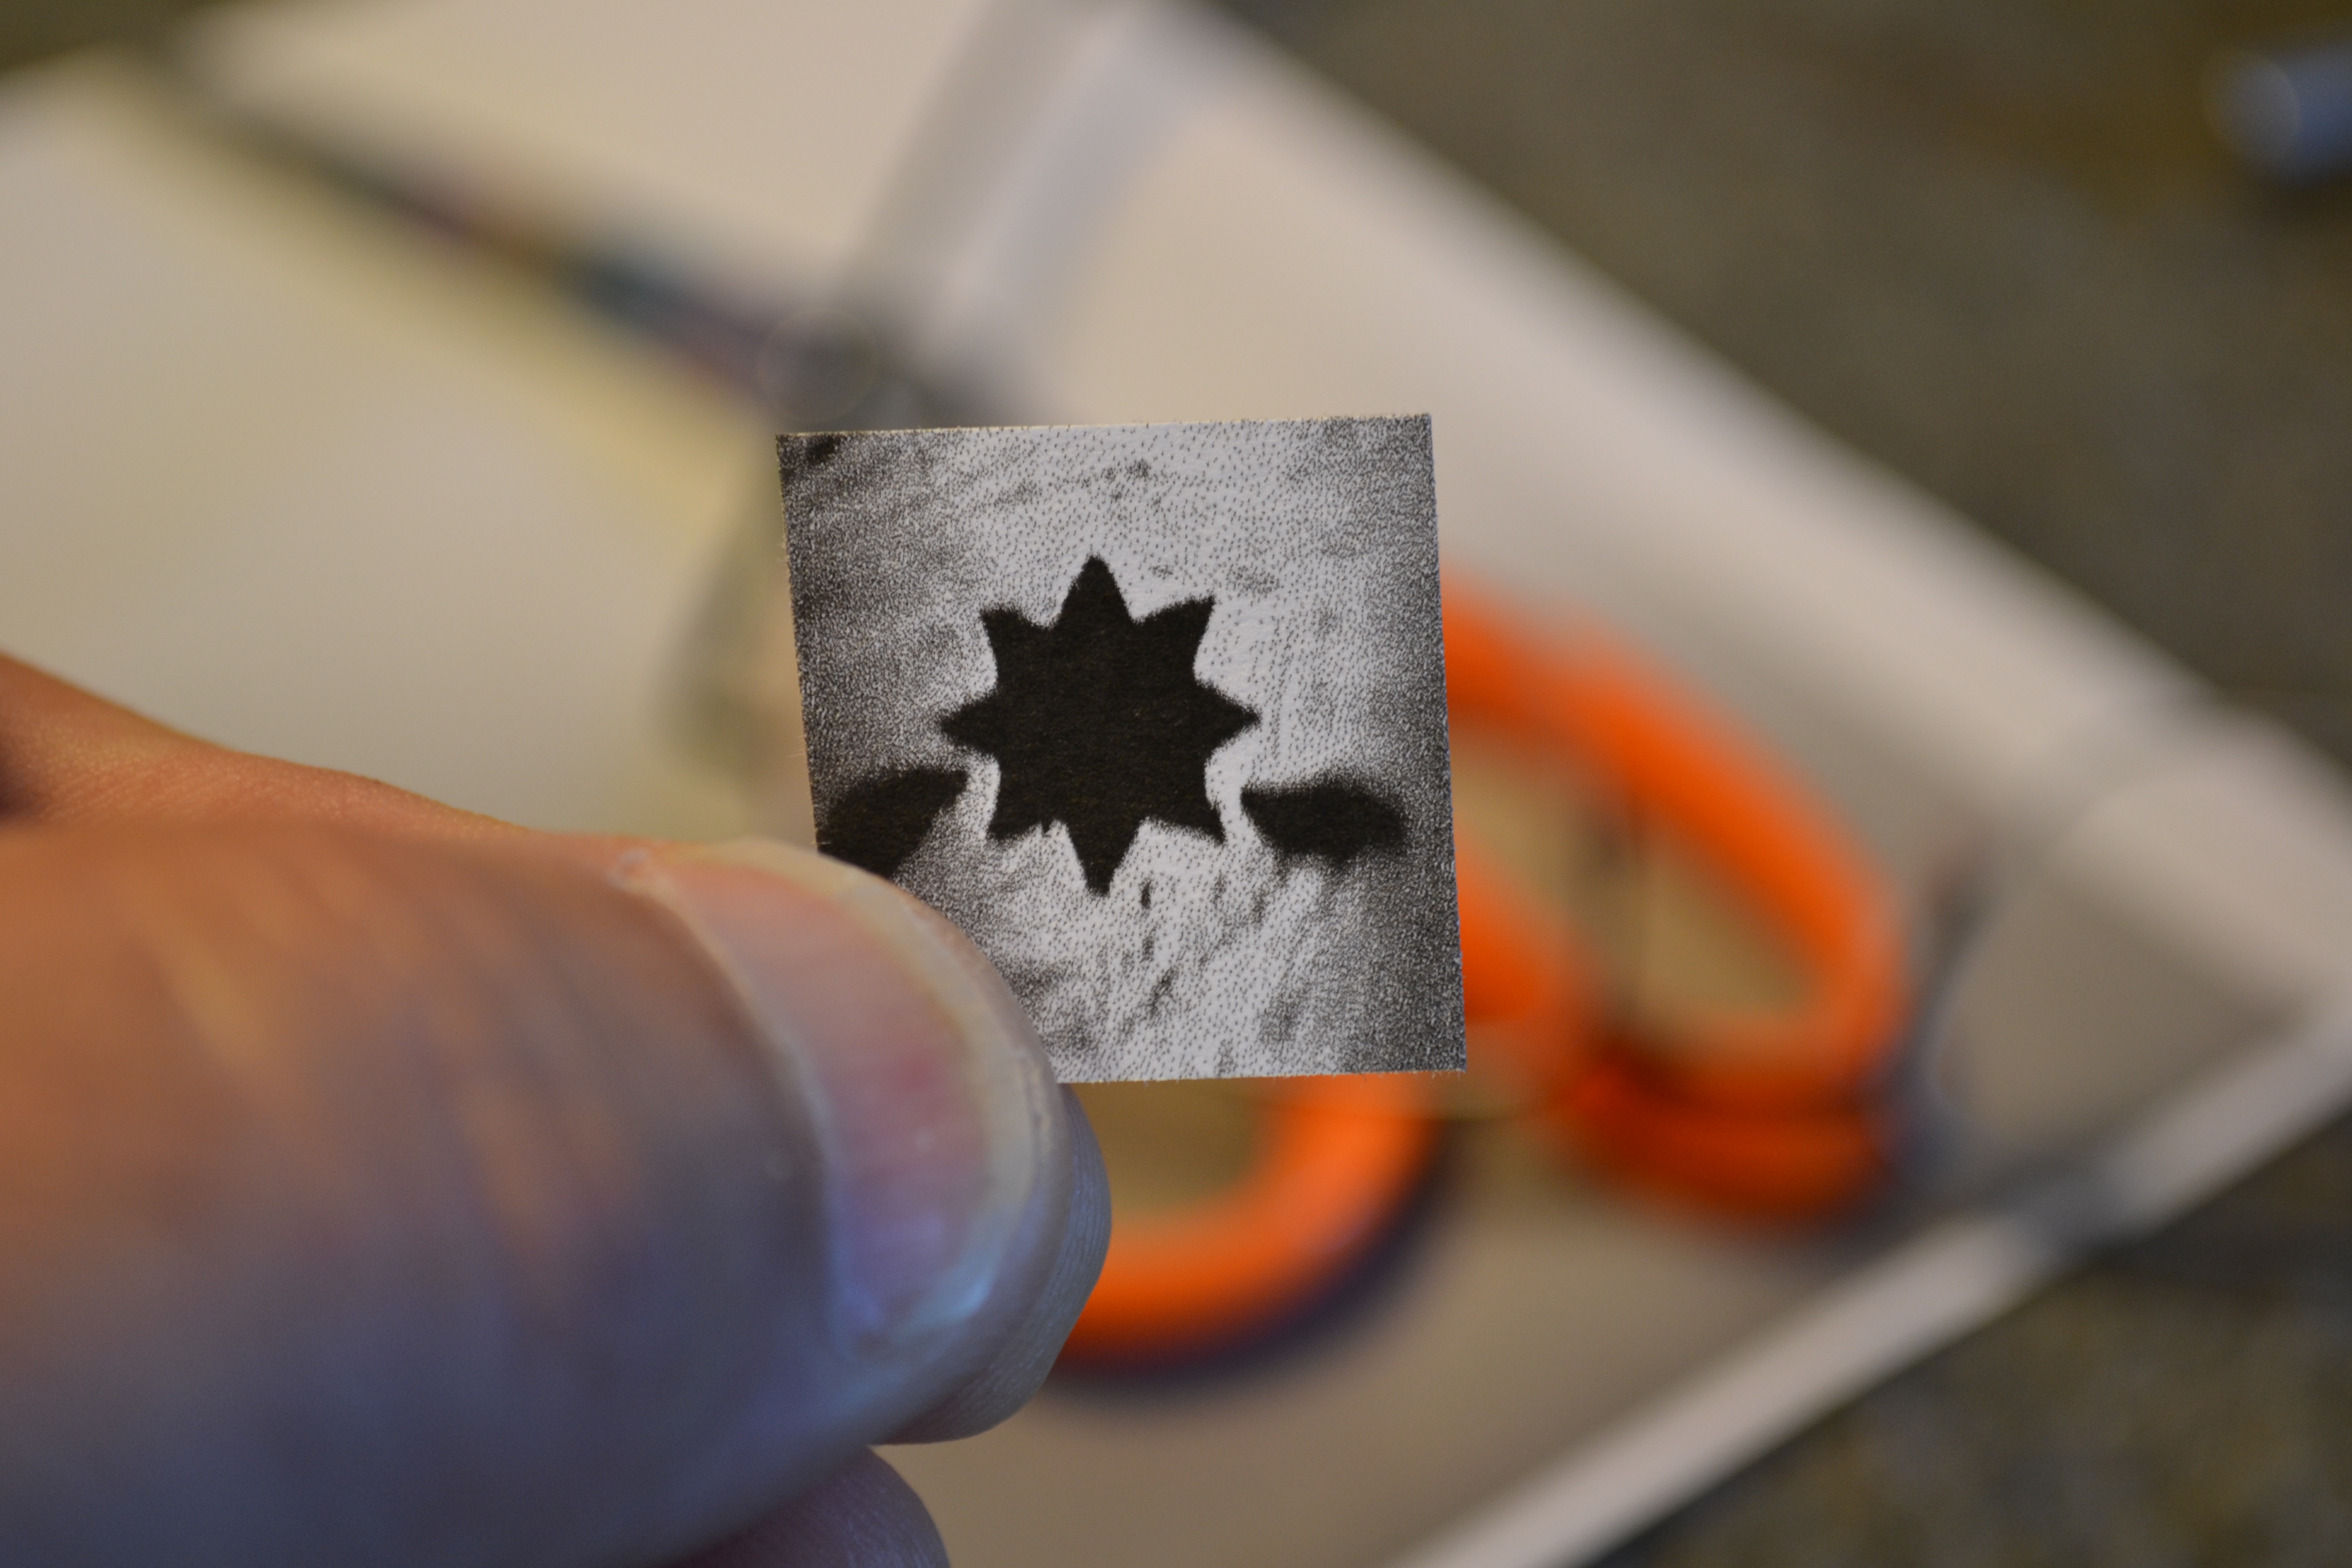
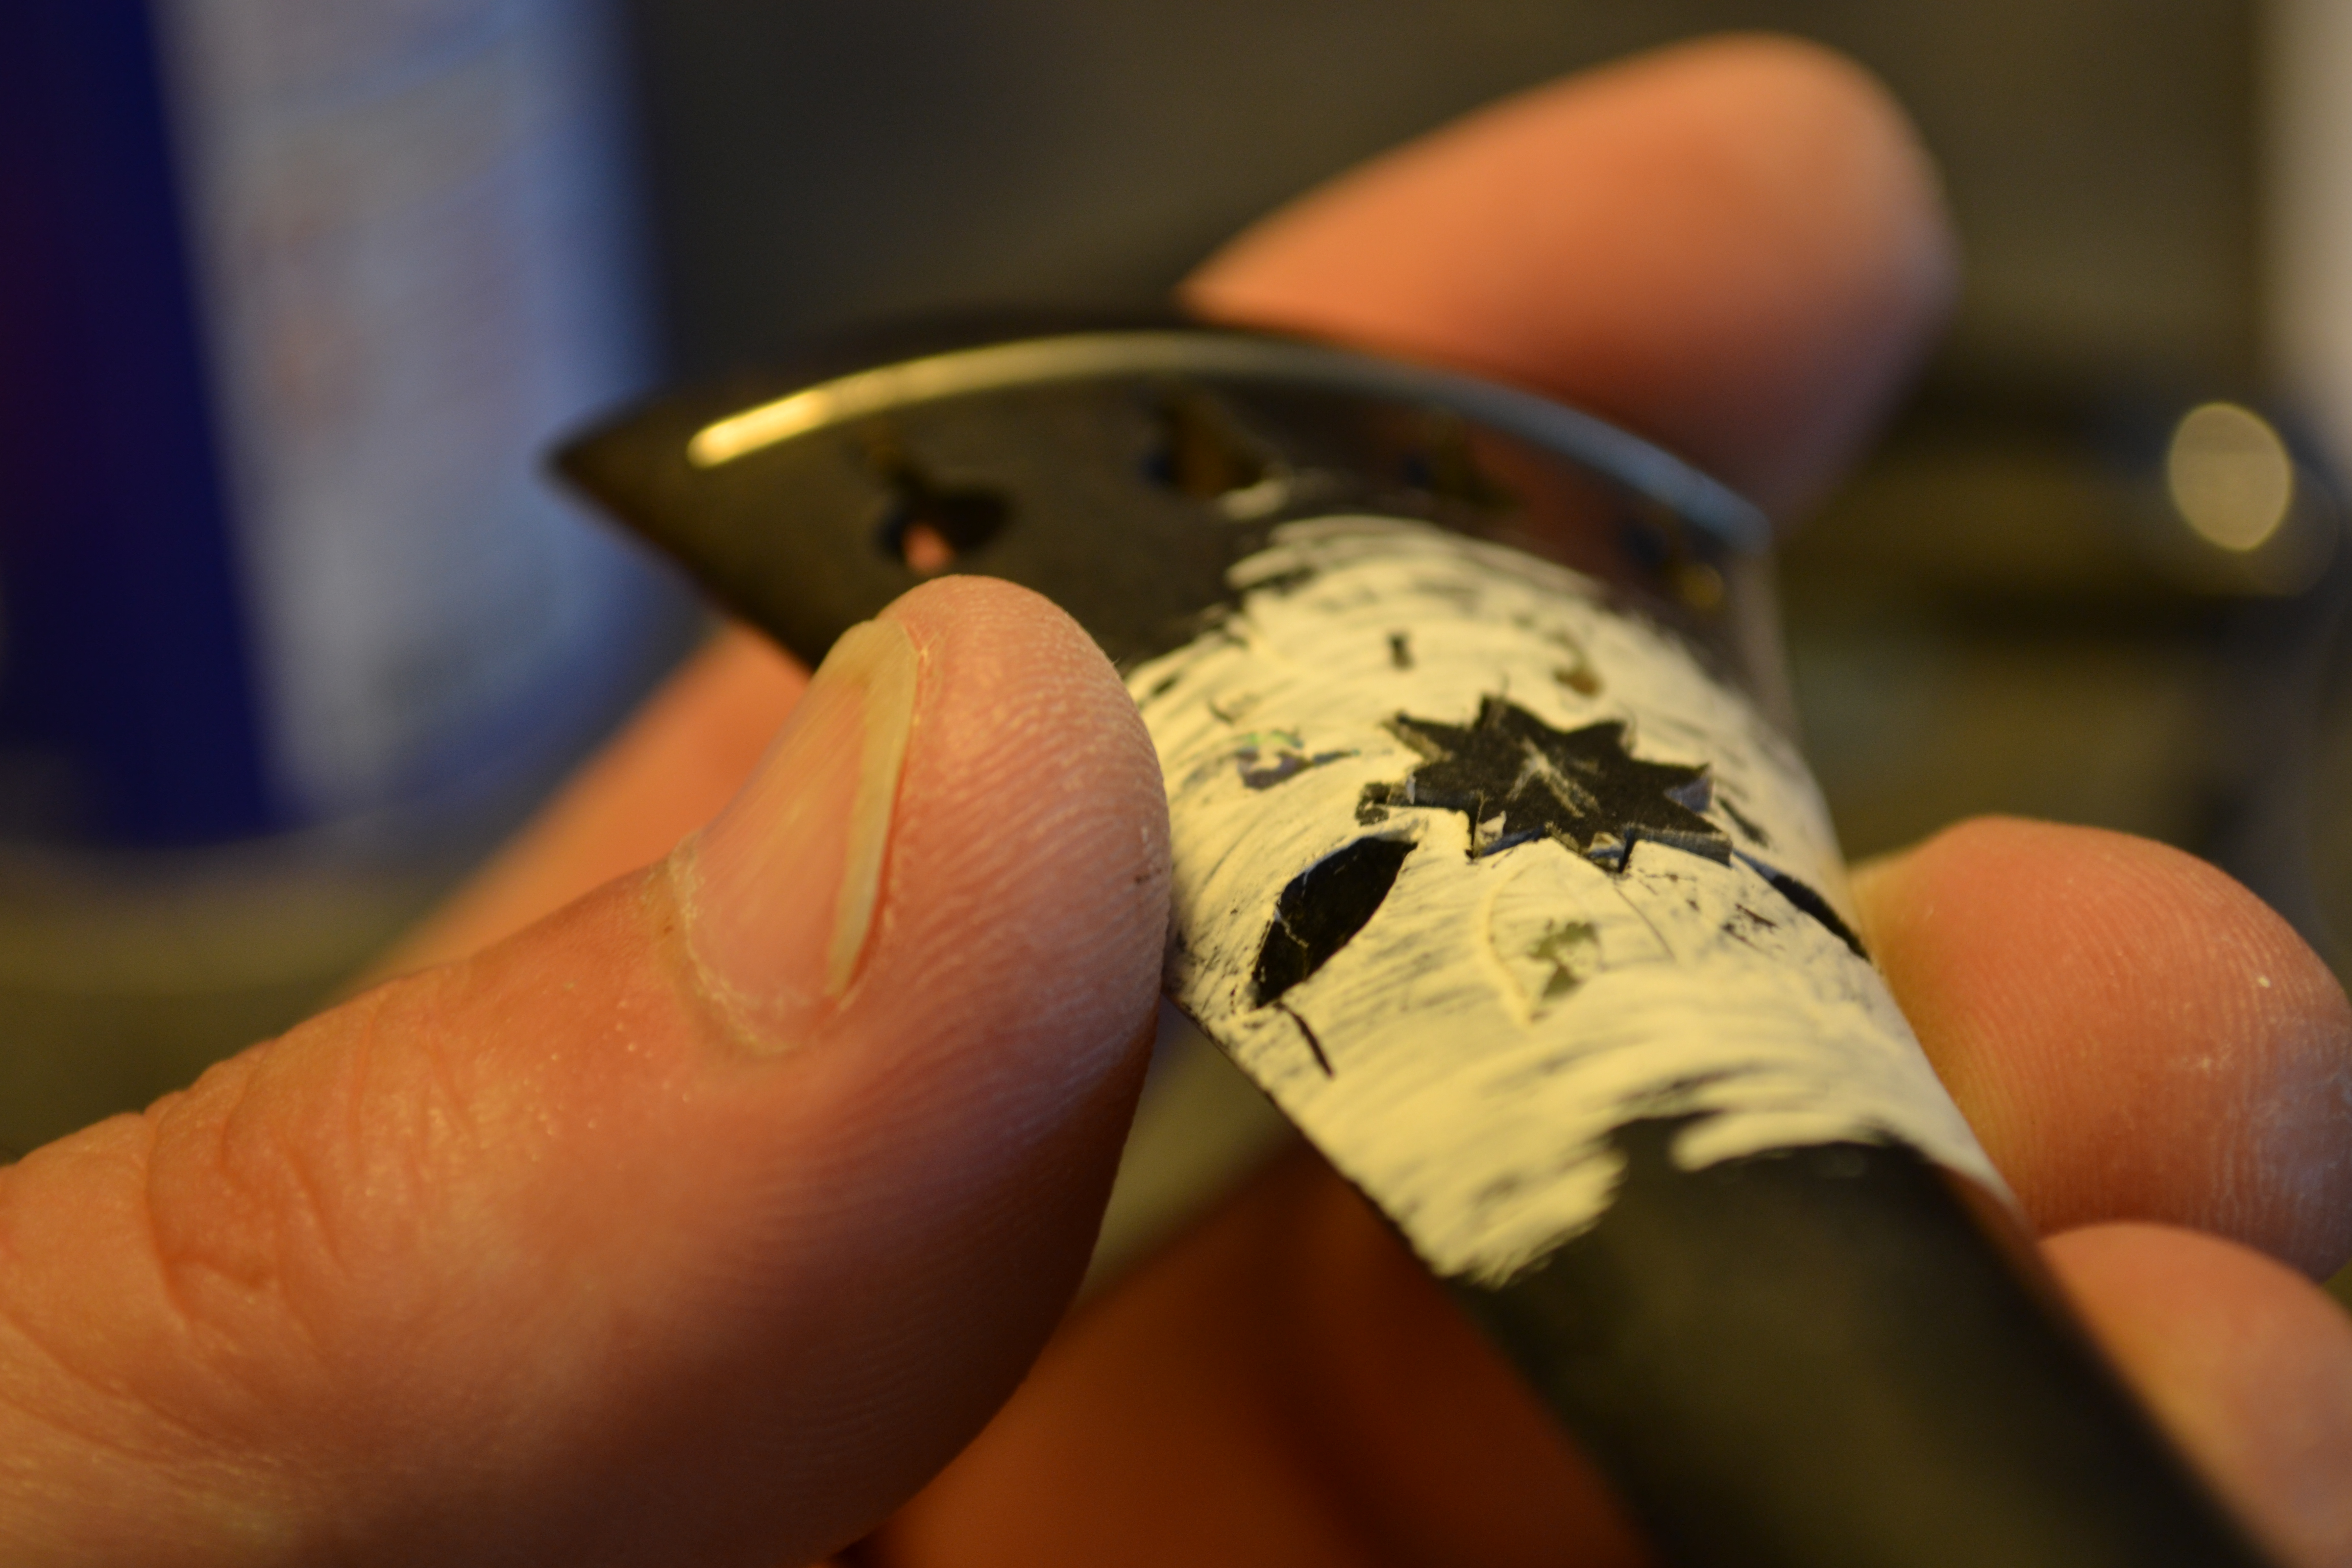
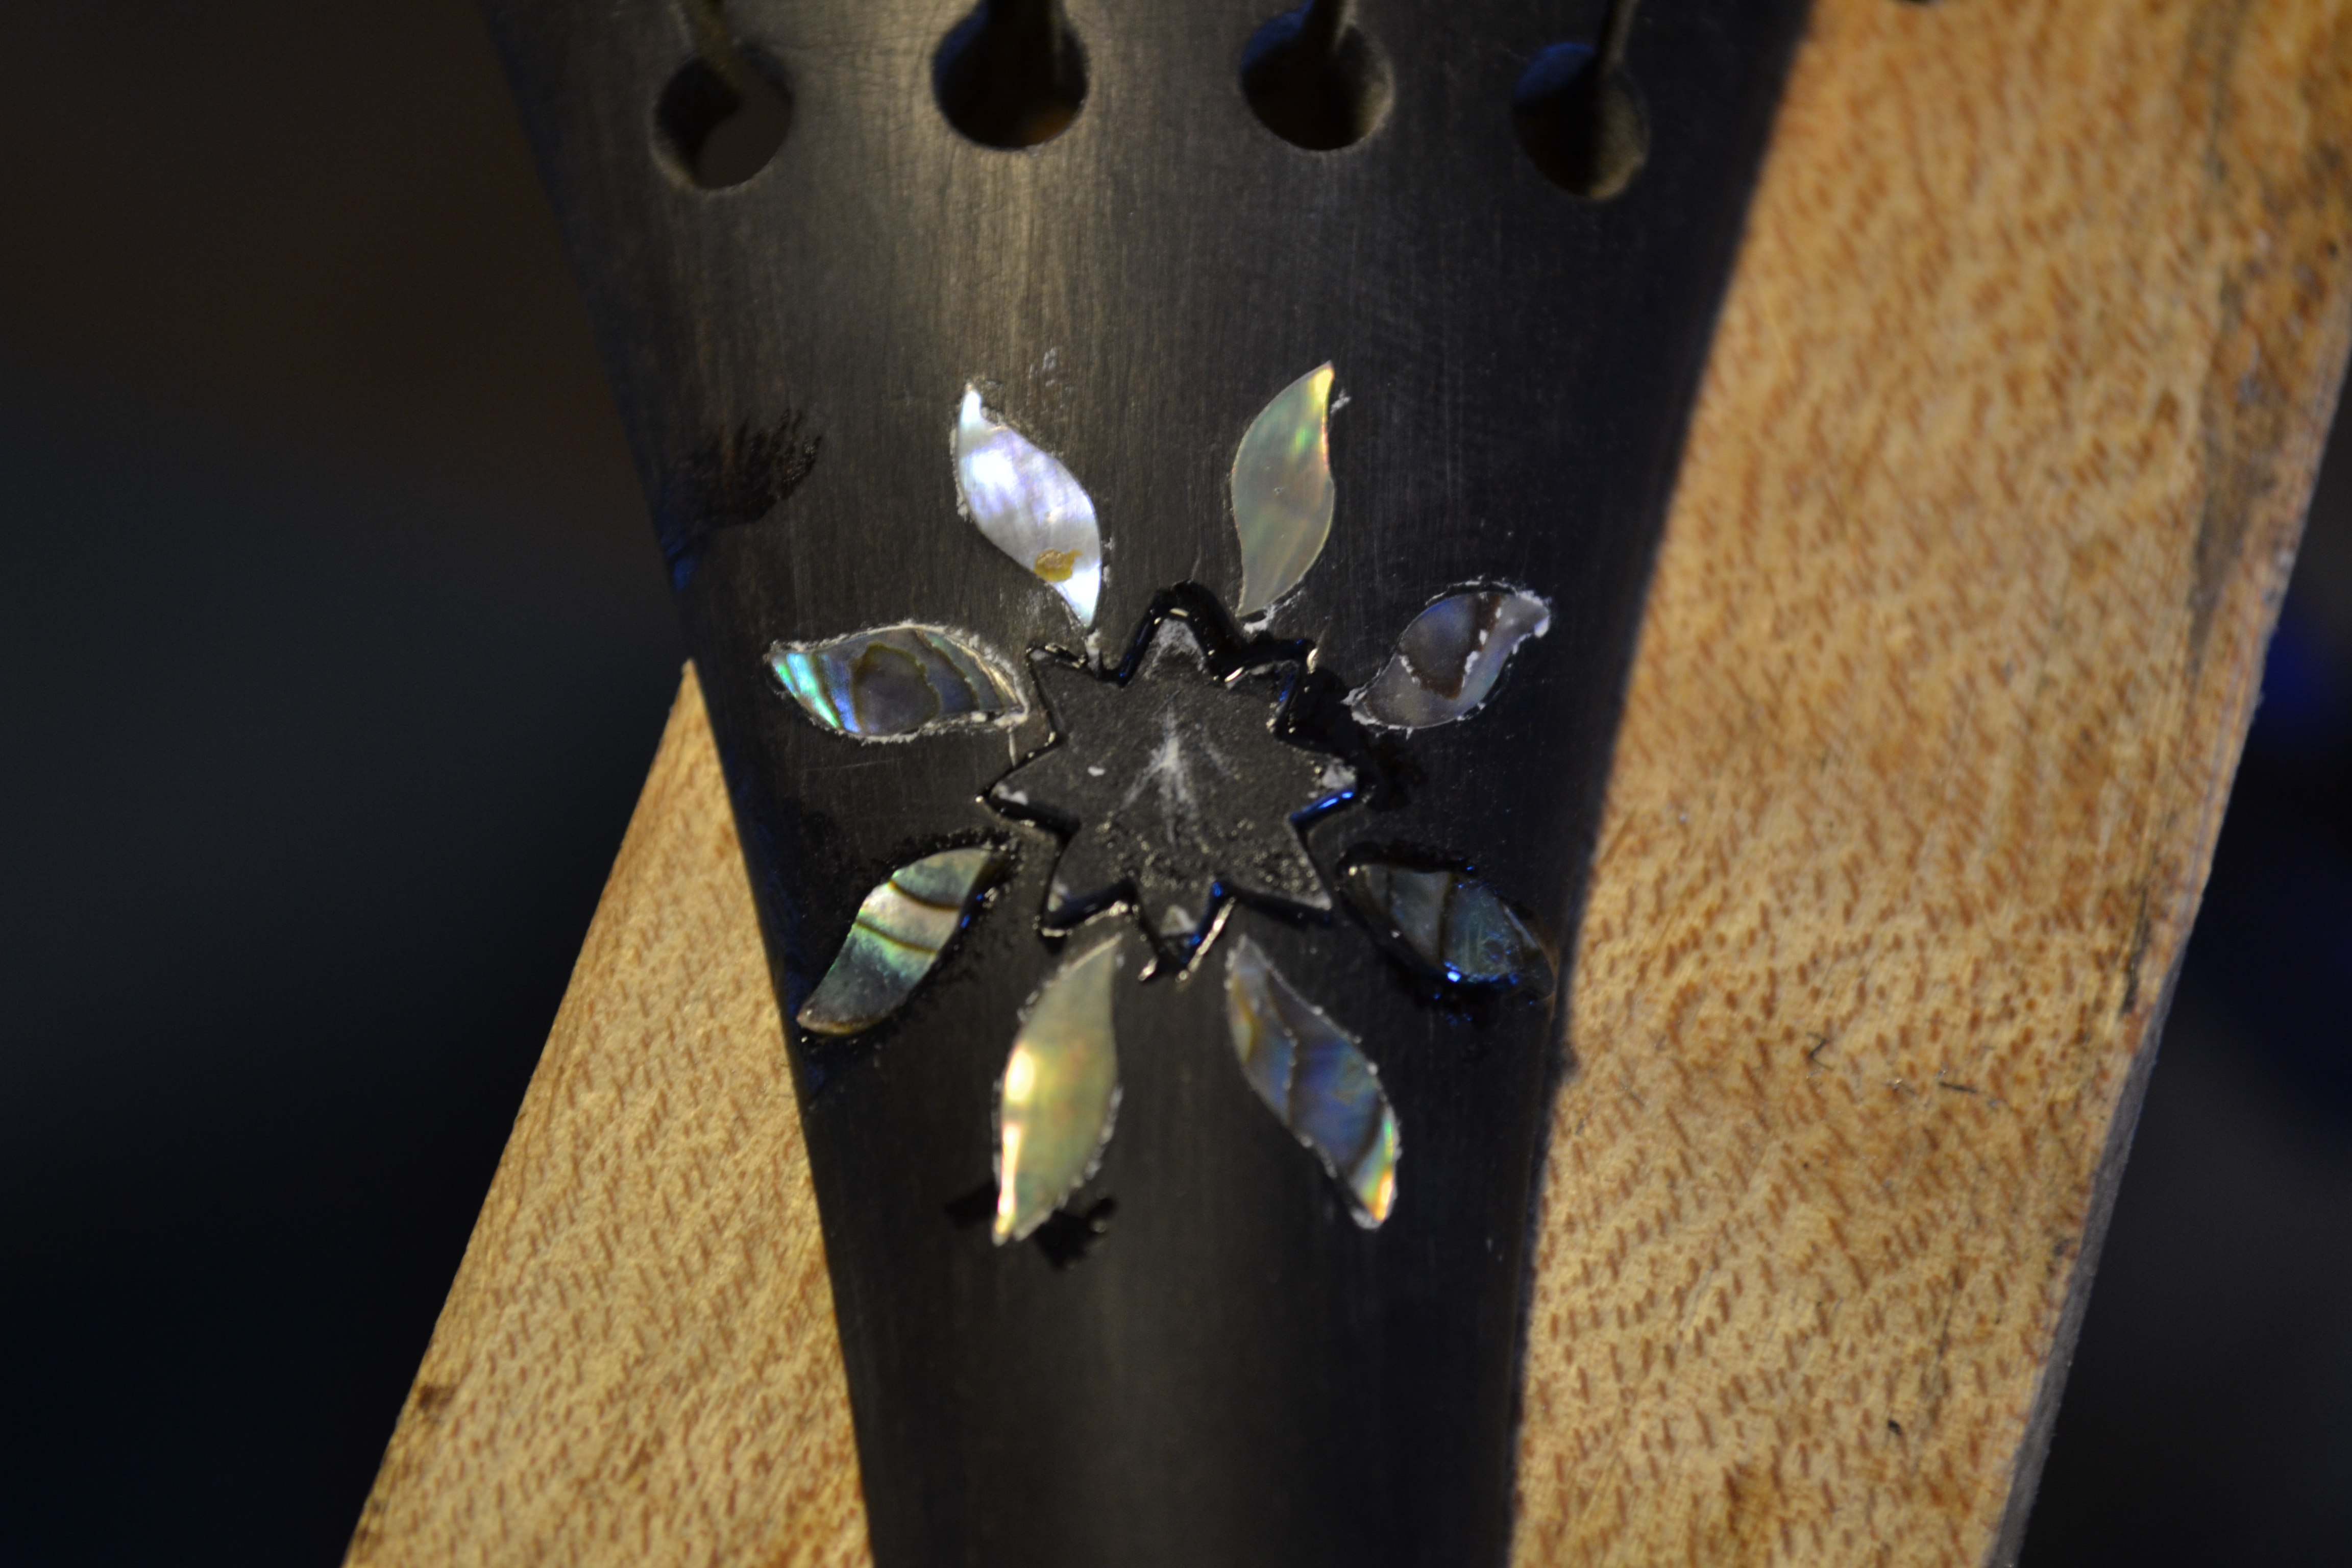
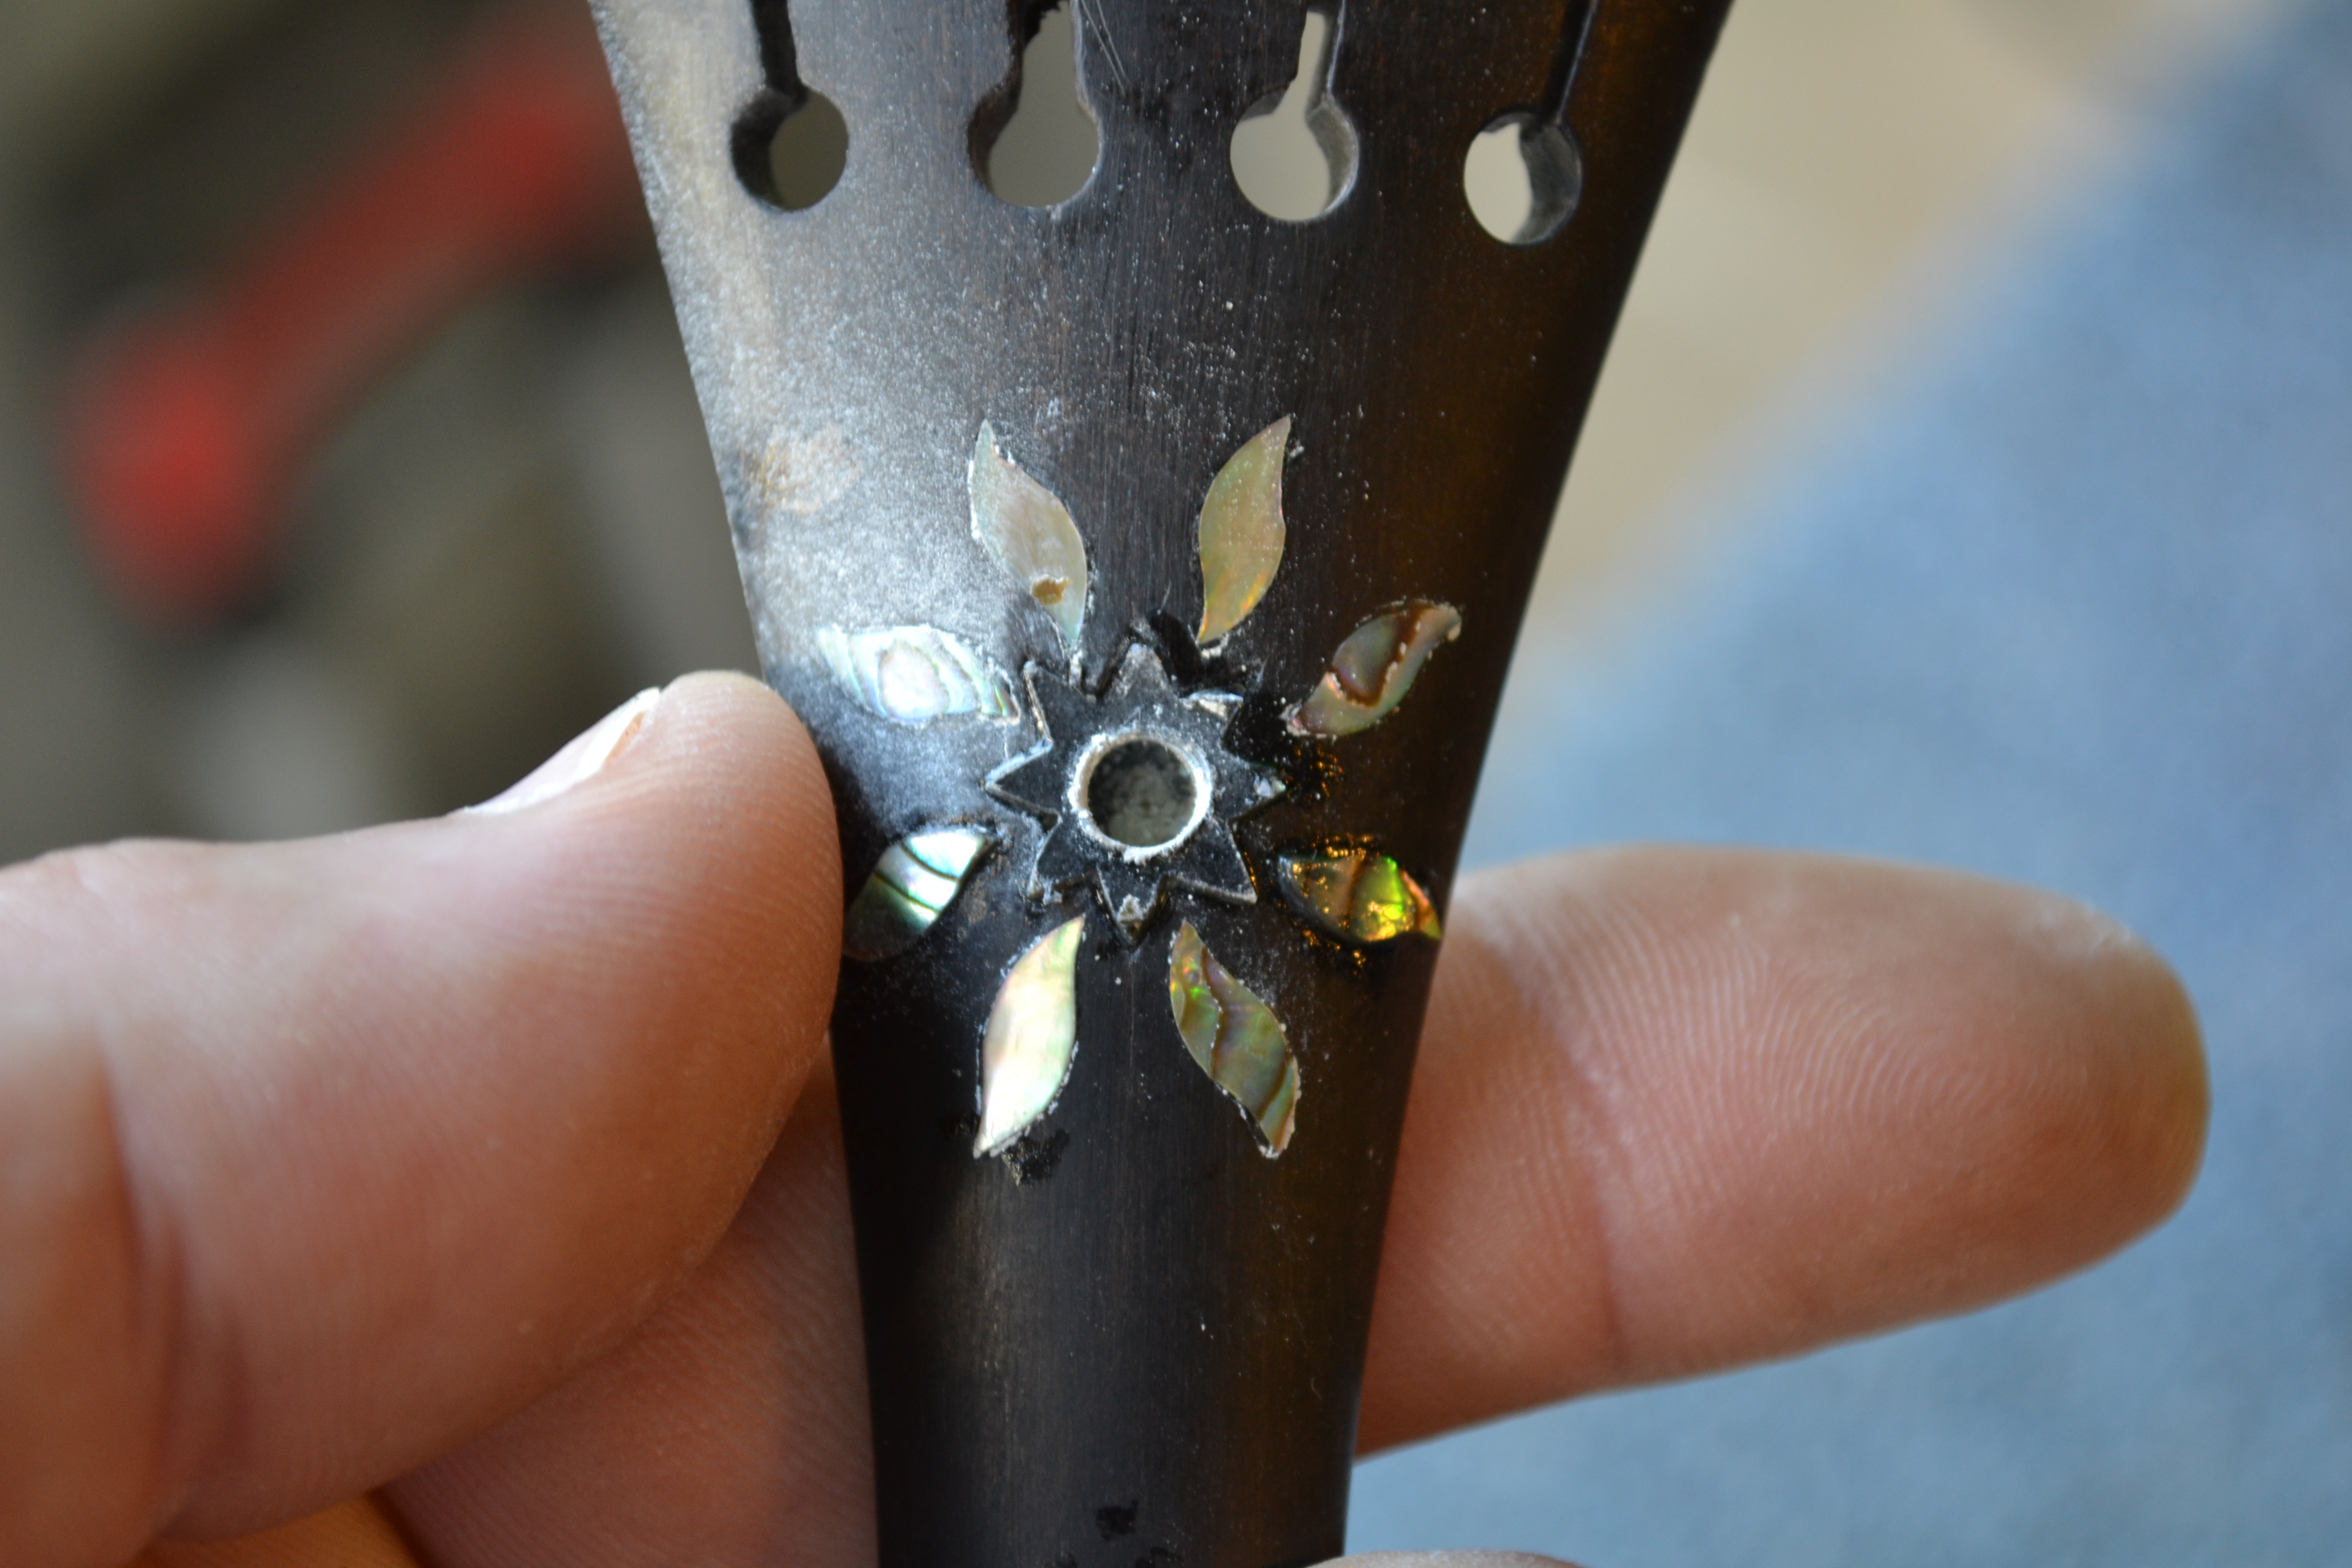
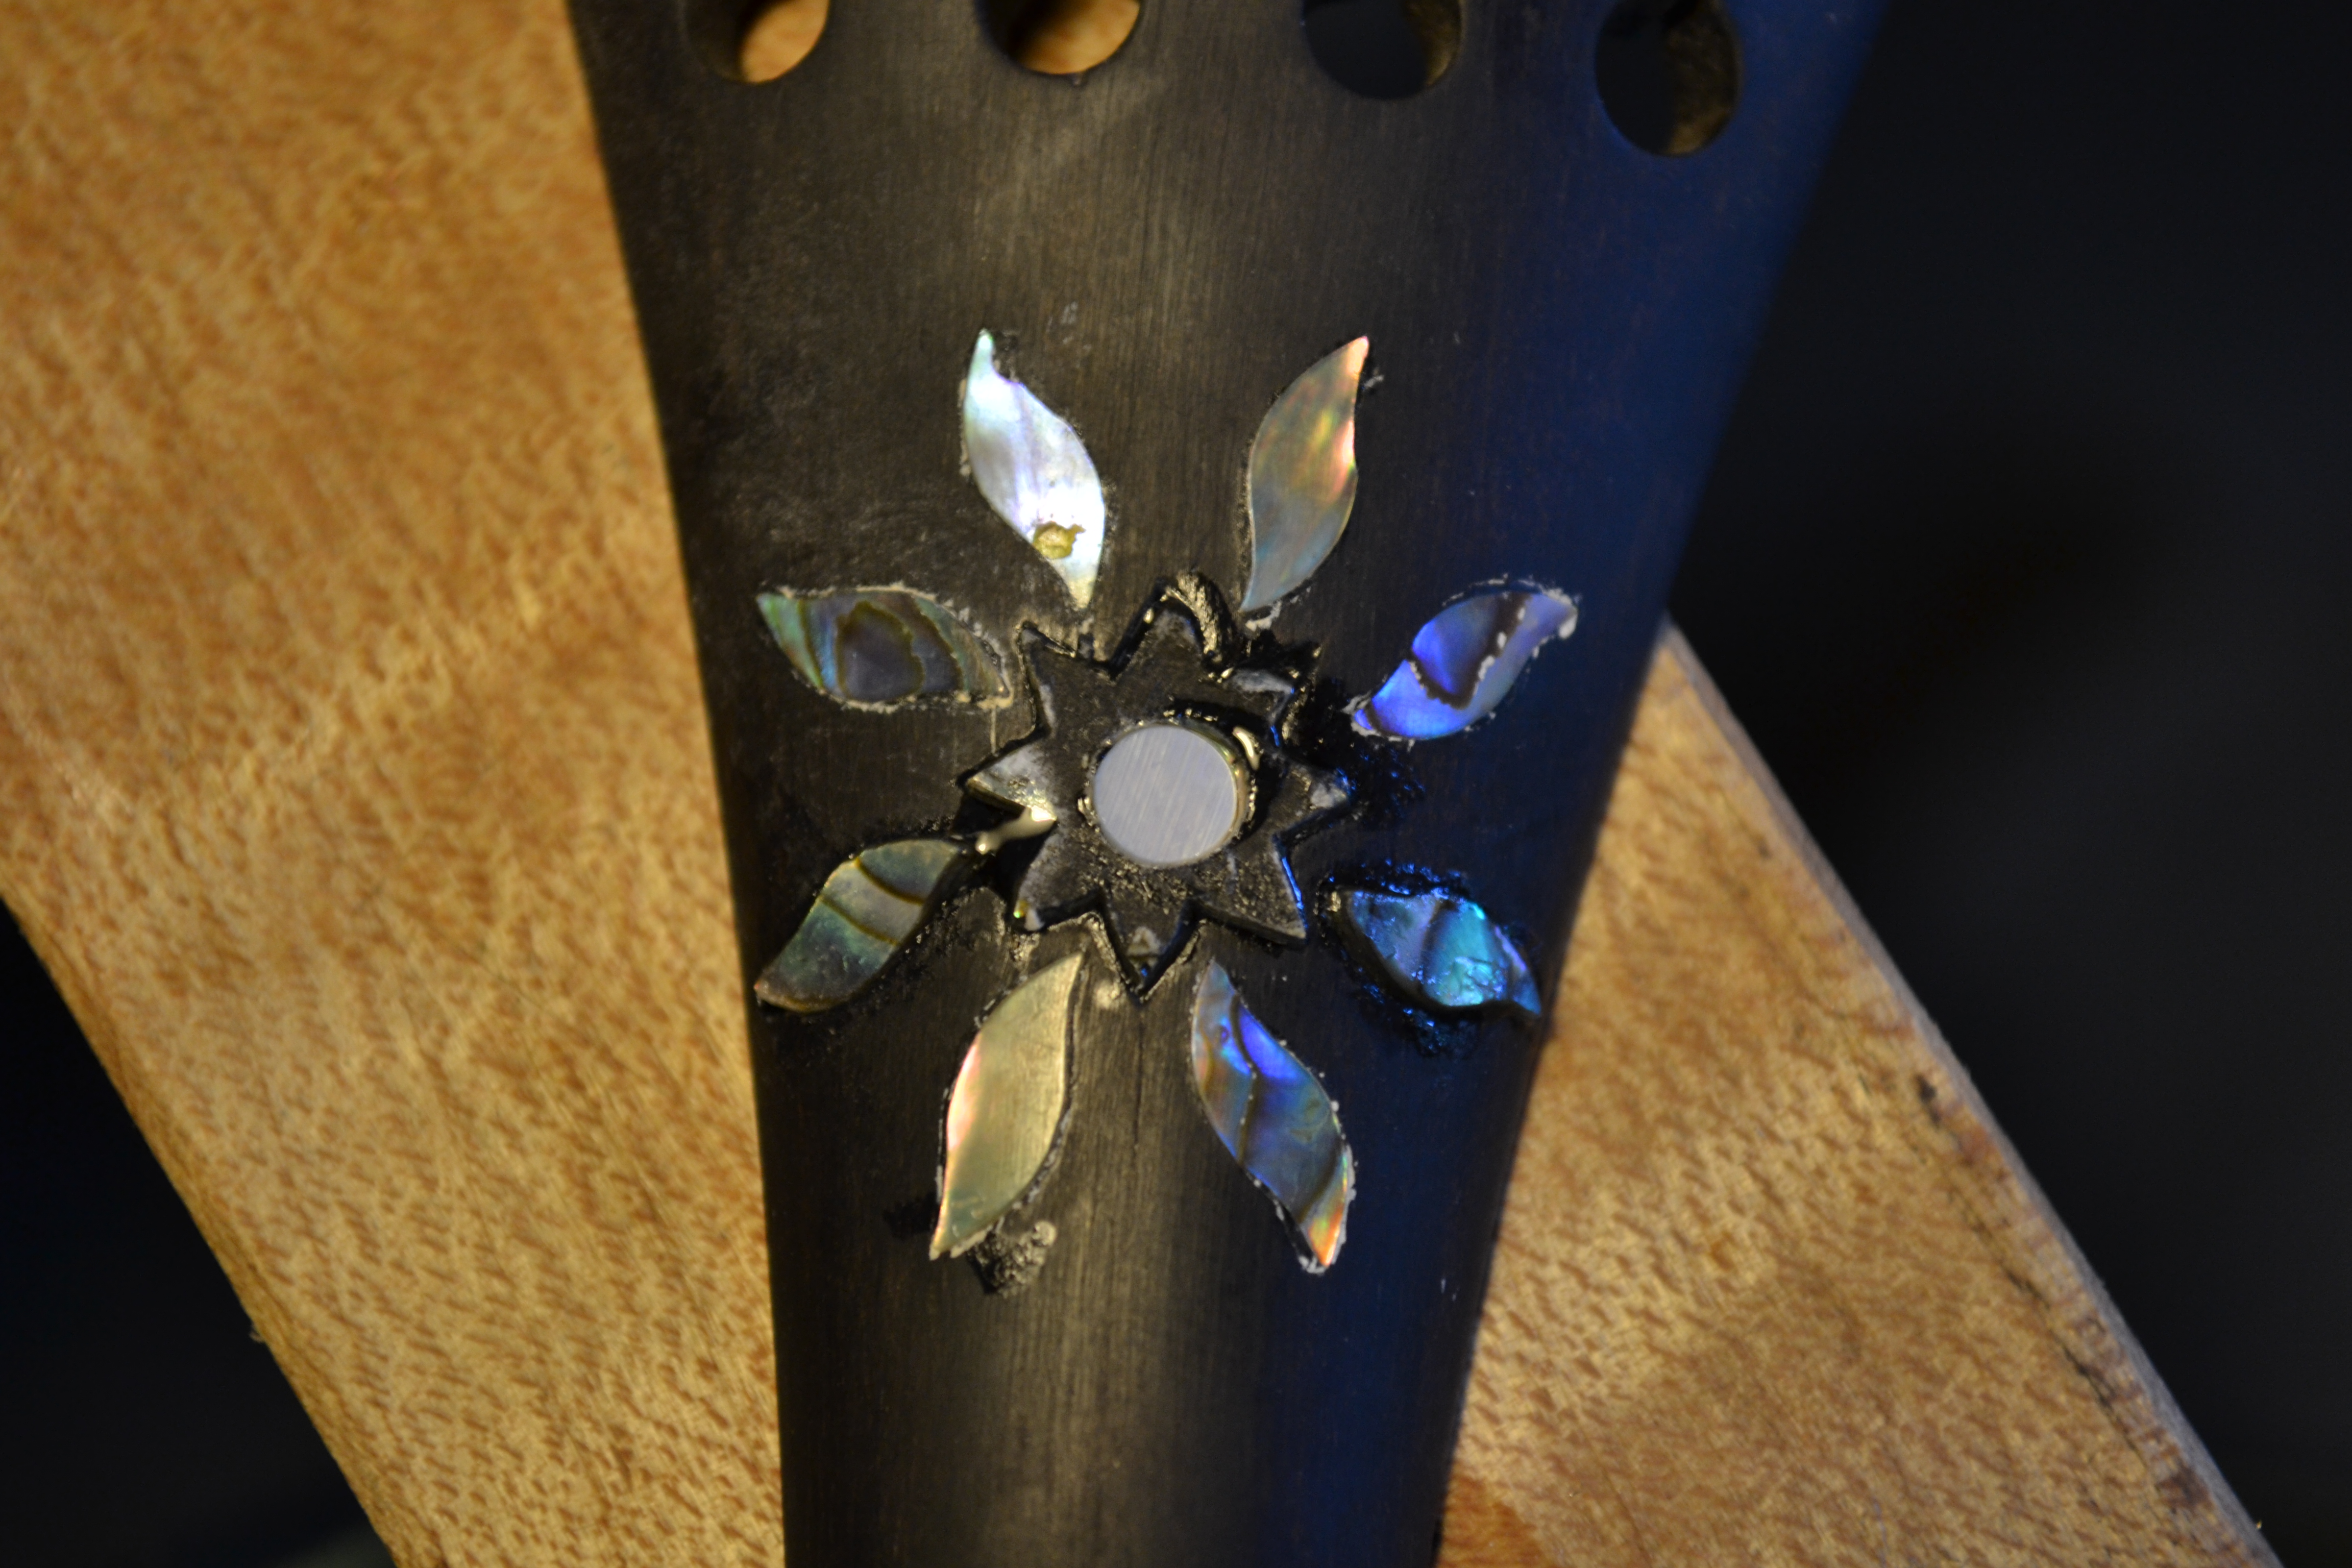
Once the two “rays” are completed I decided that the centerpiece should be placed on my copier. In order to make it contrast, I put a water based finger paint on it being careful not to get any down inside so as to make the copy as crisp as possible. The paper copies can then be cut out and used to reproduce the abalone heart. Evidence on this tailpiece suggests that there was a center piece inlaid inside the abalone as well. I can only guess as to what that actually was, but chances are it was a center dot of mother-of-pear. The hole in the center even suggests what size it was, so I am going with that.
 |
 |
 |
 |
 |
 |
 |
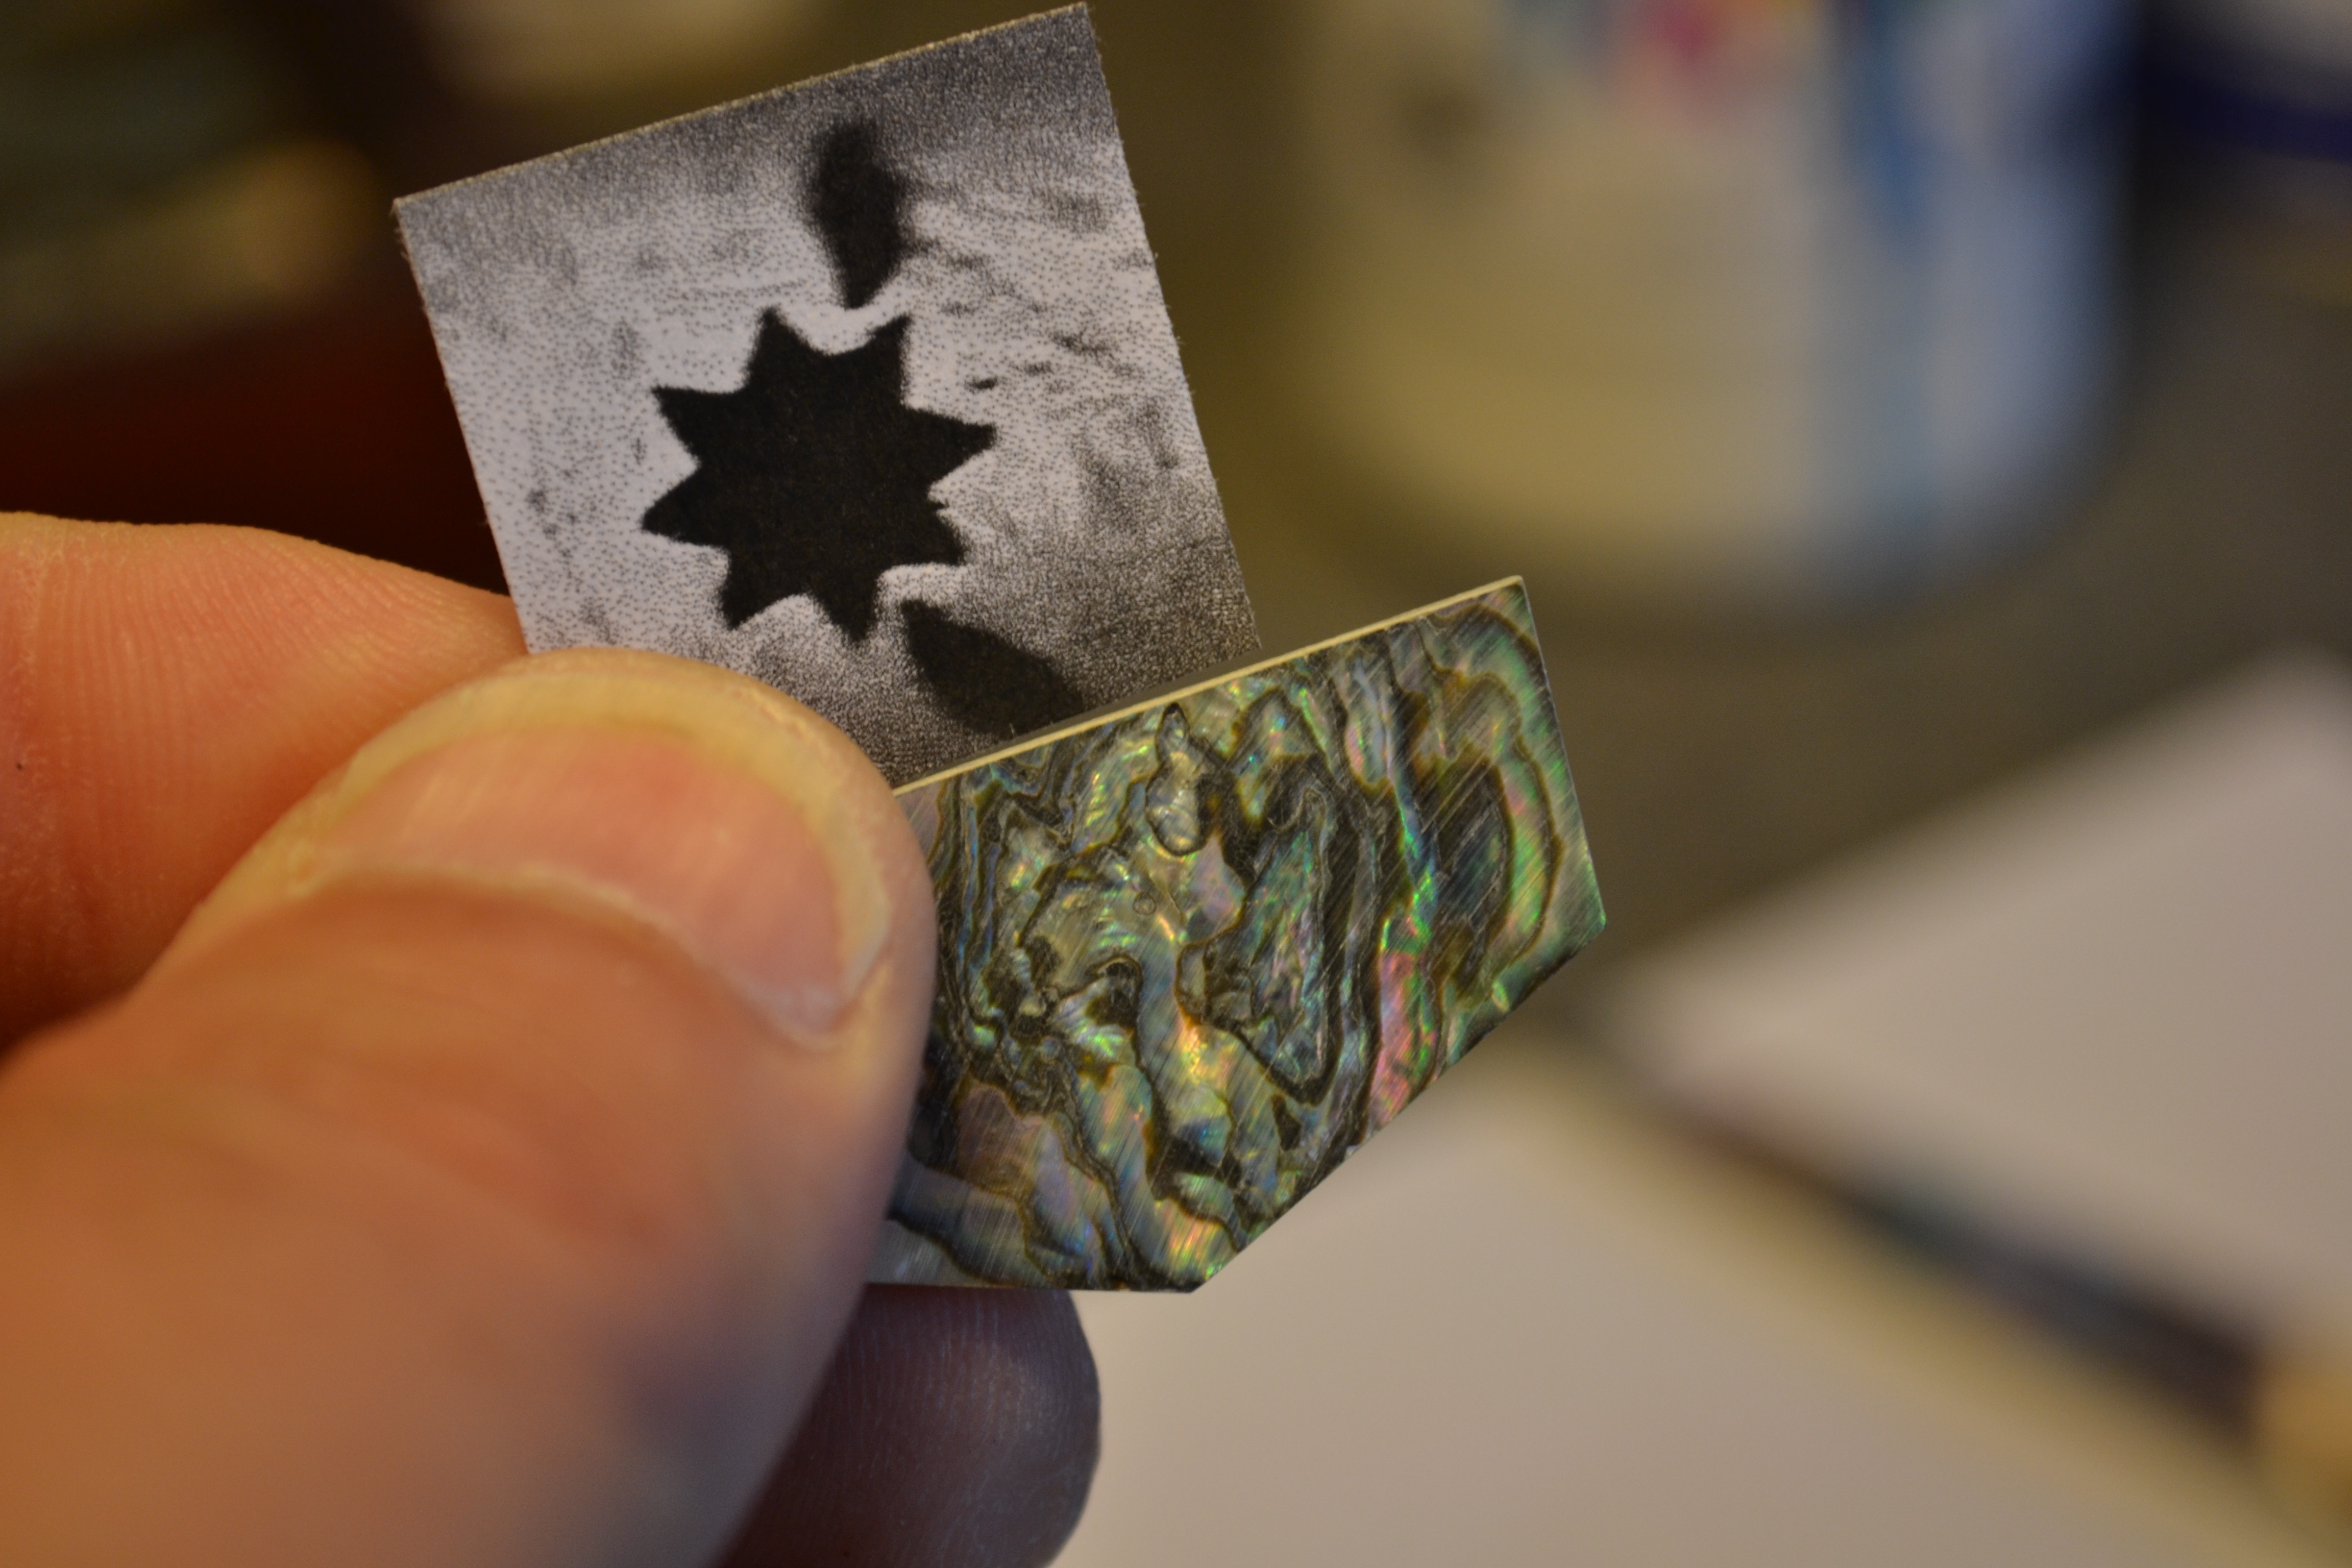 |
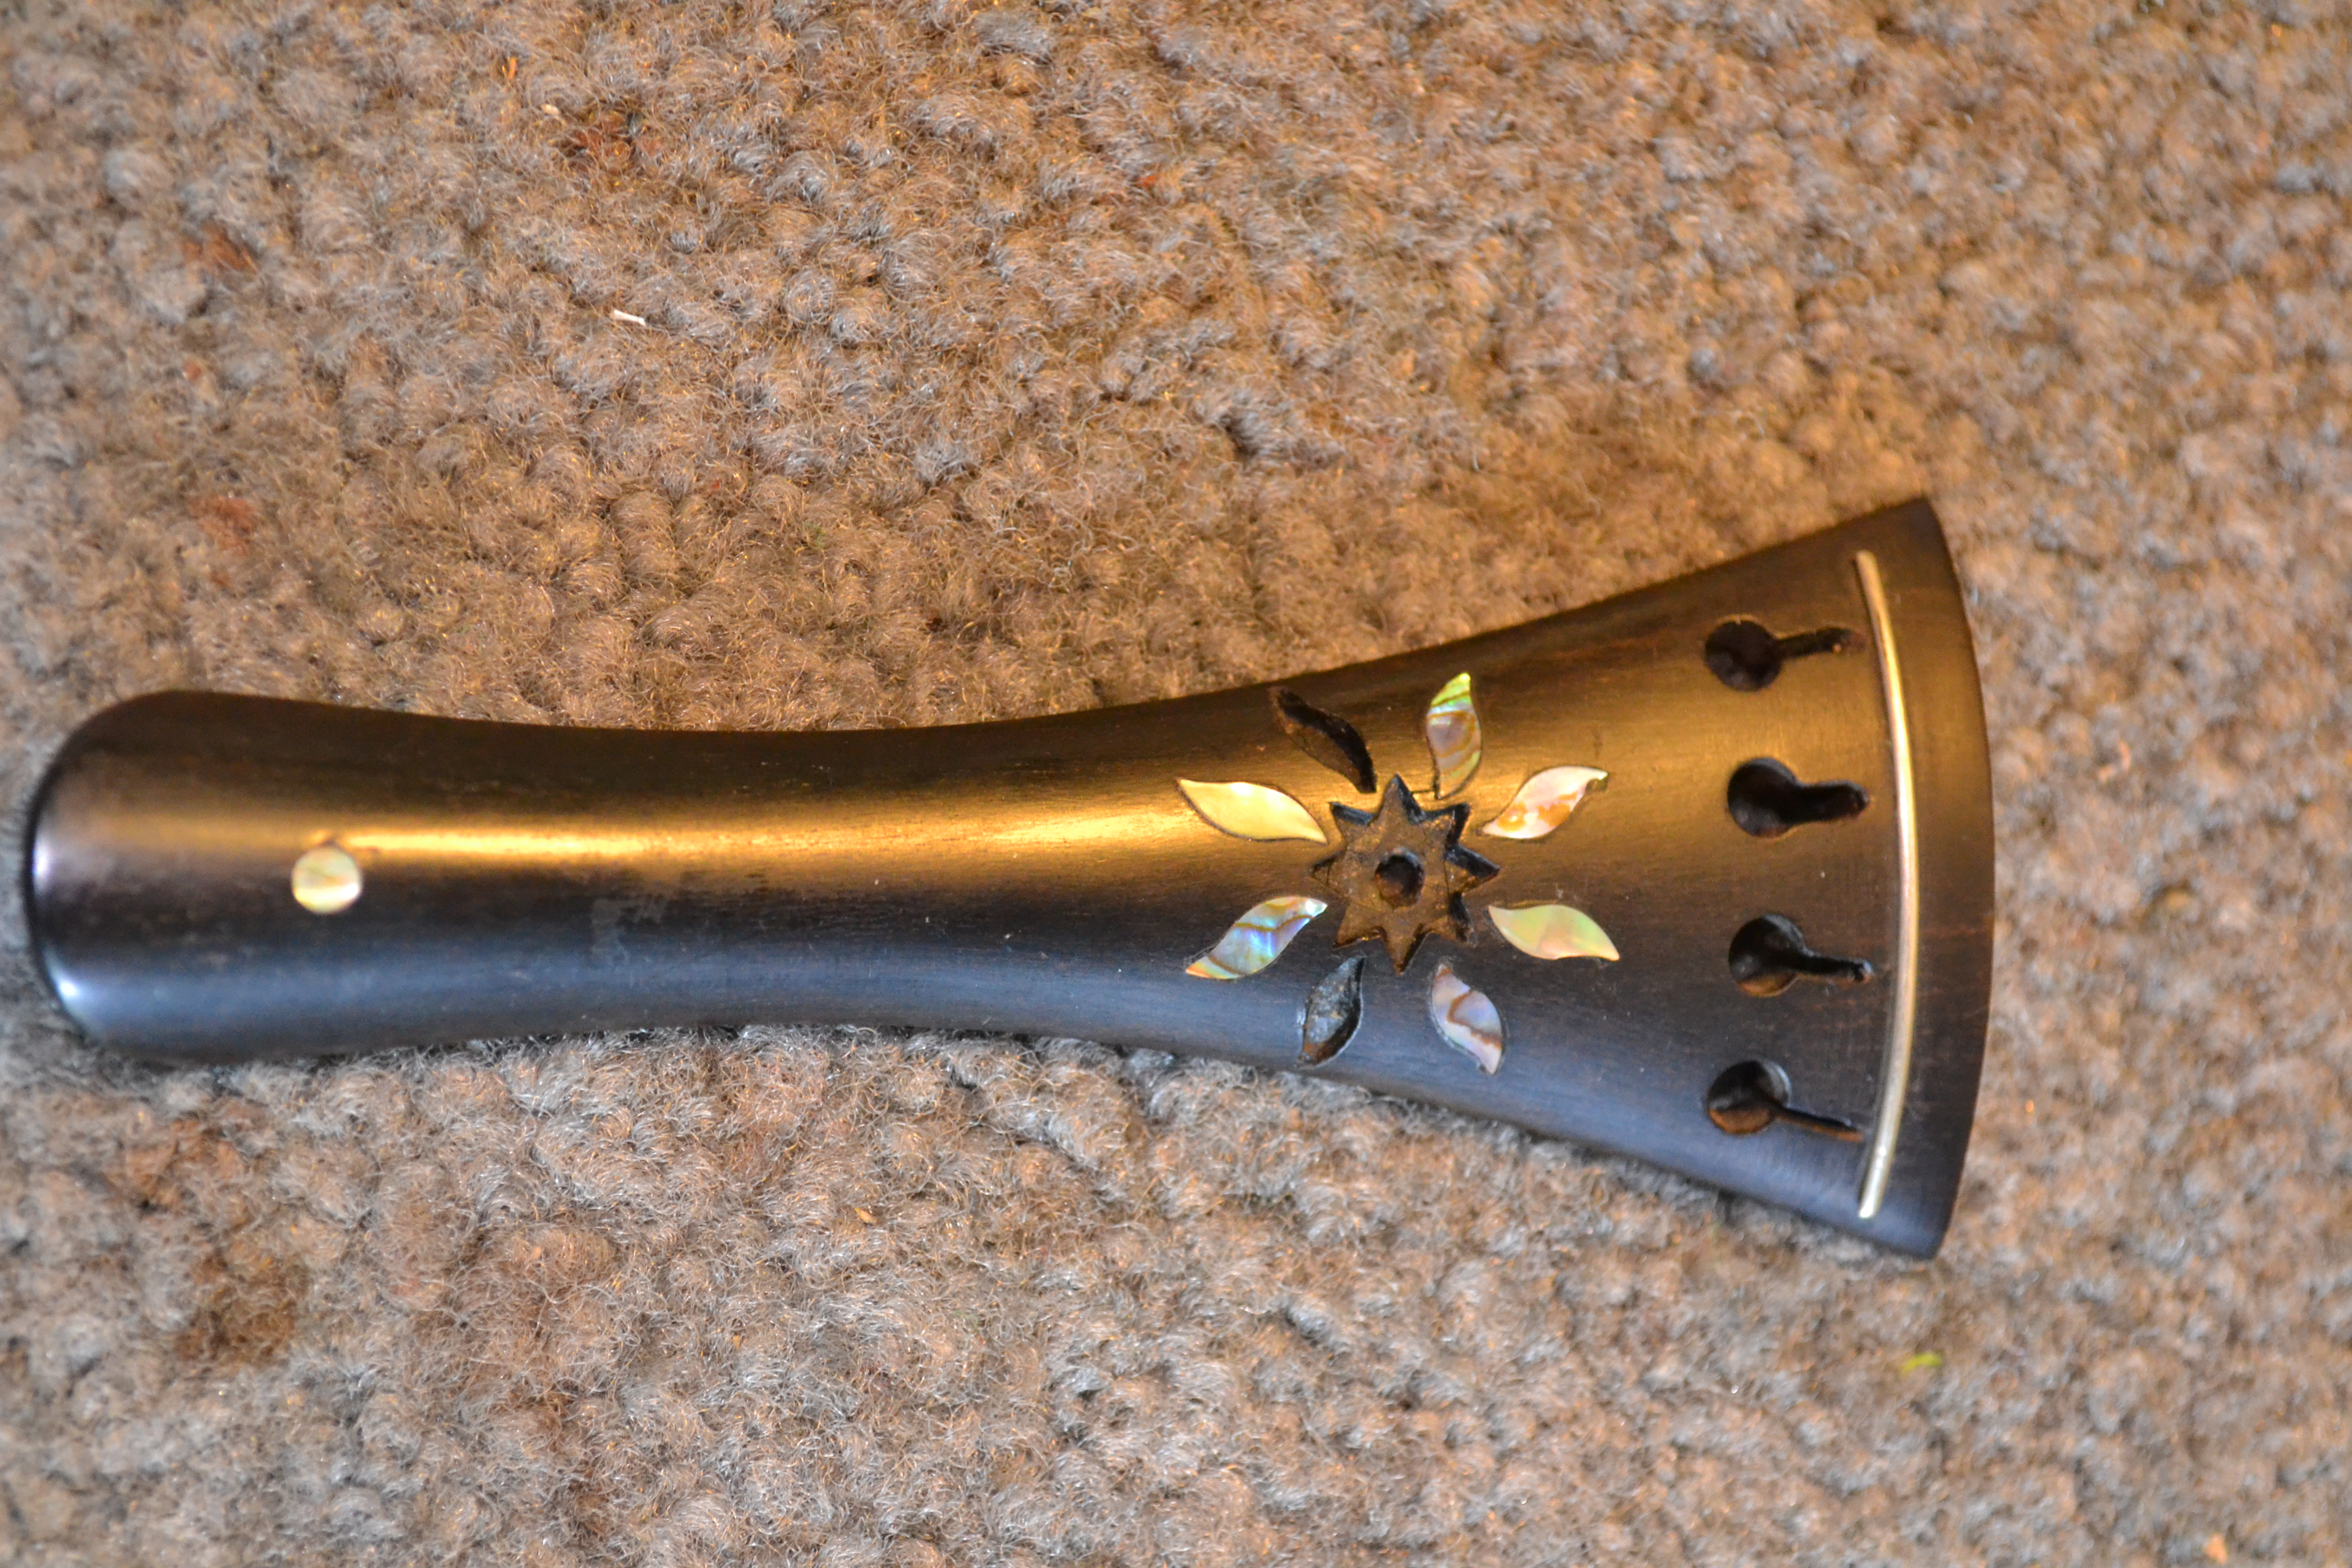
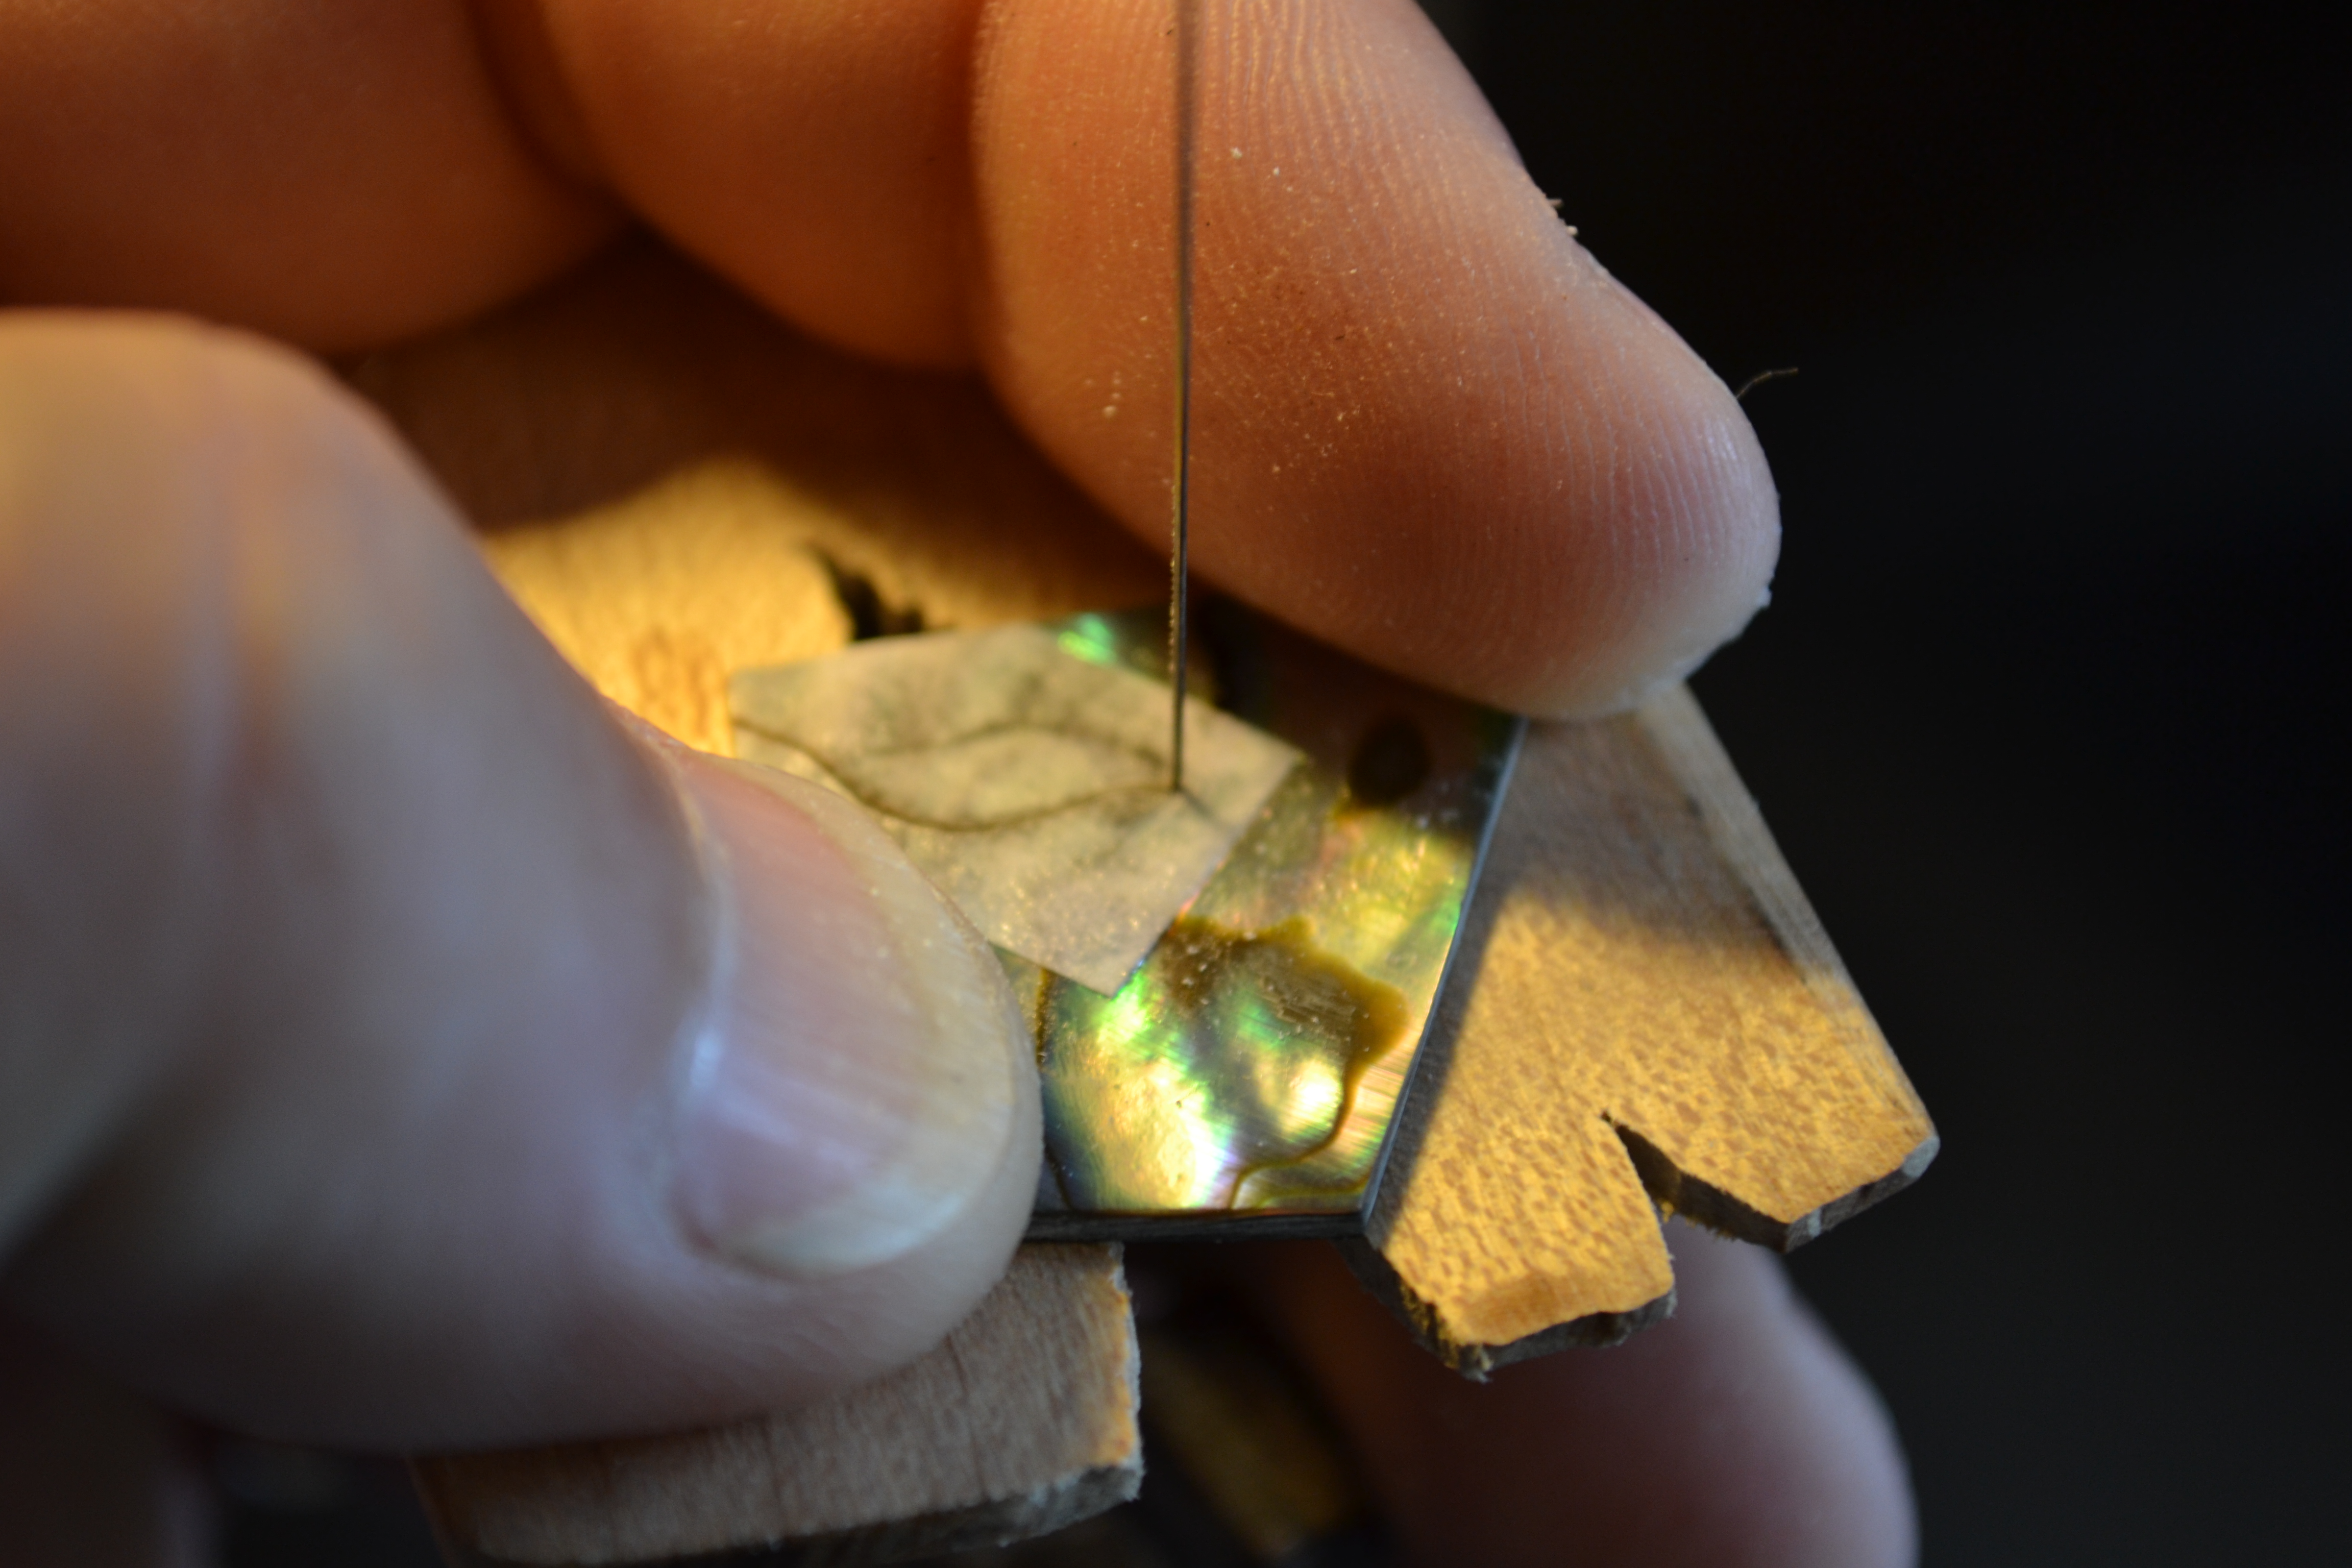
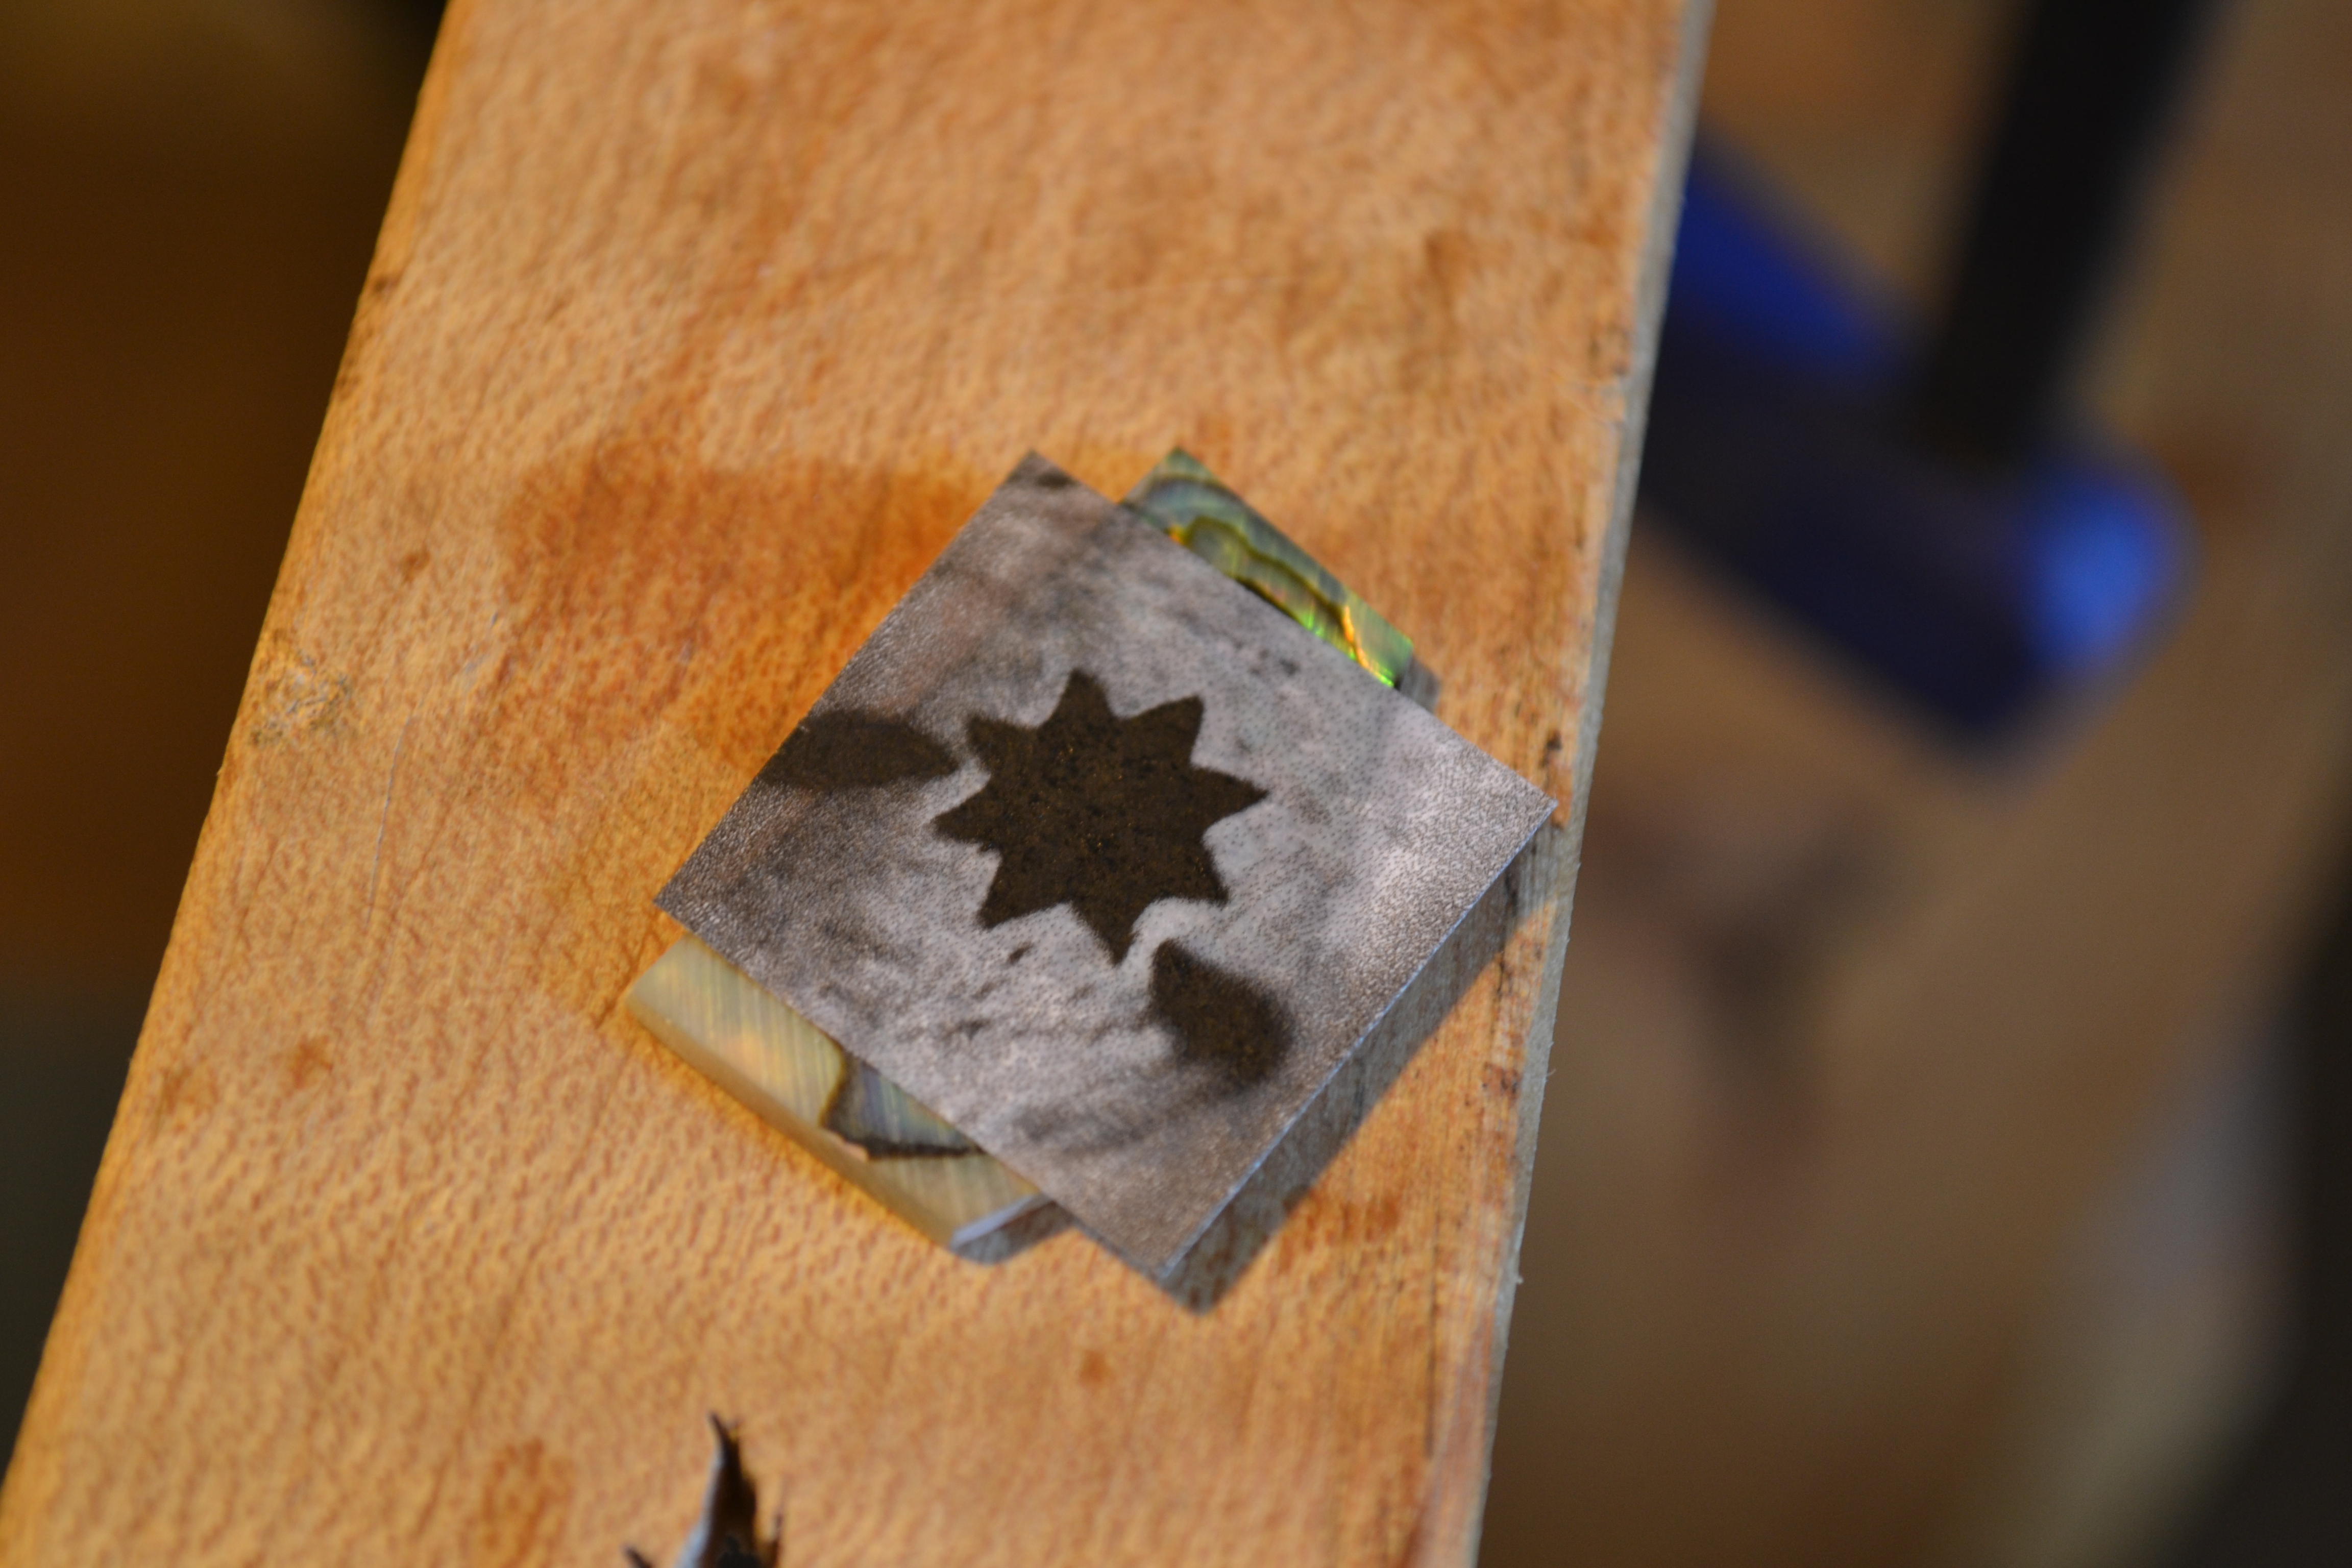
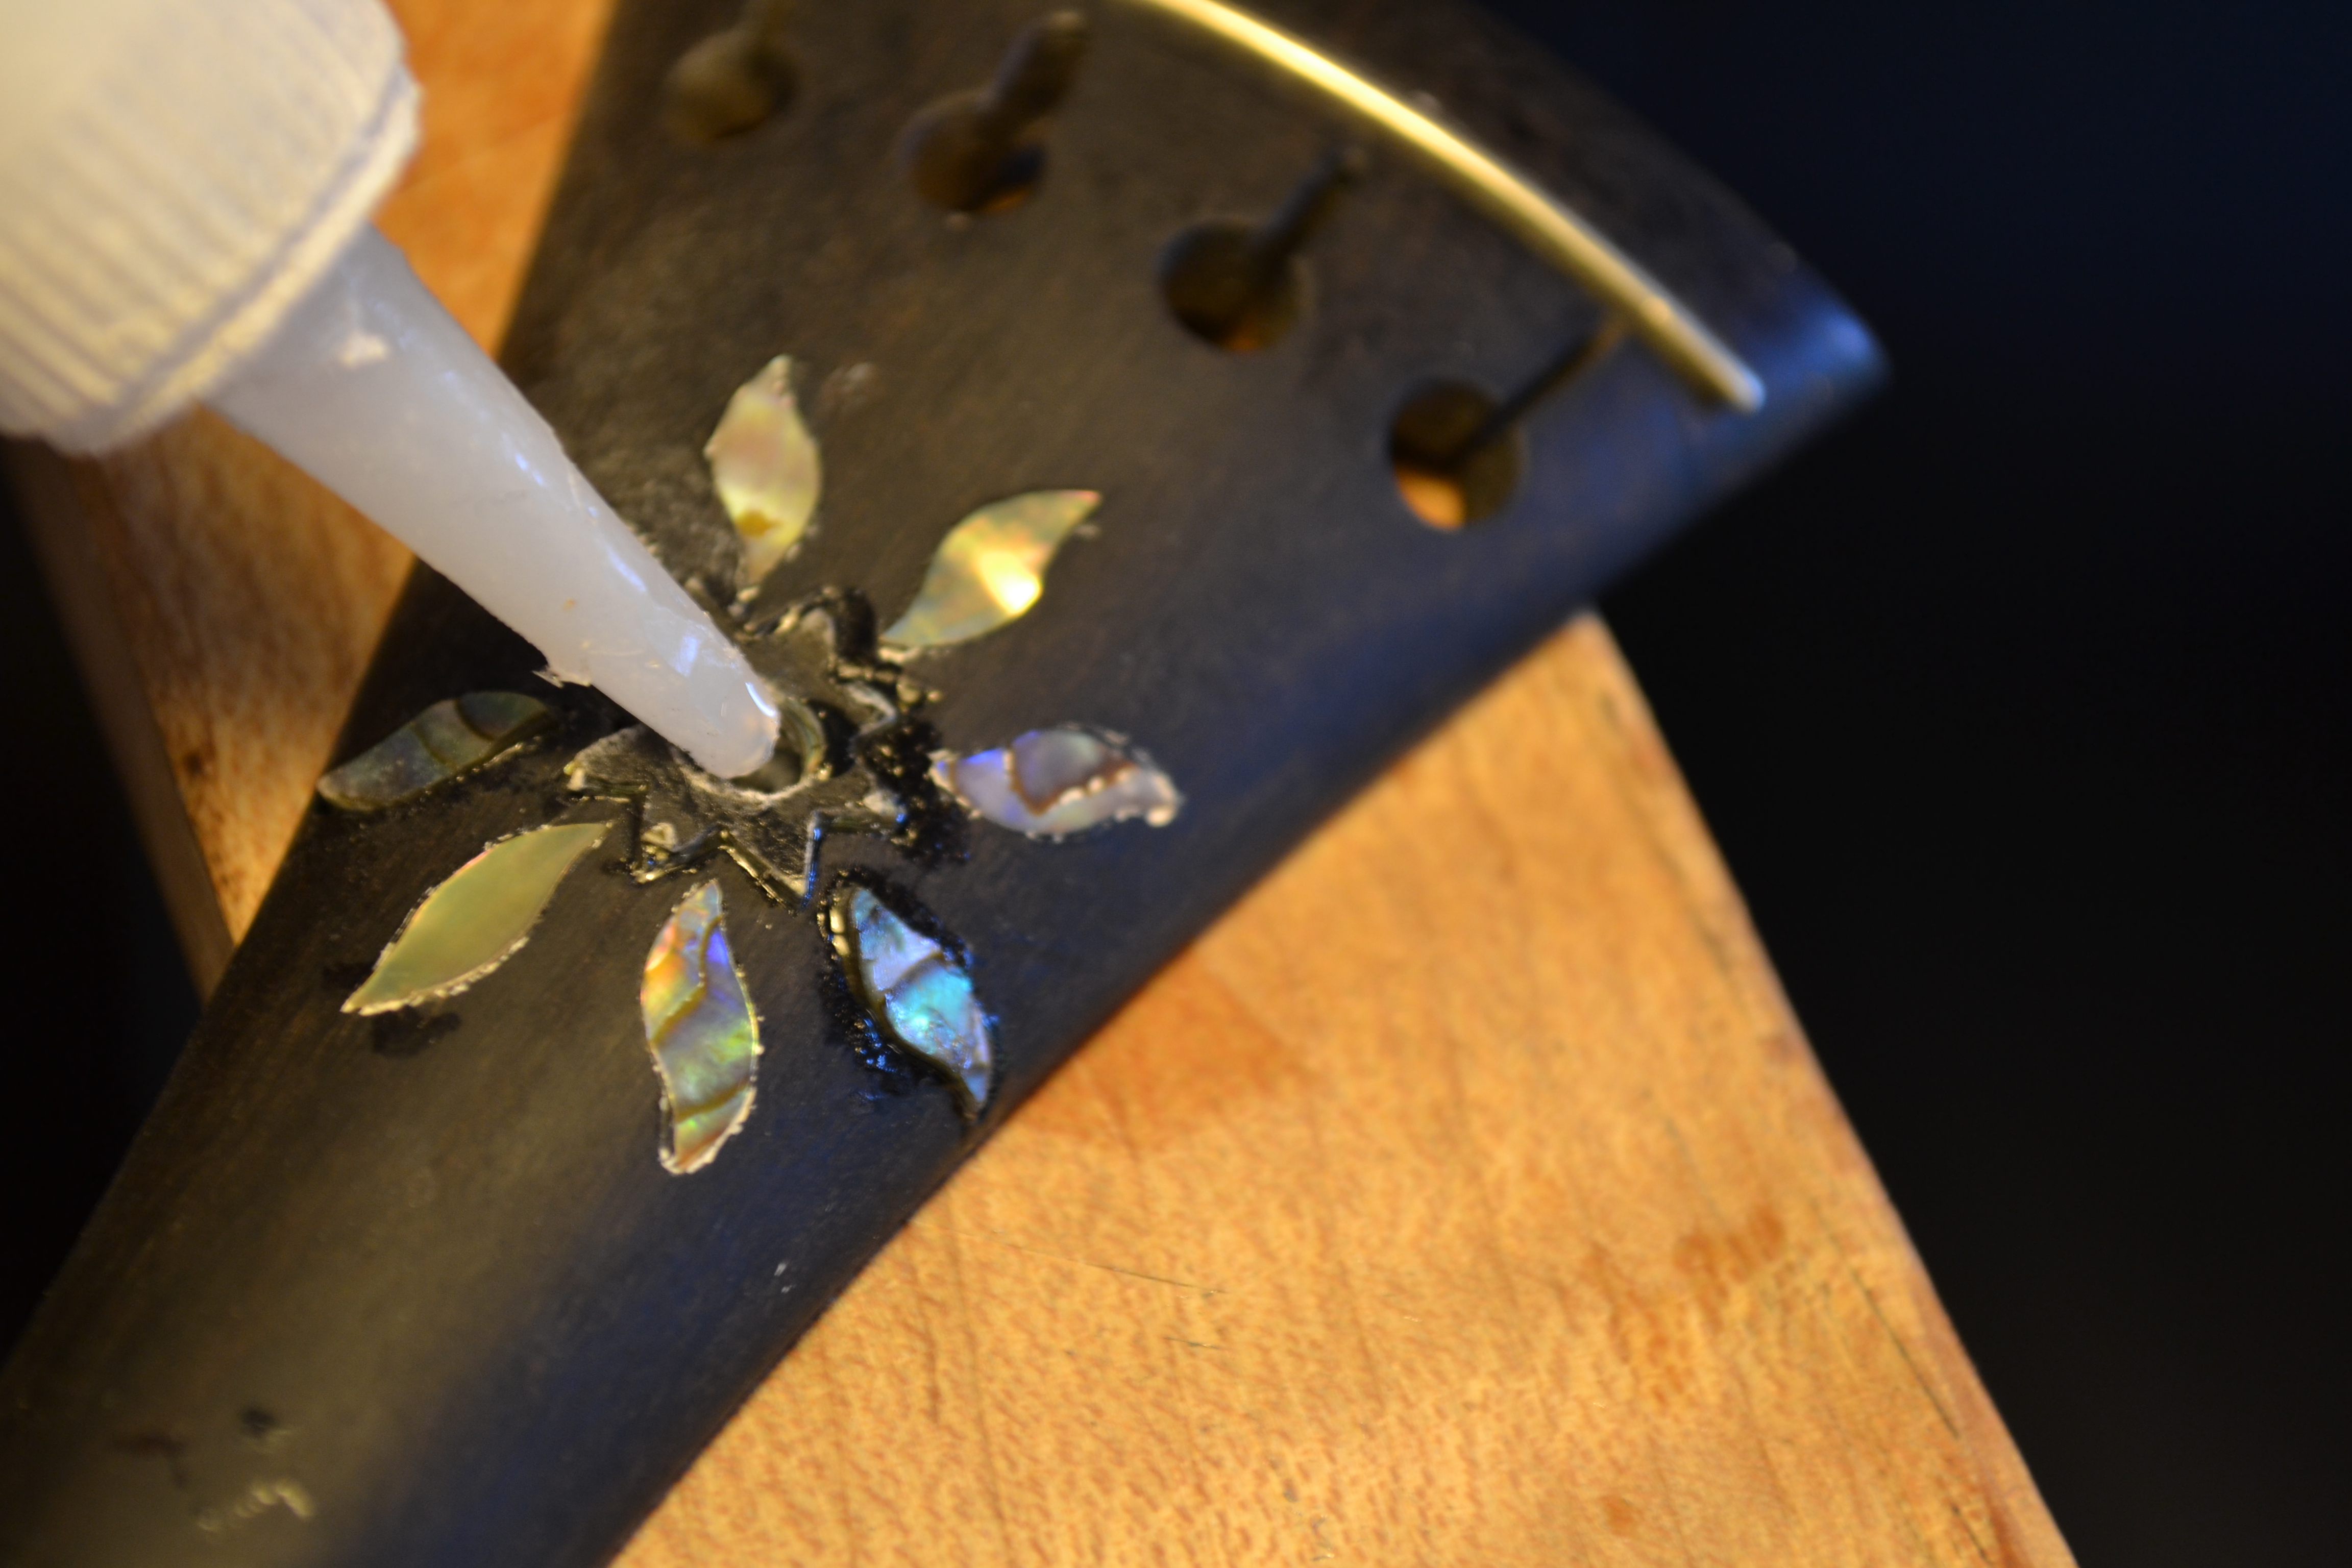
The pattern can now be glued onto the piece of abalone. I chose green abalone heart for the centerpiece. I use a small file to clean up the lines of the star then confirm the fit and mark the direction of the inlay onto the paper pattern. I then remove all the inlay that I have cut and clean off the finger paint with a piece of .0000 steel wool.
 |
 |
 |
 |
 |
 |
 |
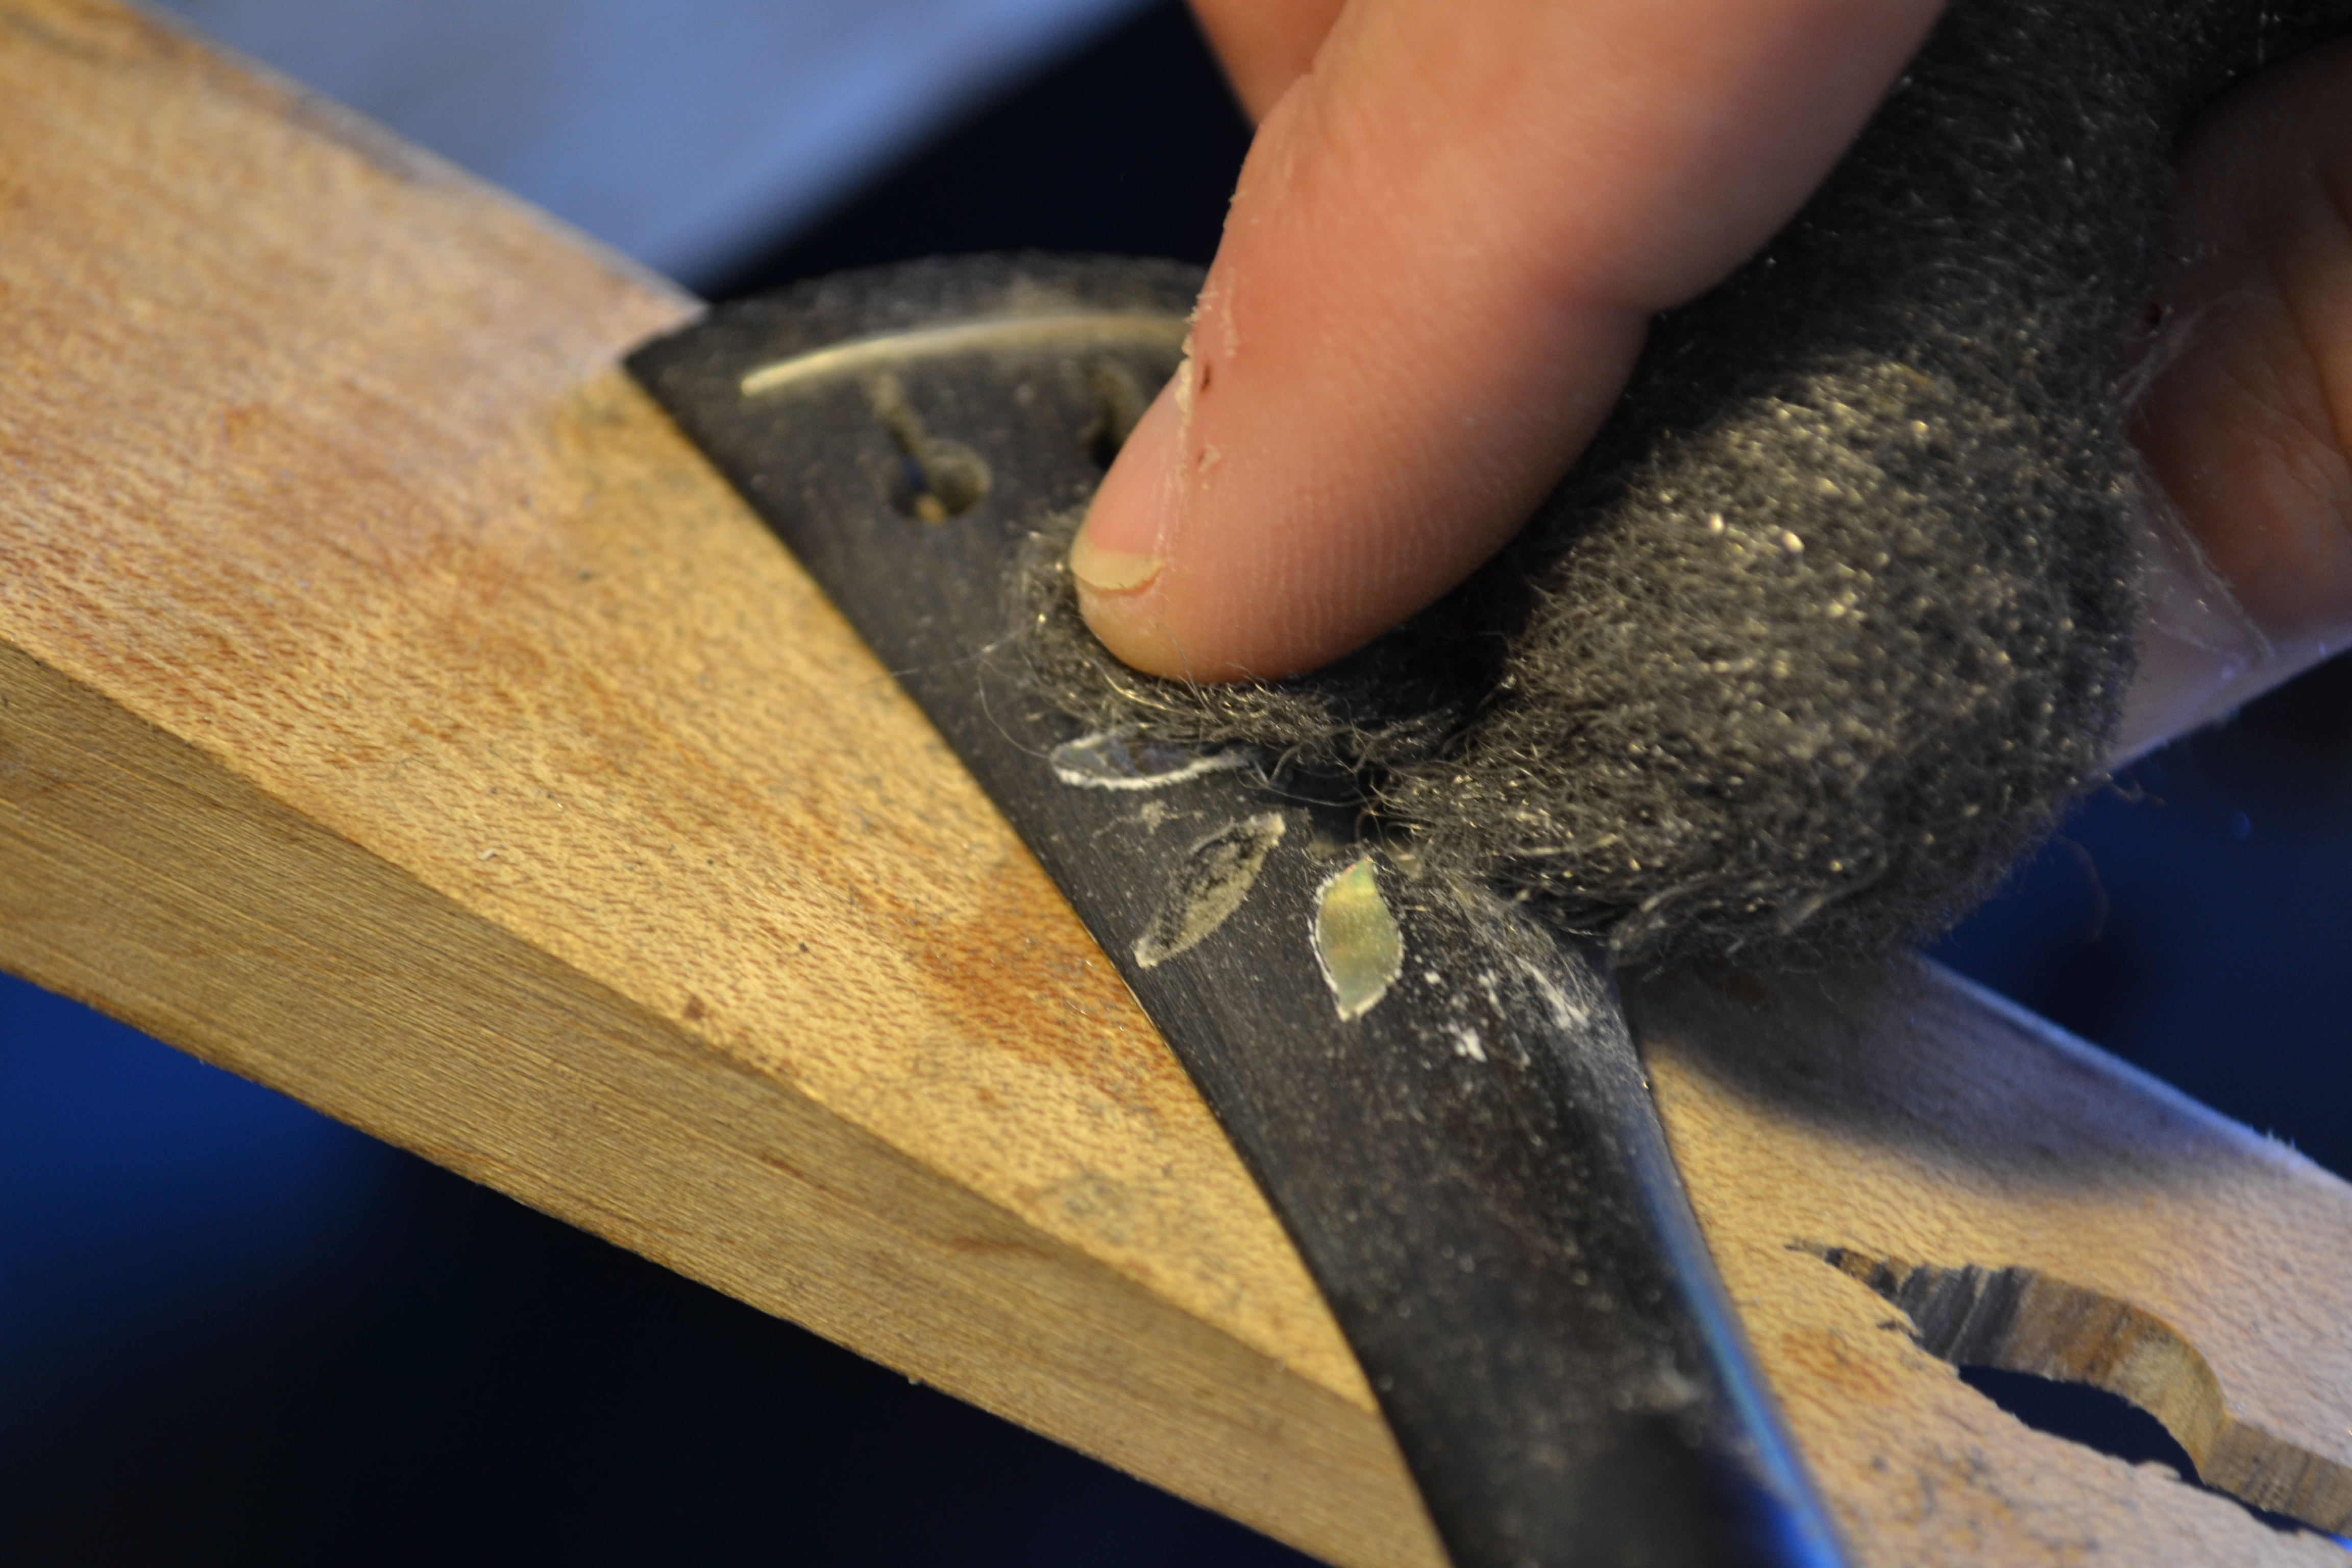 |
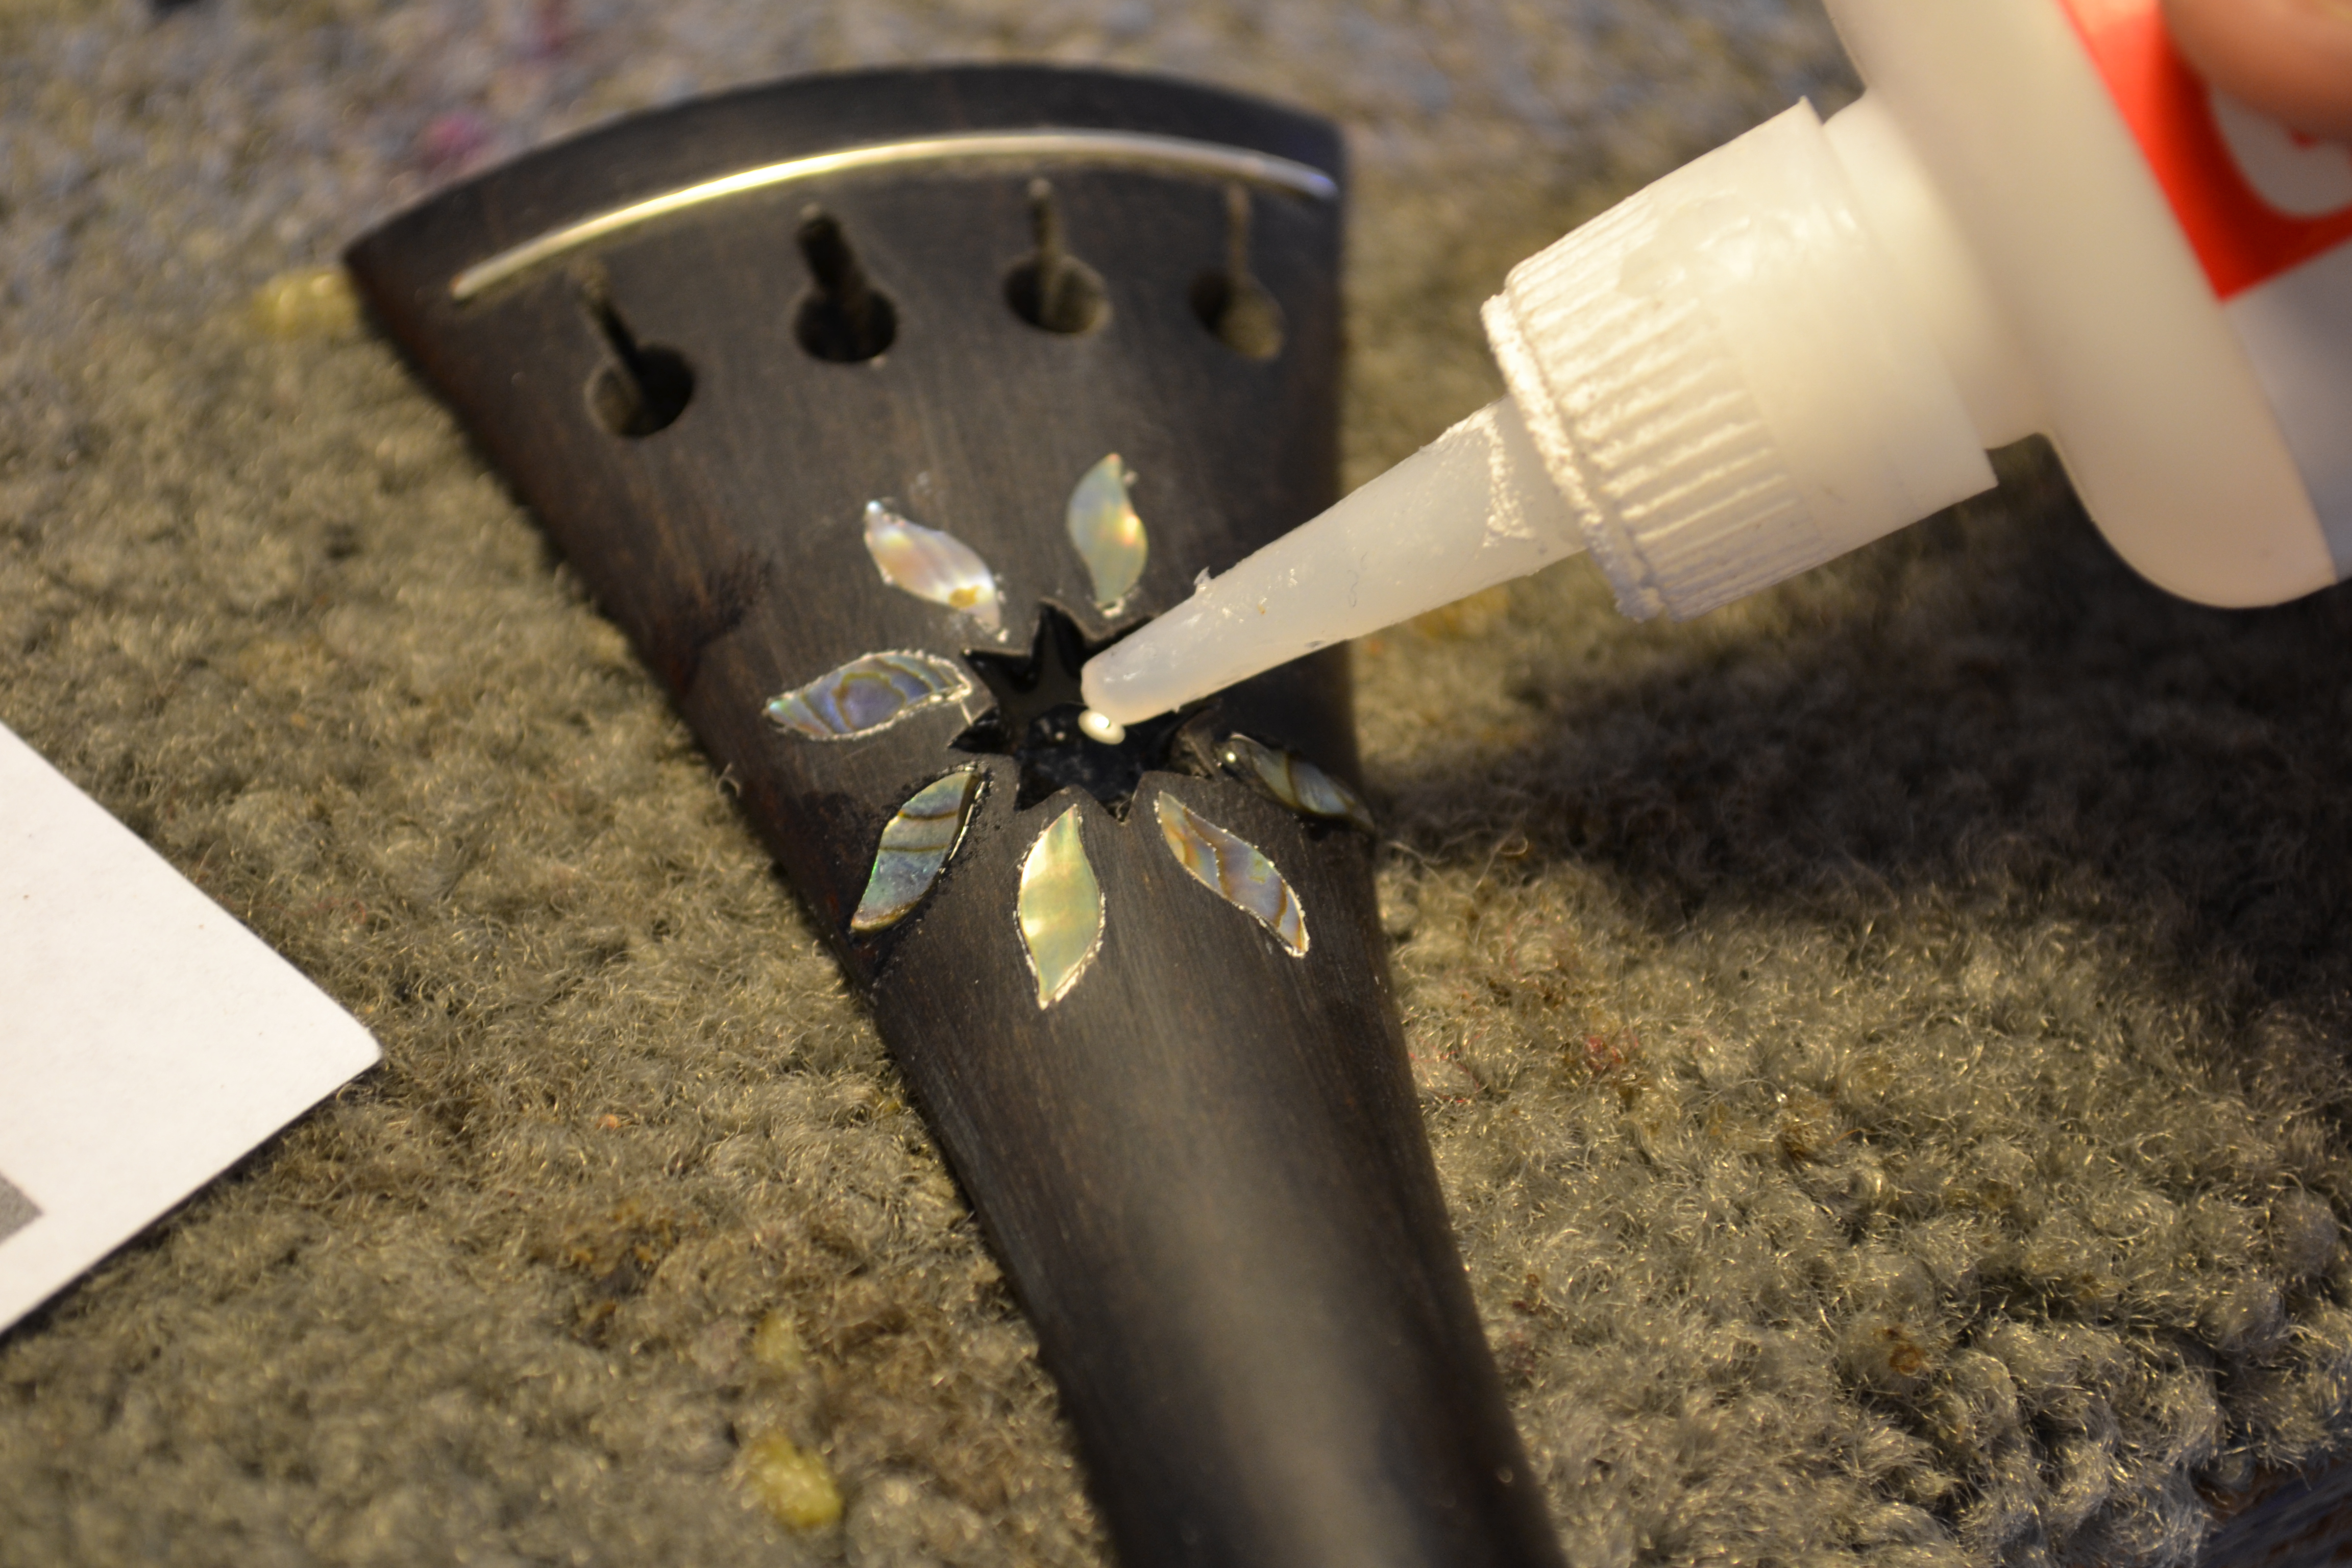
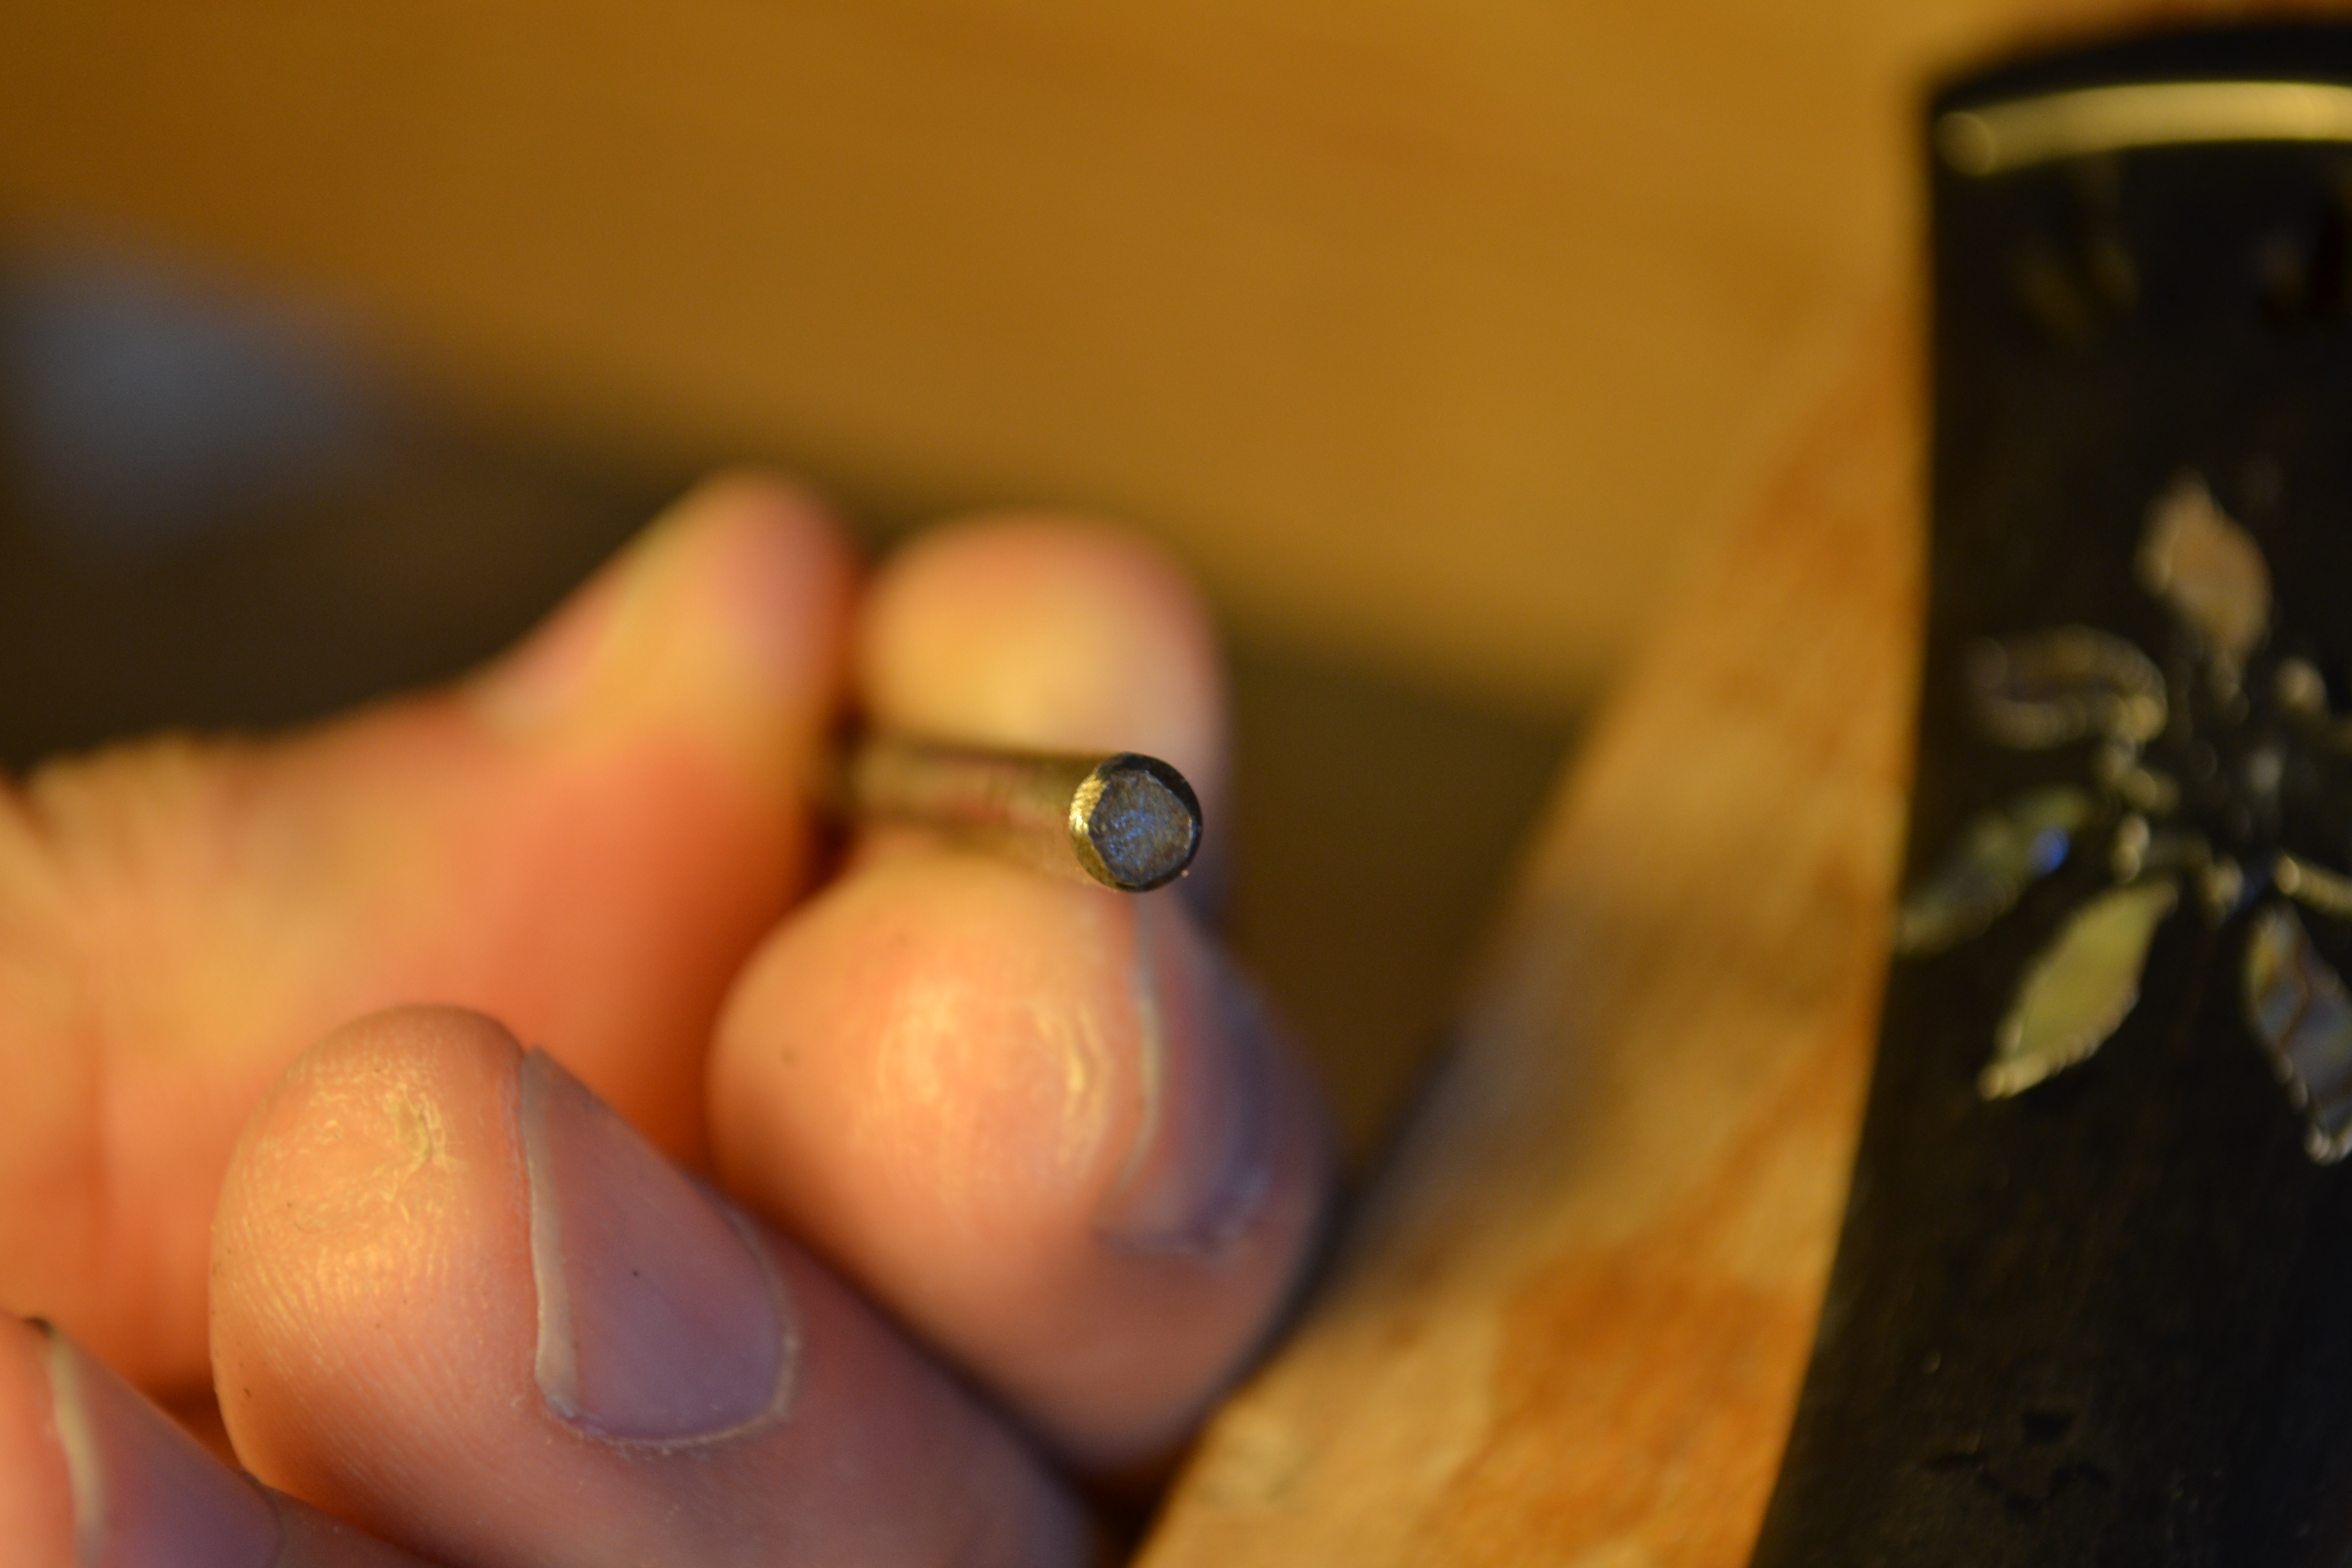
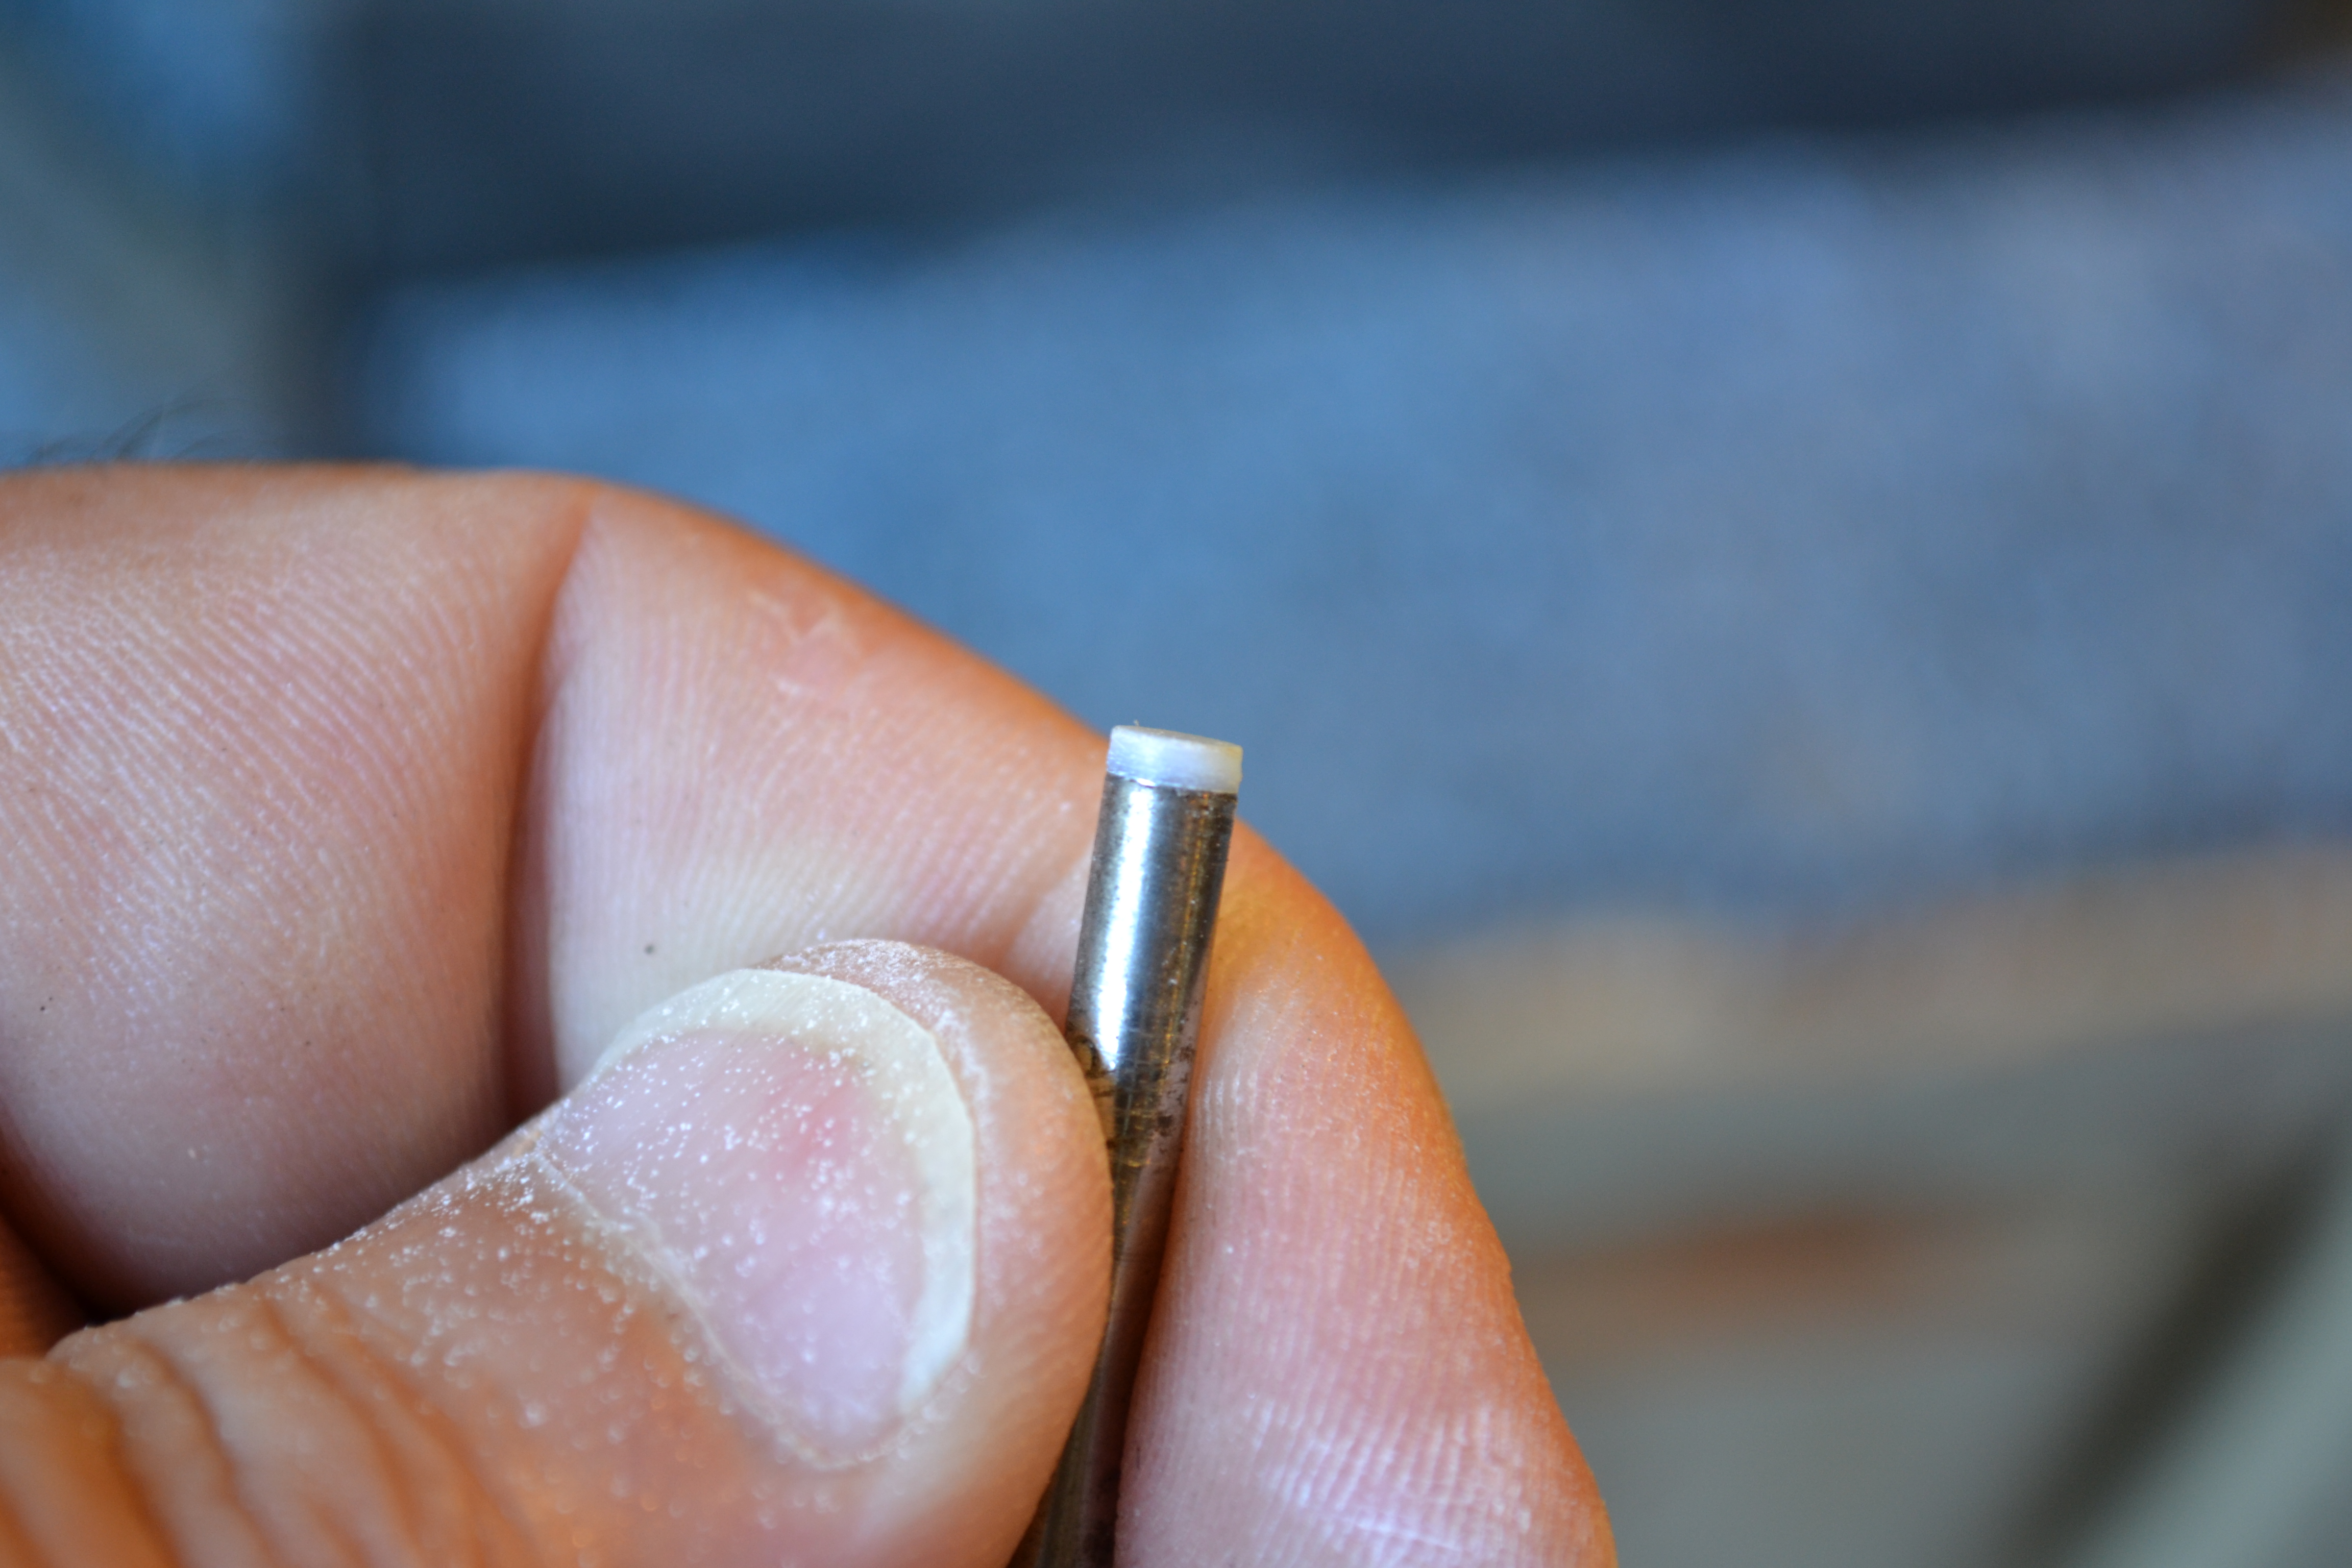
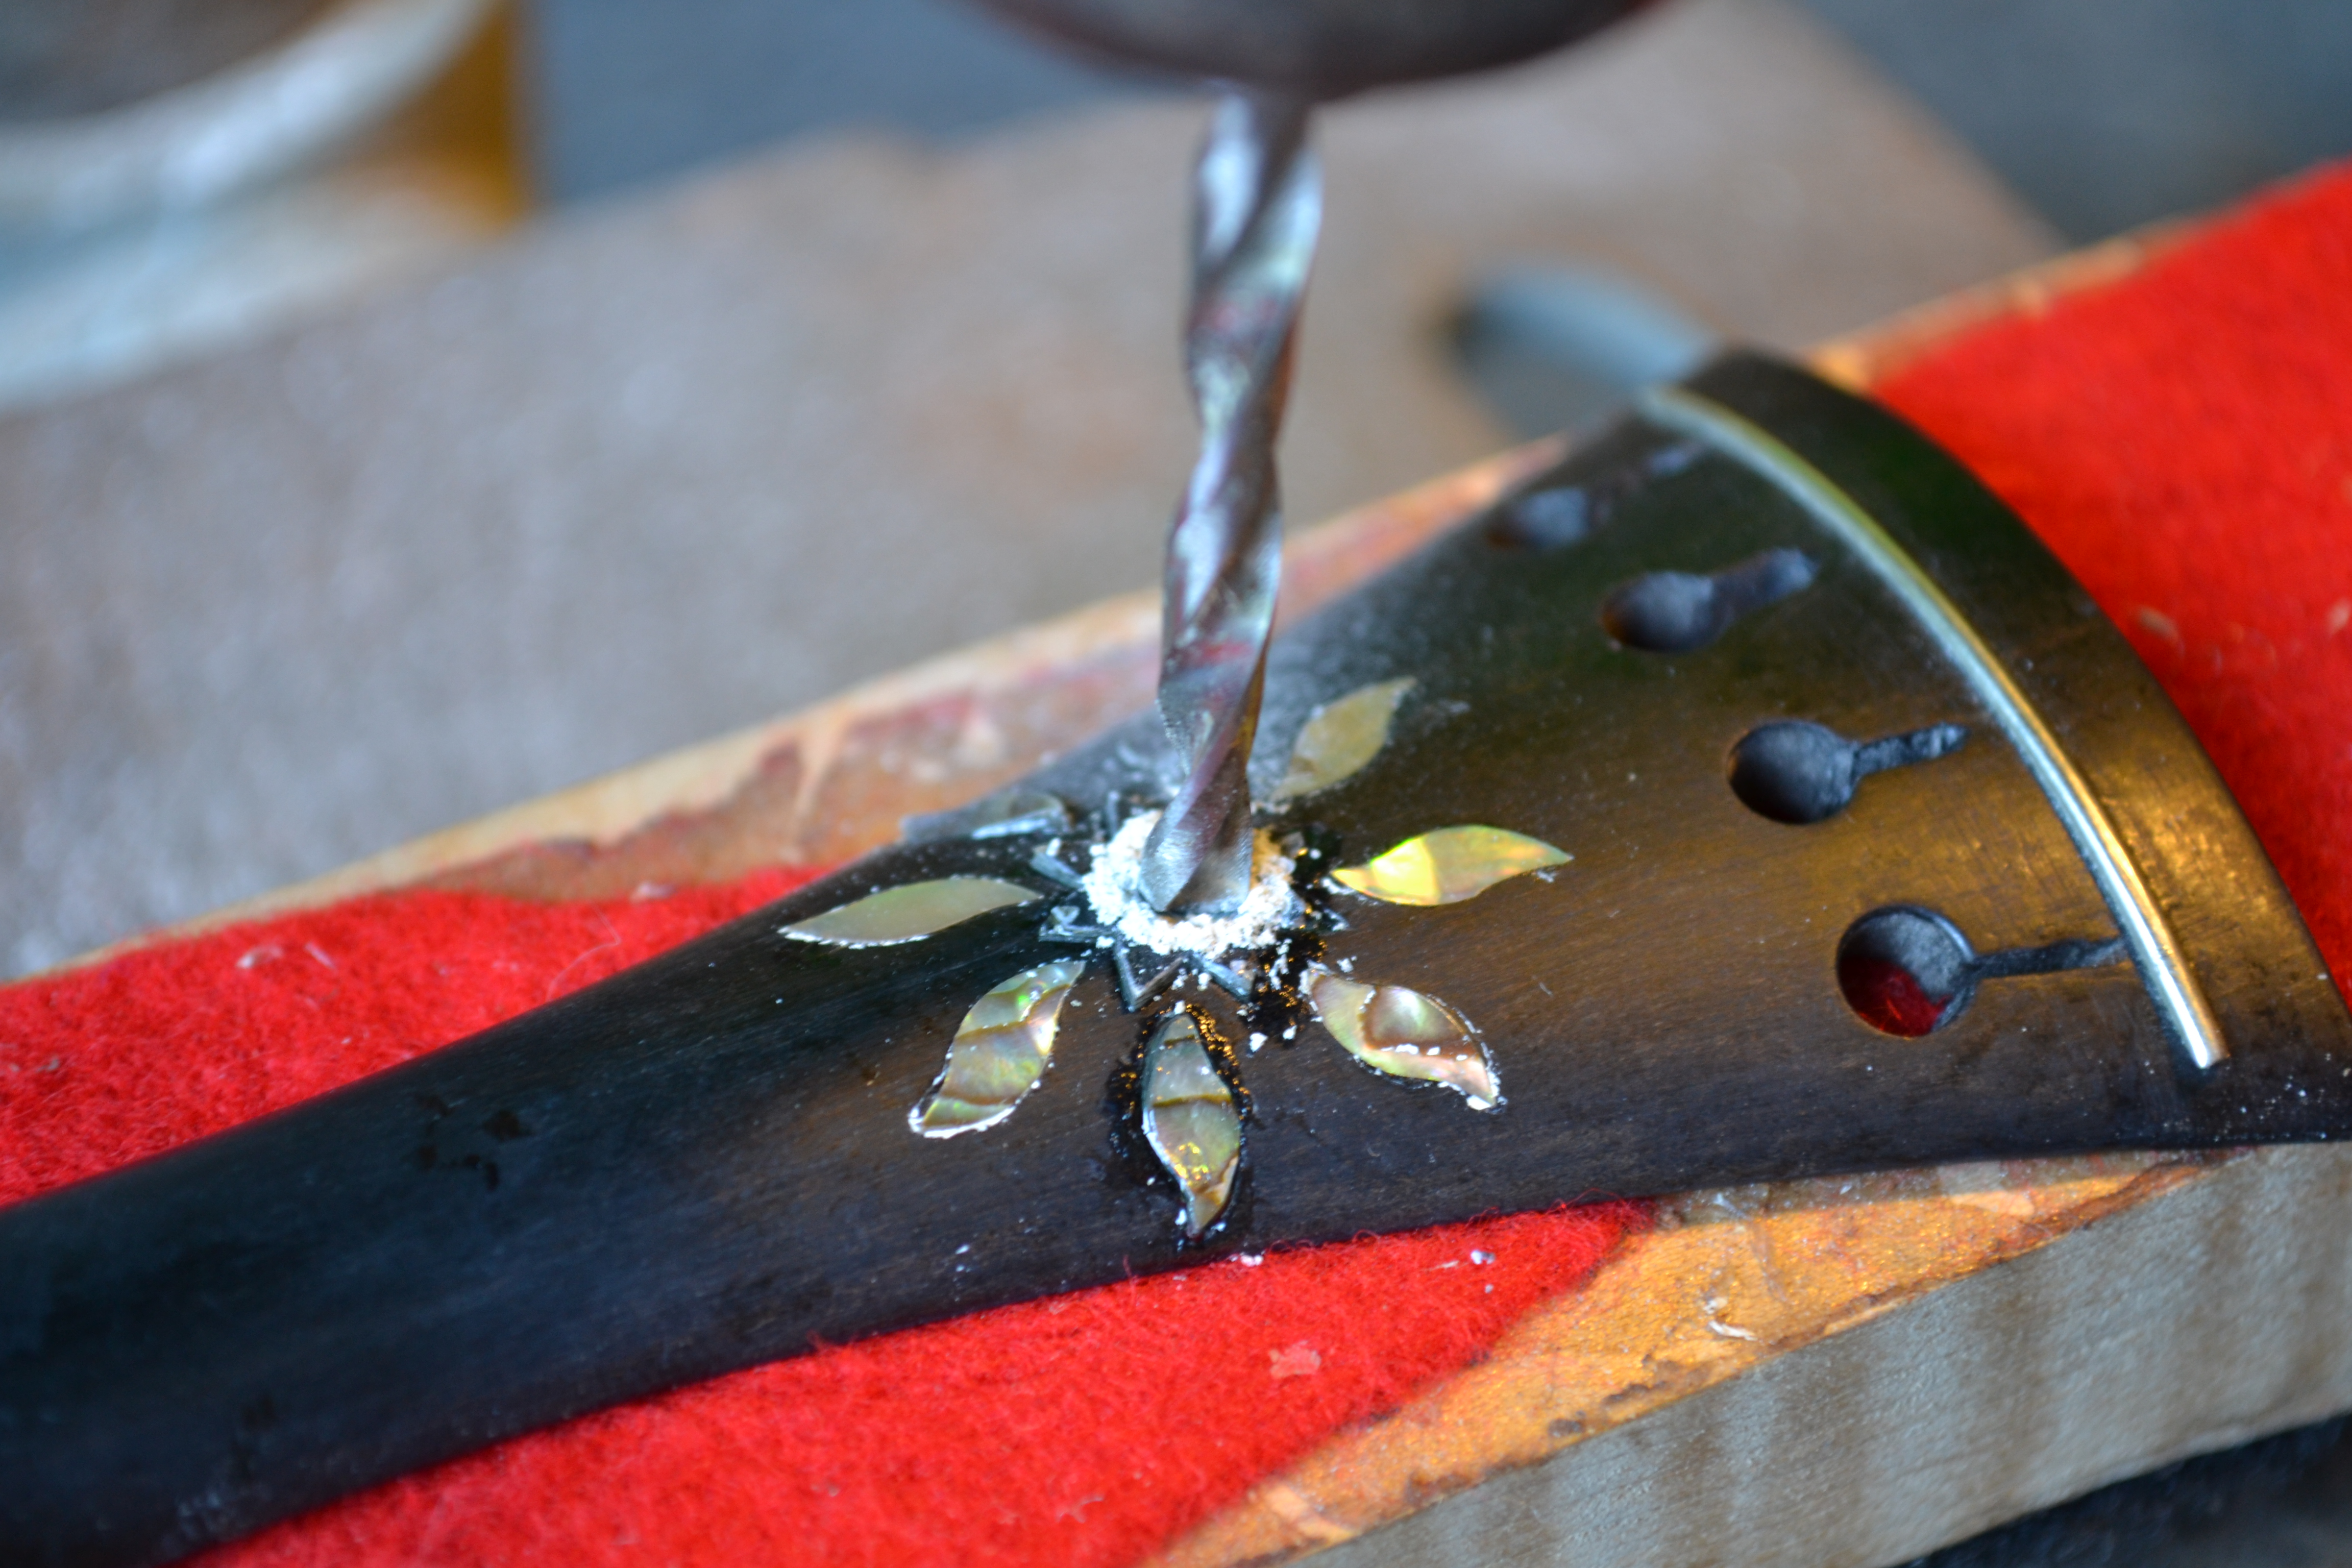
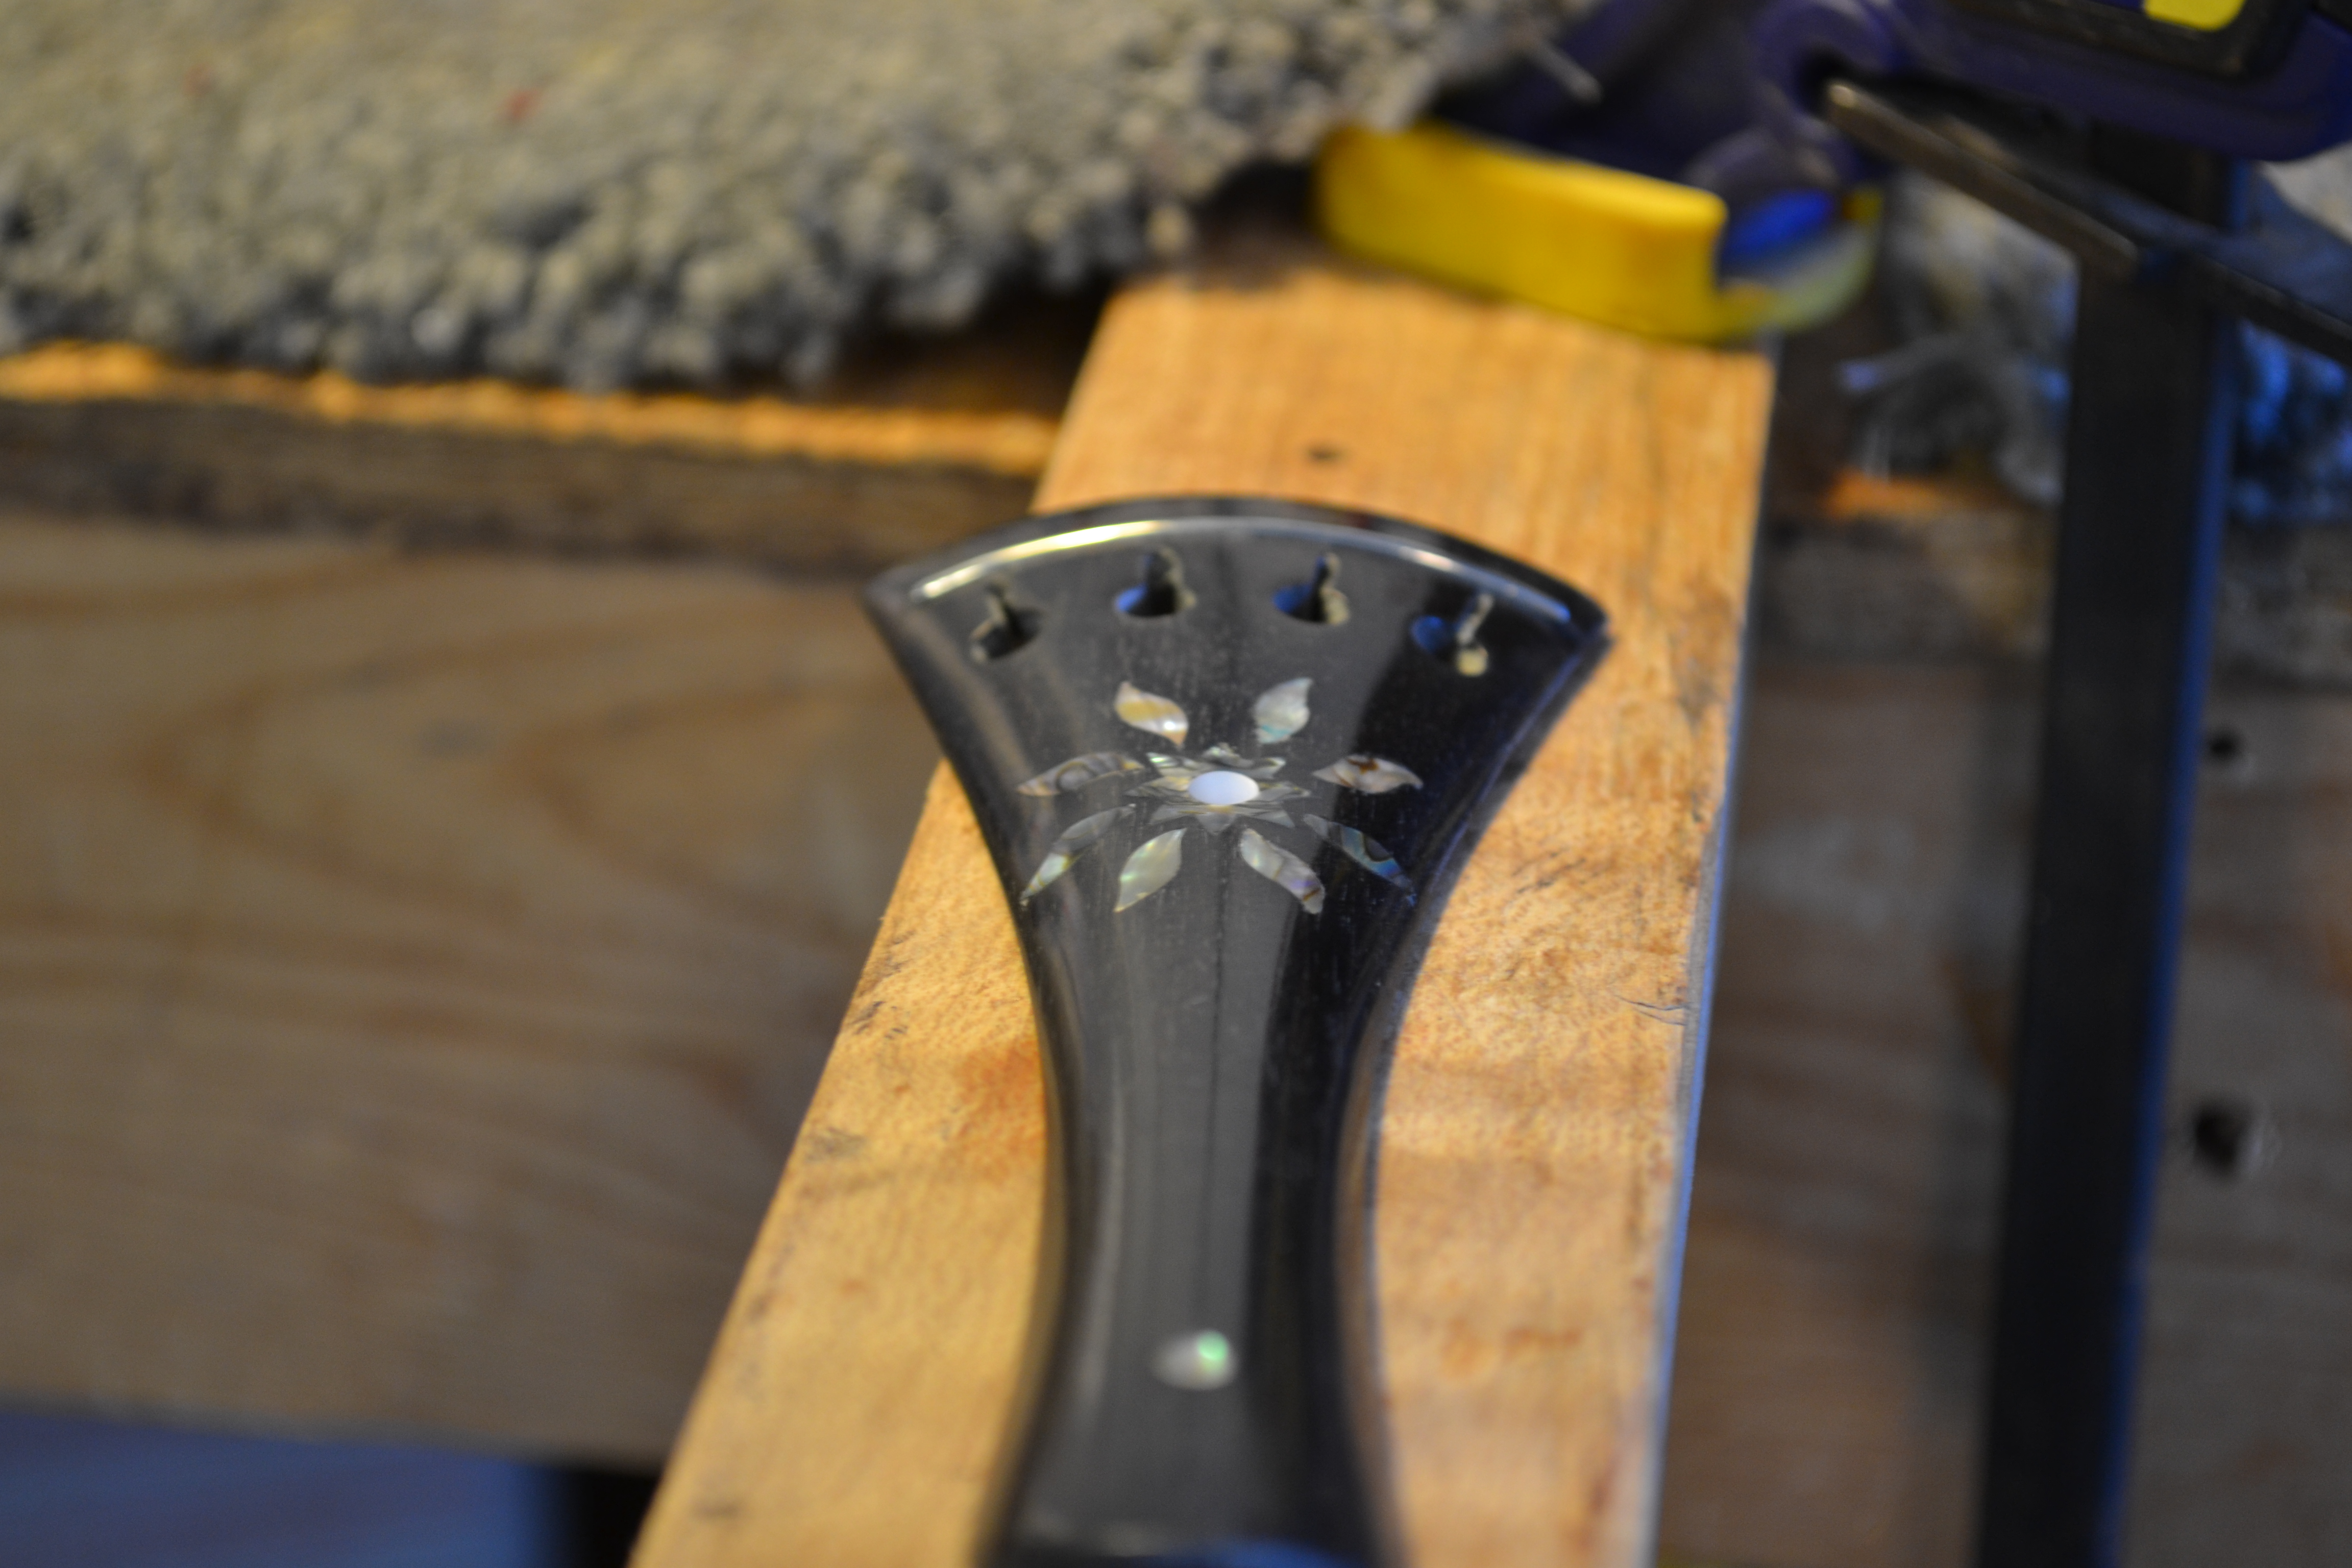
I am using cyanoacrylate for this job. It permeates every nook and cranny and does a great job holding the inlay as well as making a great filler if you aren’t too sloppy cutting out your inlays. The center dot of mother-of-pearl is made to an exact match by glueing a piece of pearl onto the butt end of the drill bit you intend to use for the hole. The dot is filed flush with the side of the drill bit as it rotates in the drill press installed bit side up.
 |
 |
 |
 |
 |
 |
 |
 |
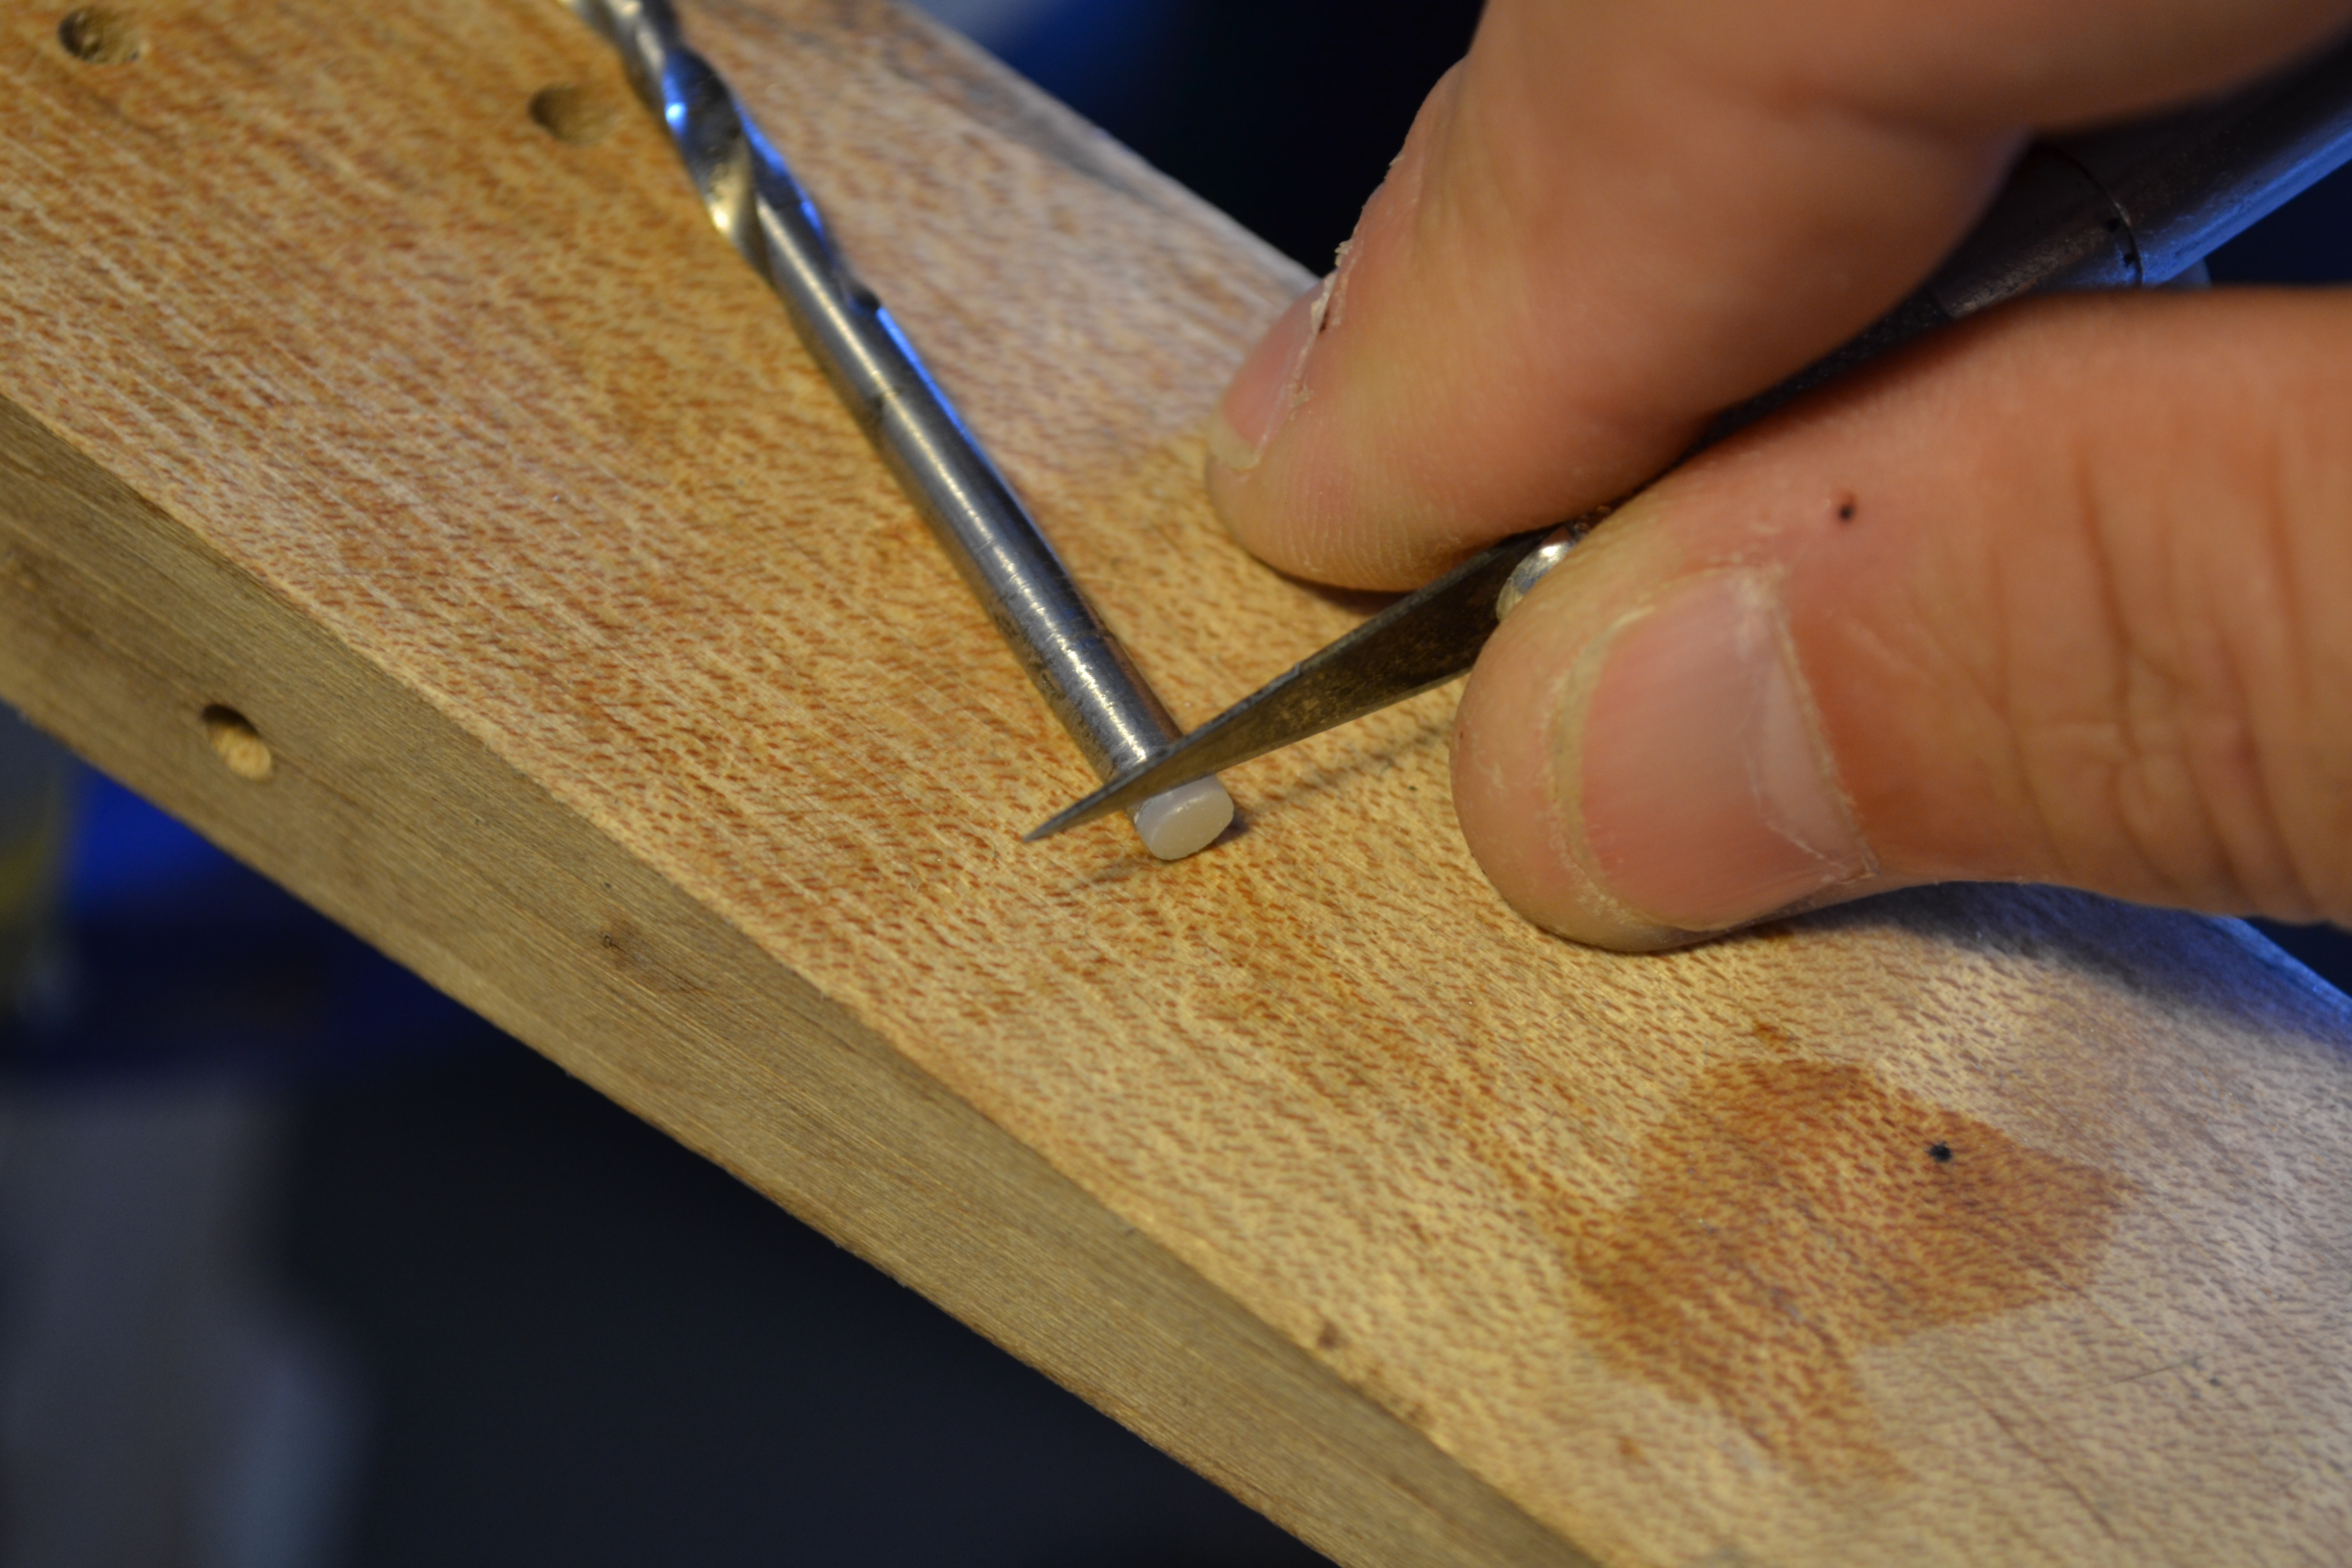
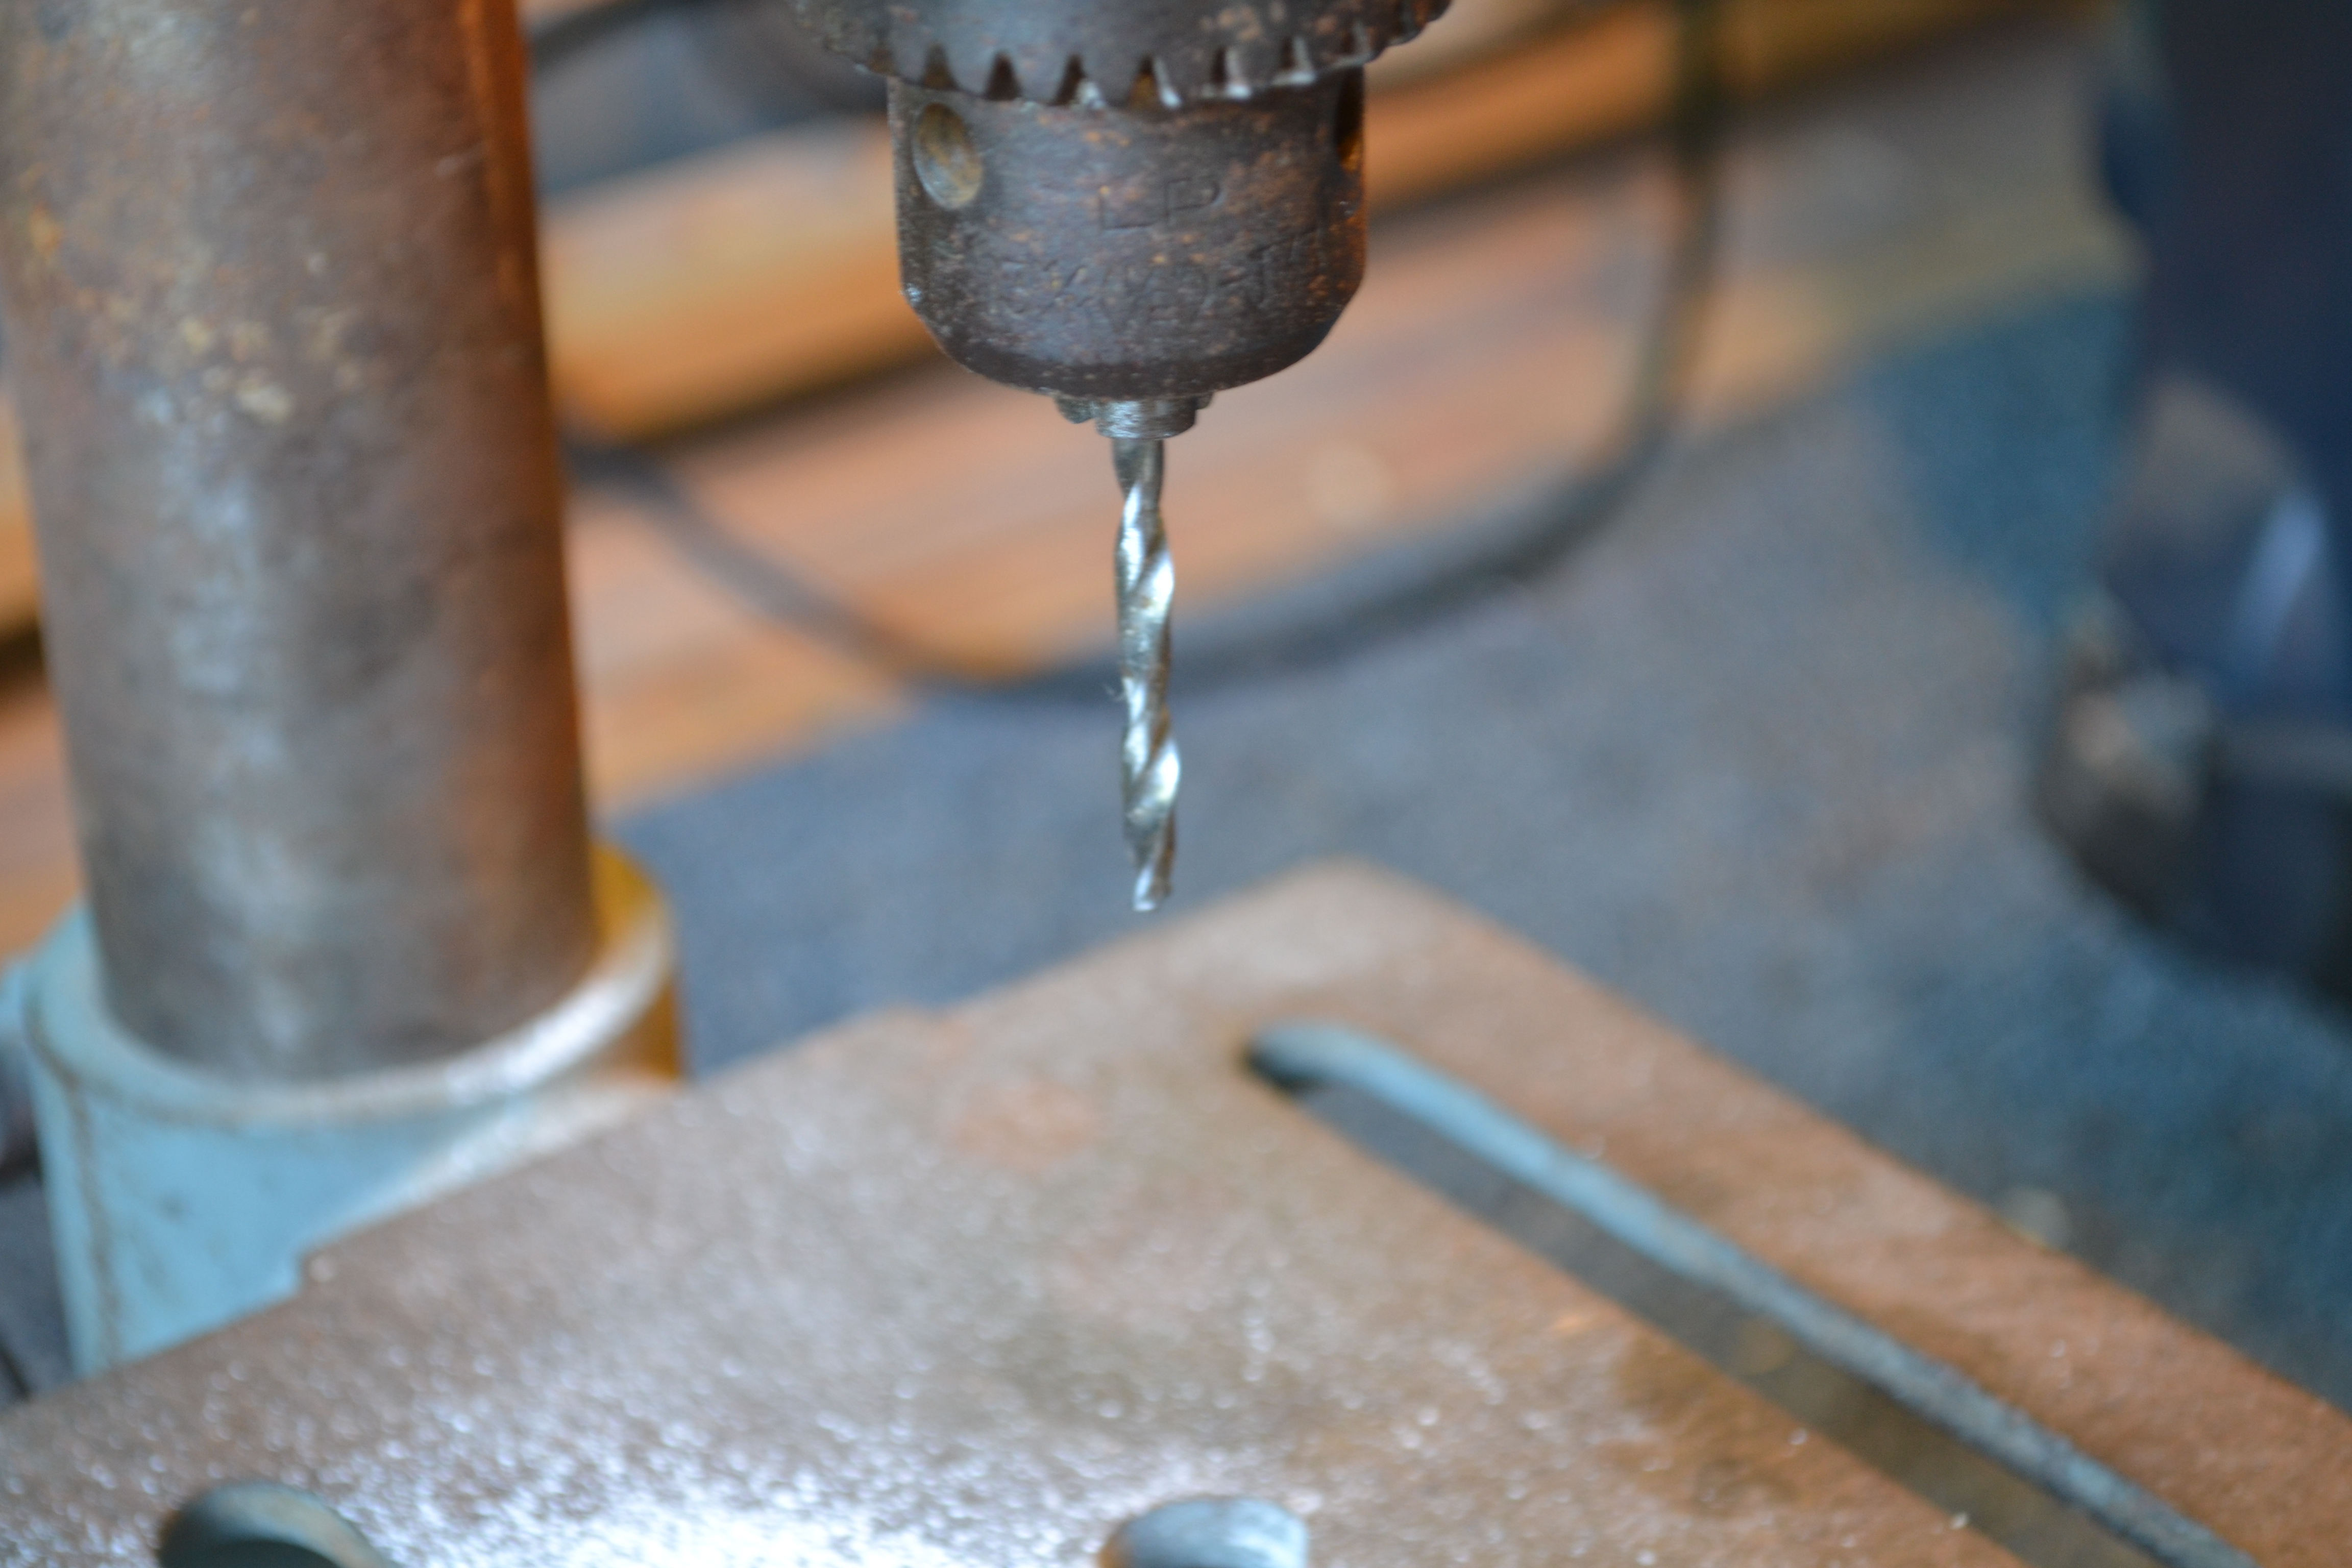
When the pearl dot is properly sized it is removed from the end of the drill bit. Be careful because they can and will fly across the room when popping them off with an X-Acto blade. The drill bit is then inserted properly in the drill press and the center inlay is drilled. The same glue is used and if everything was done correctly, you will have a nicely fitted pearl dot in the middle of your abalone star.
 |
 |
 |
 |
 |
 |
 |
 |
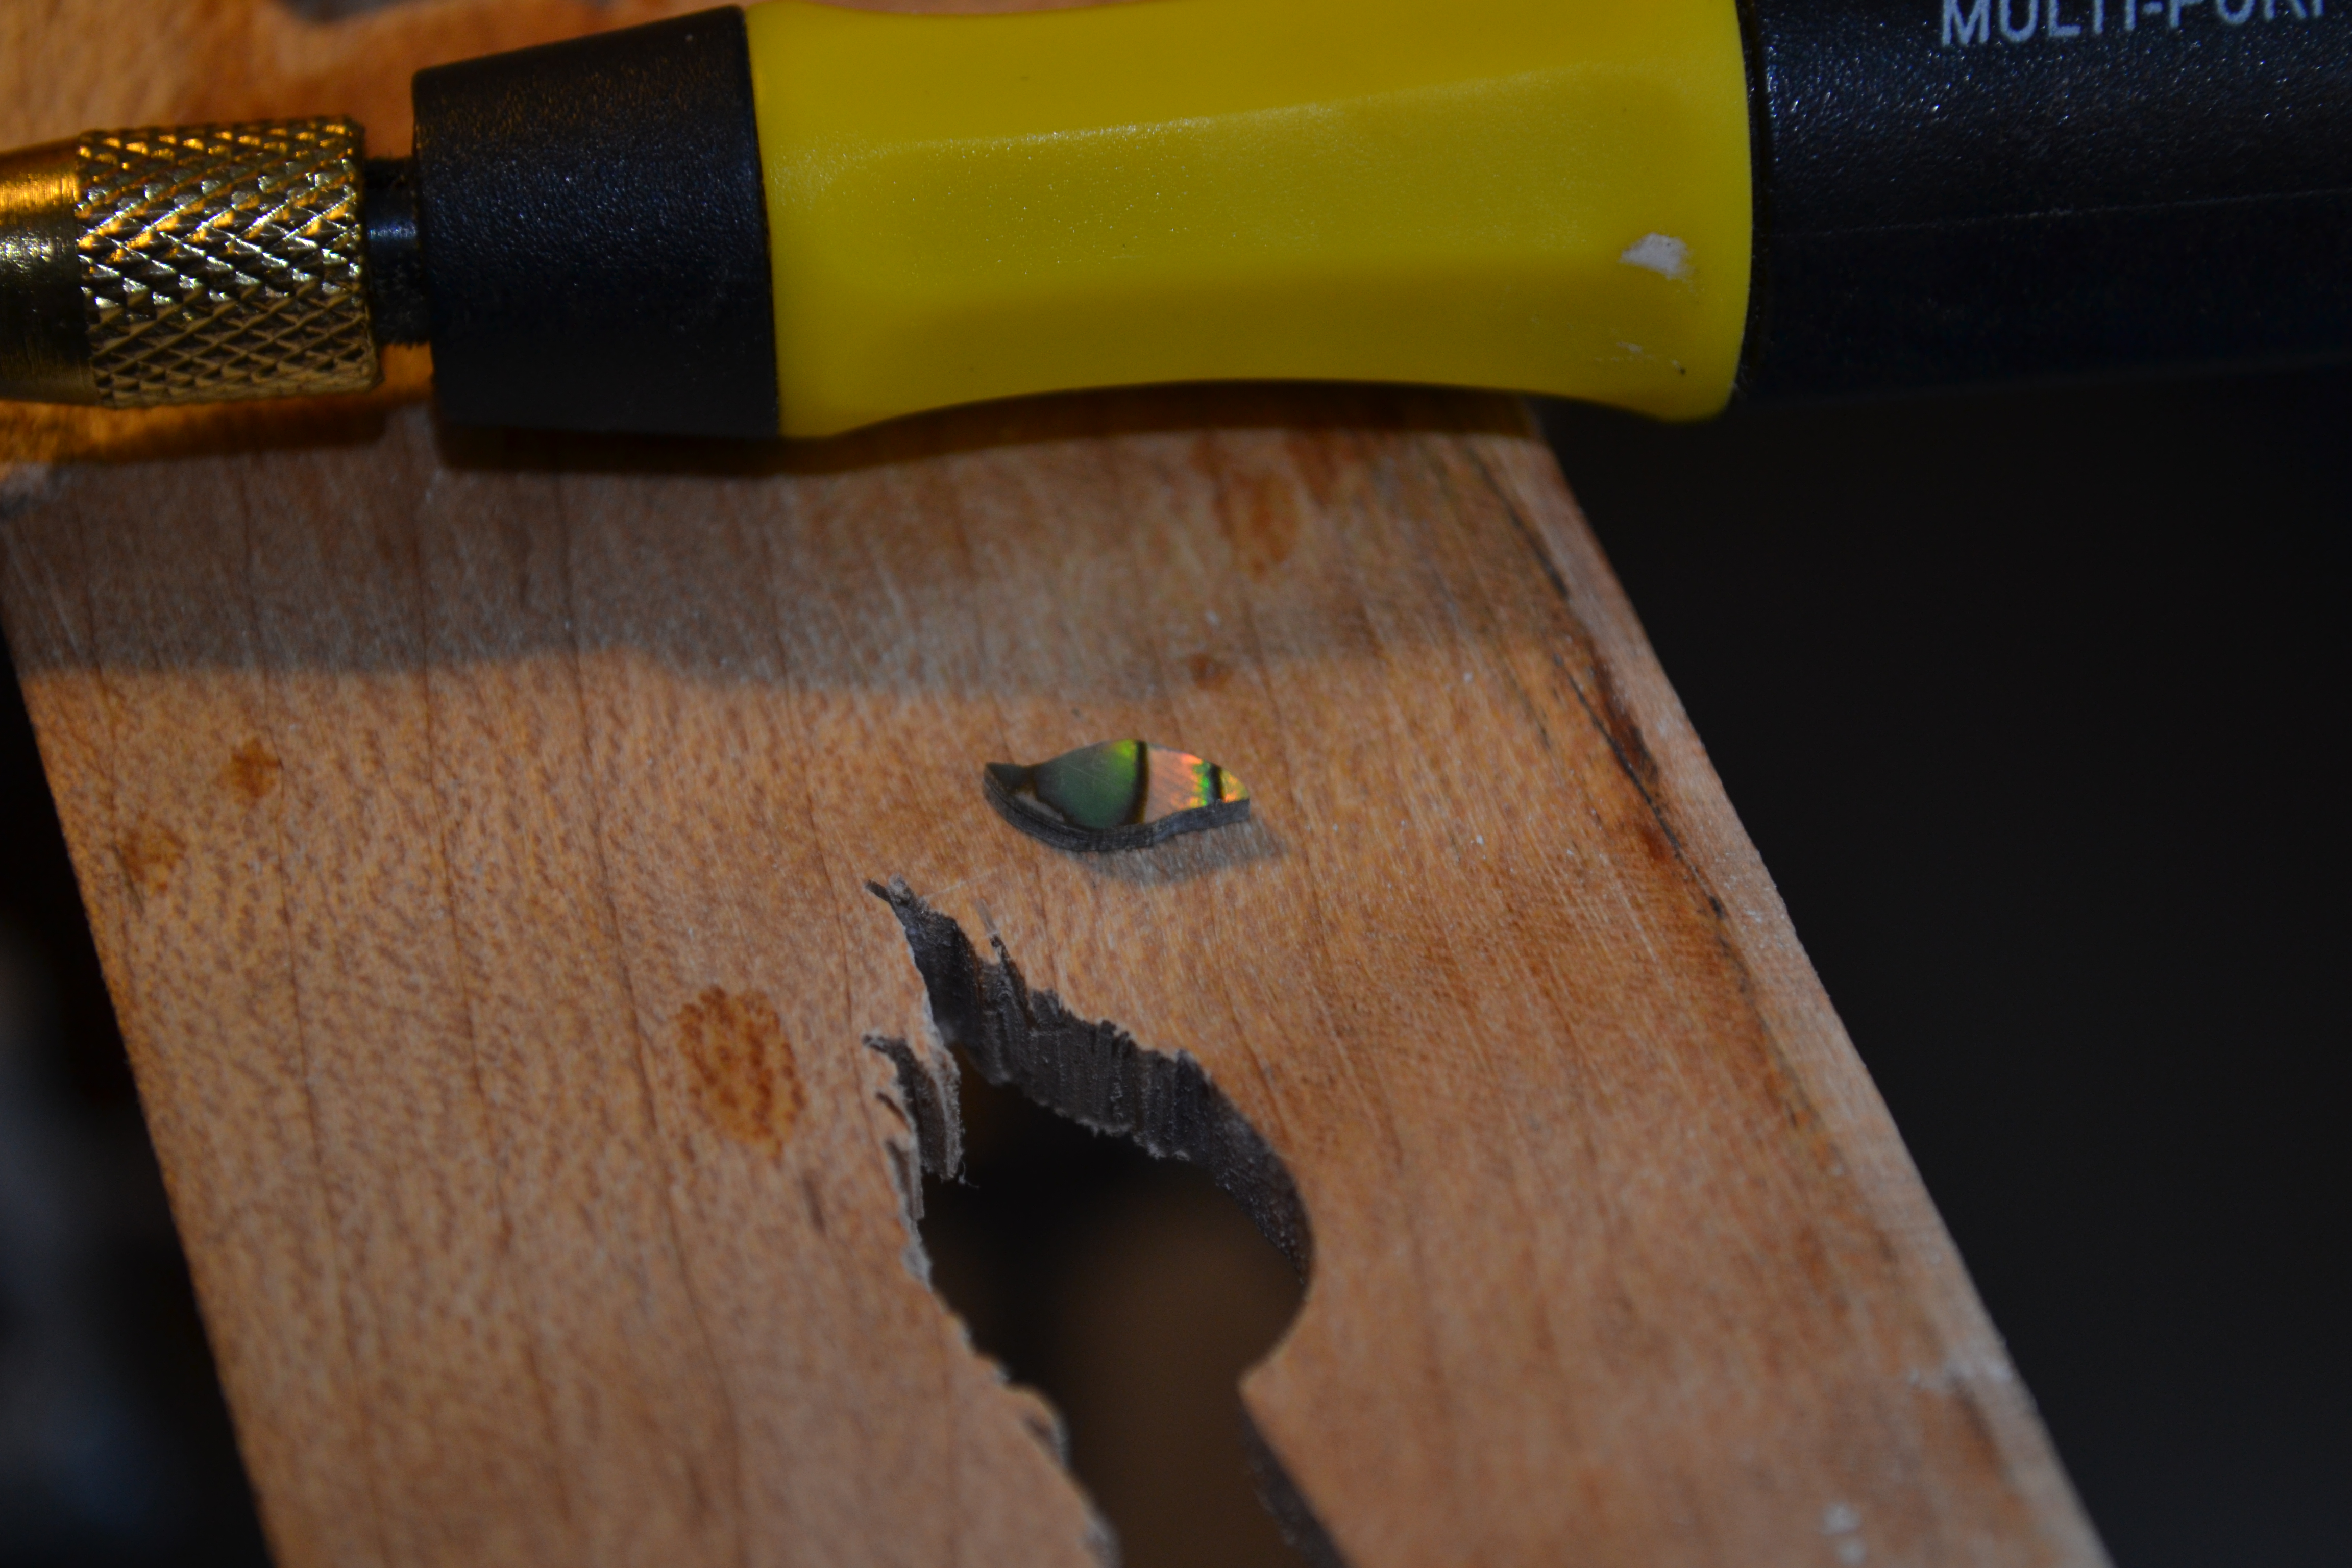
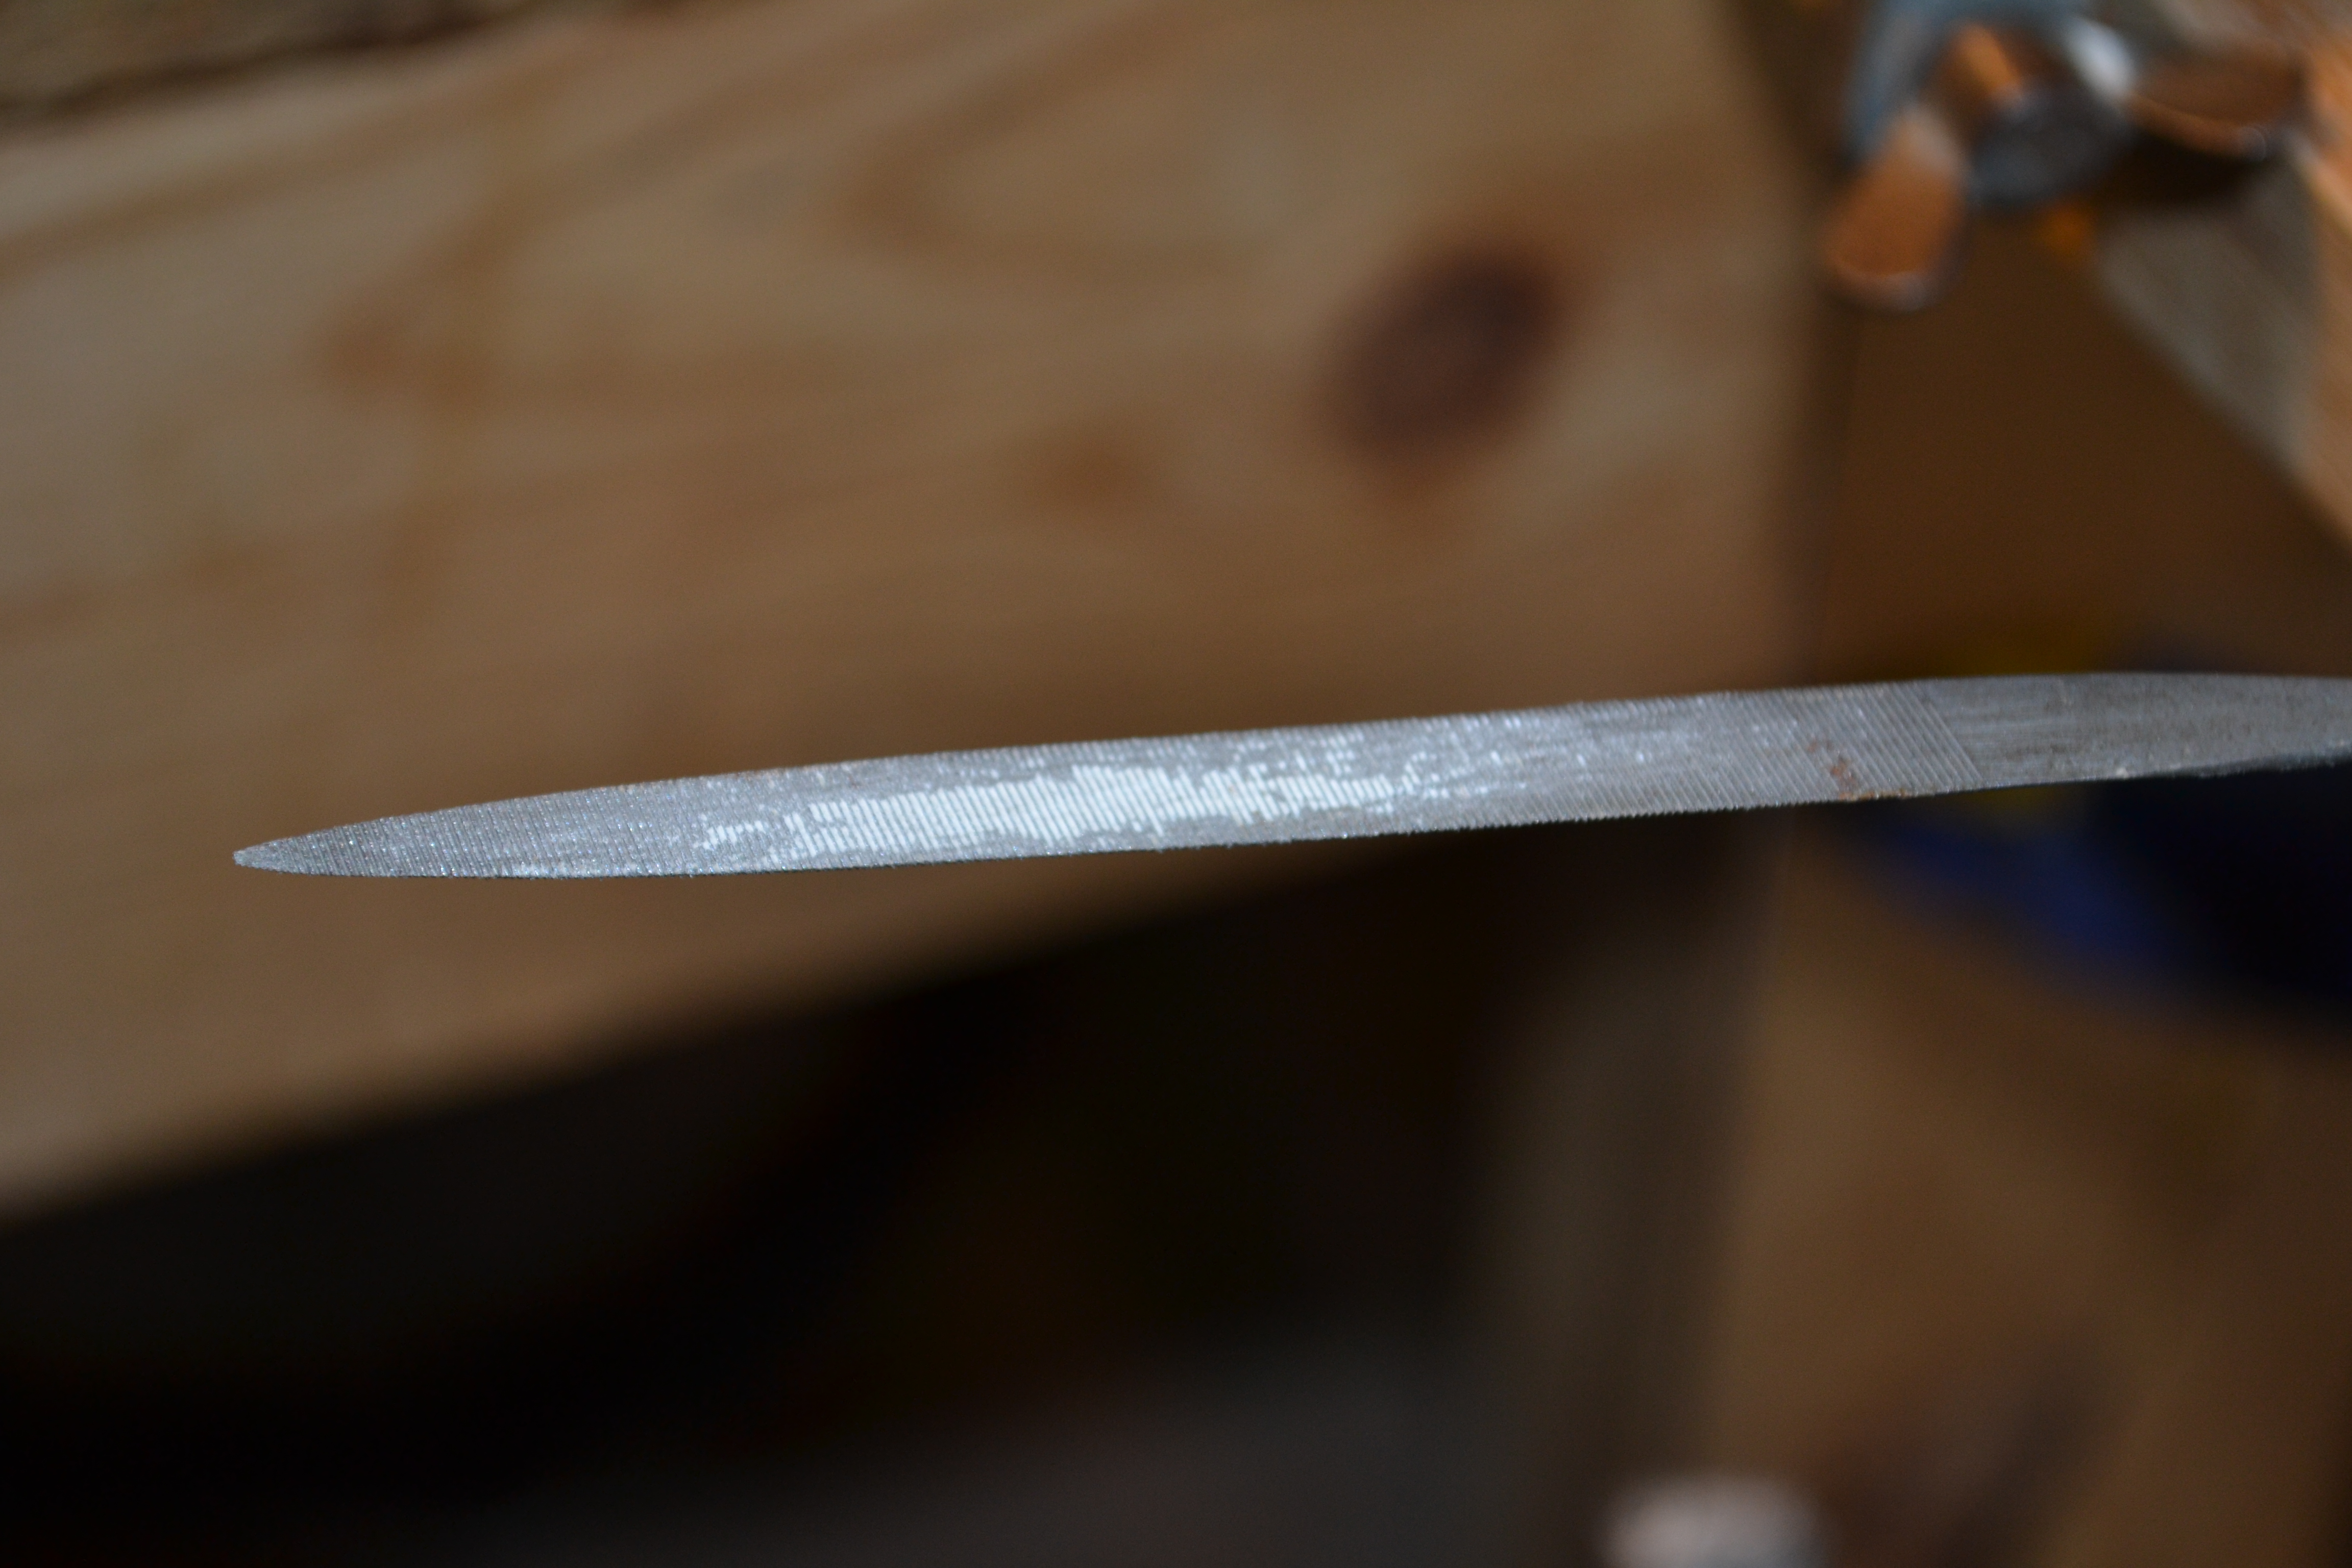
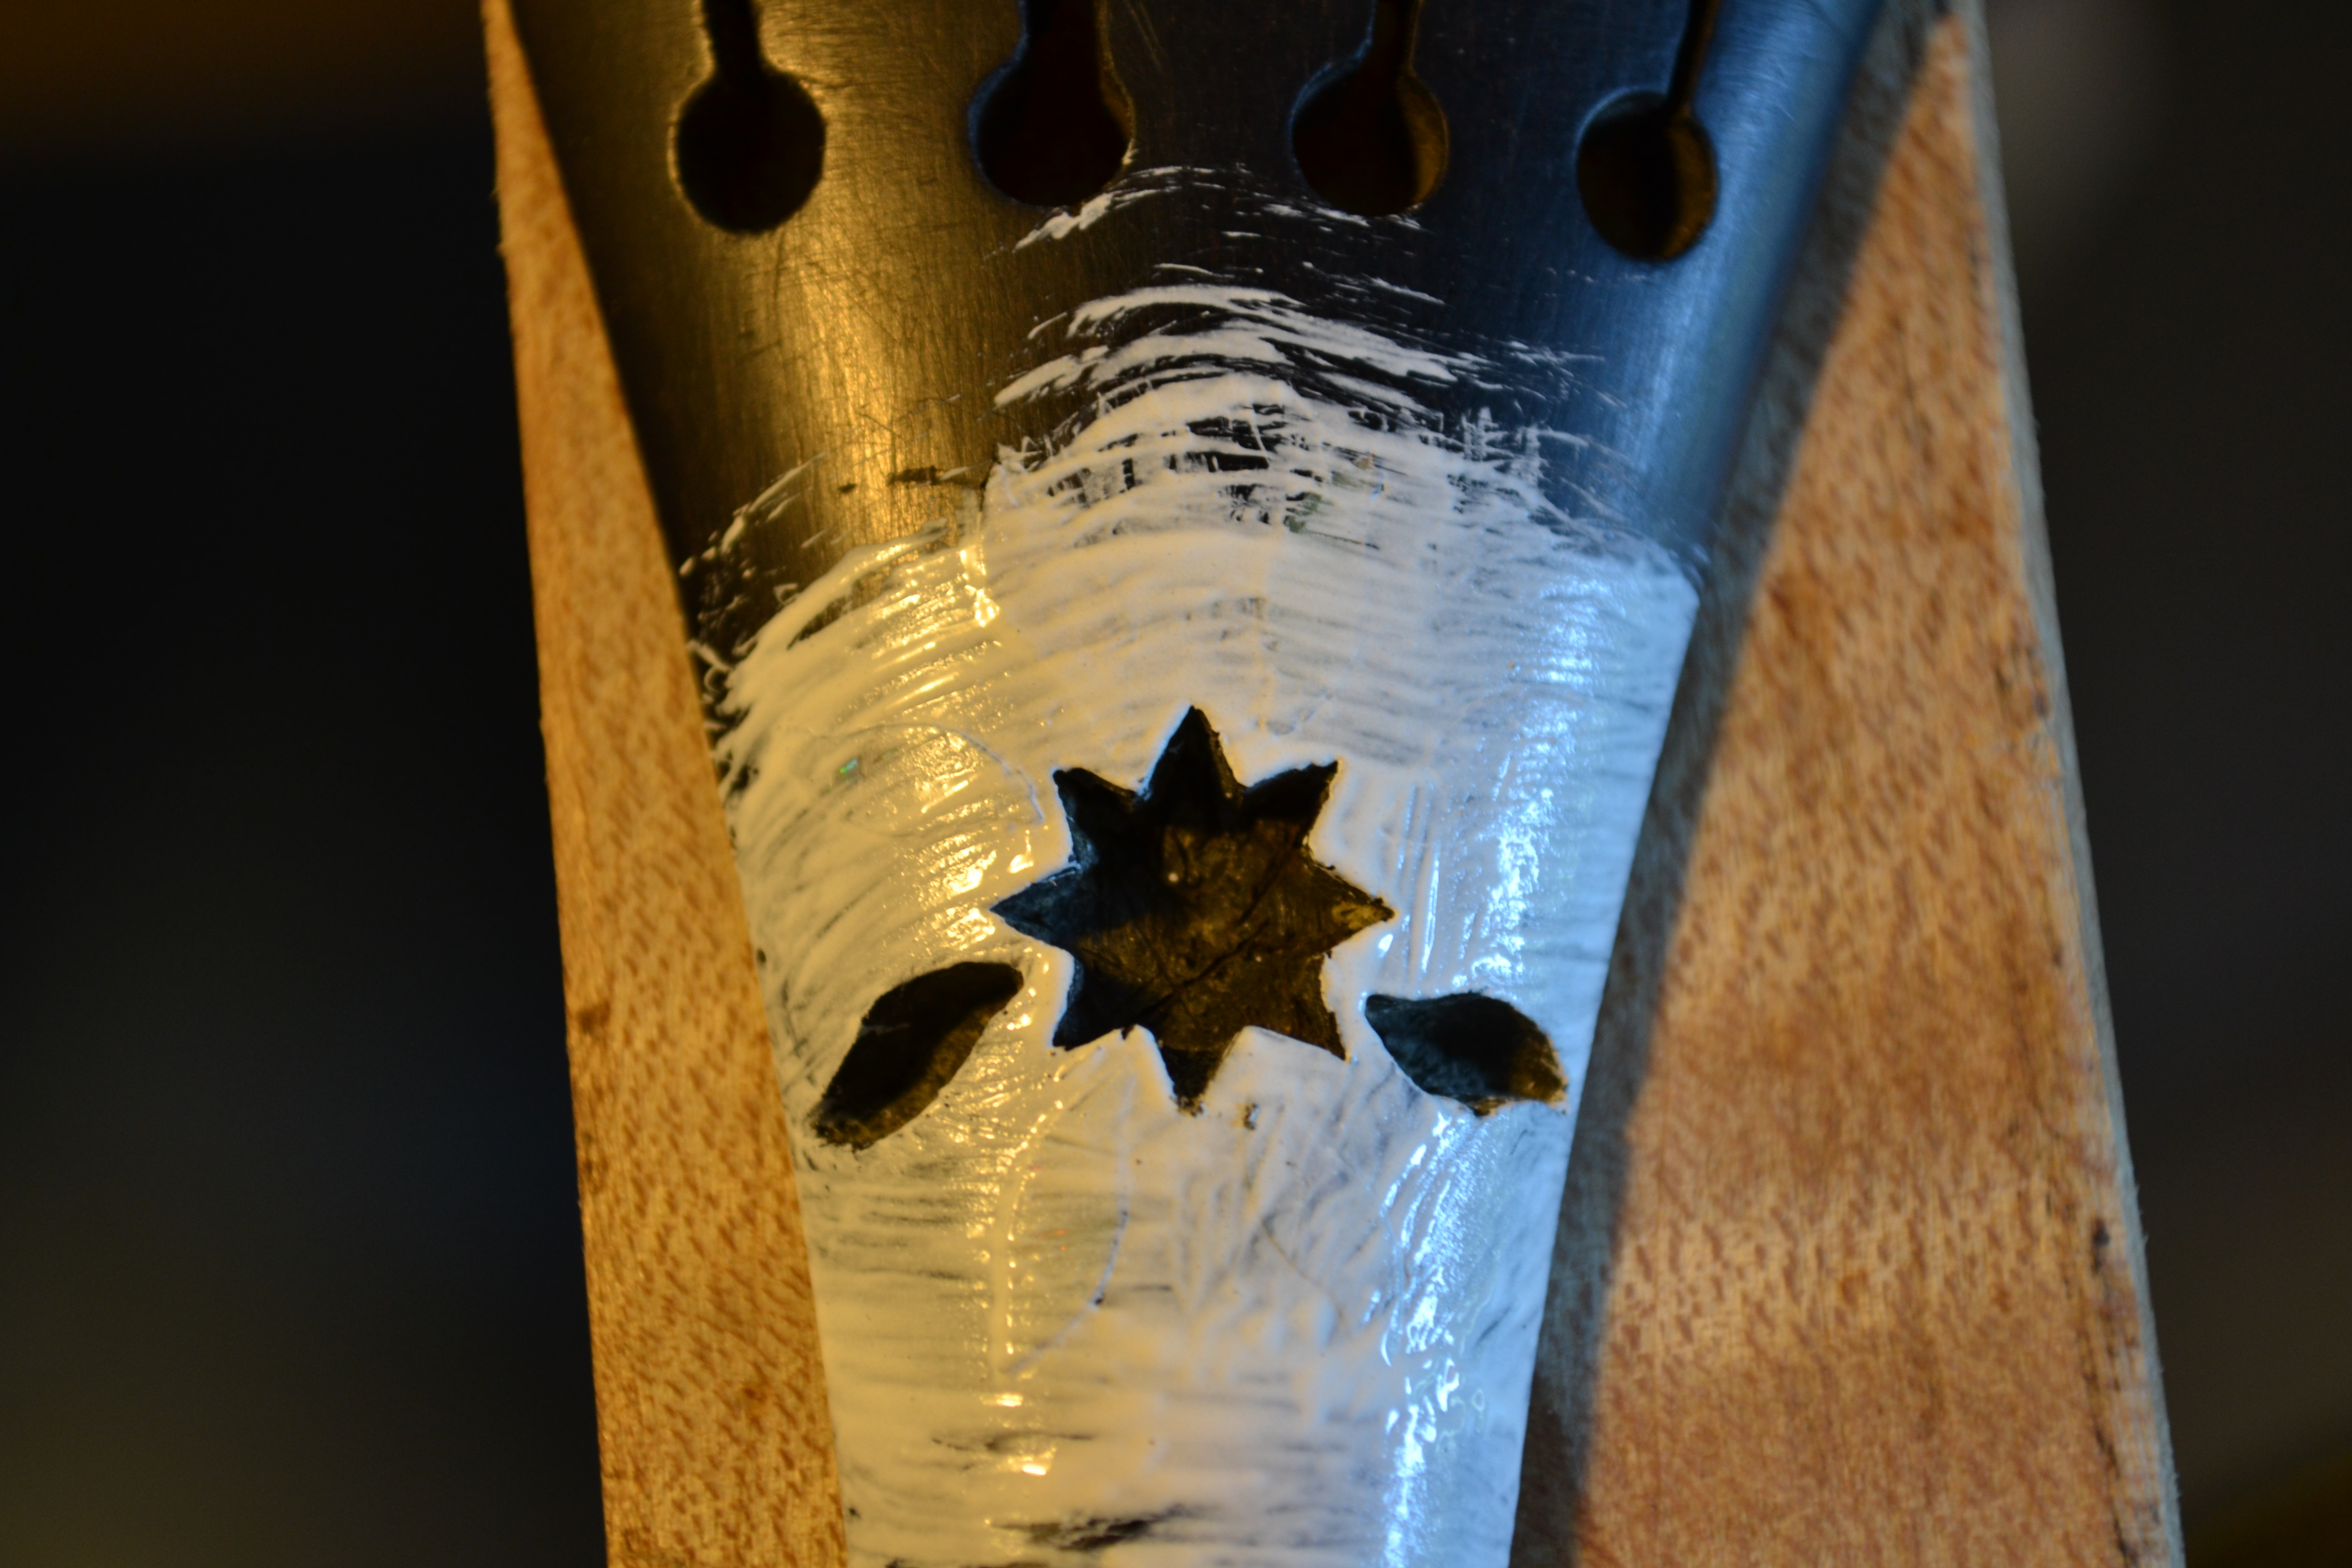
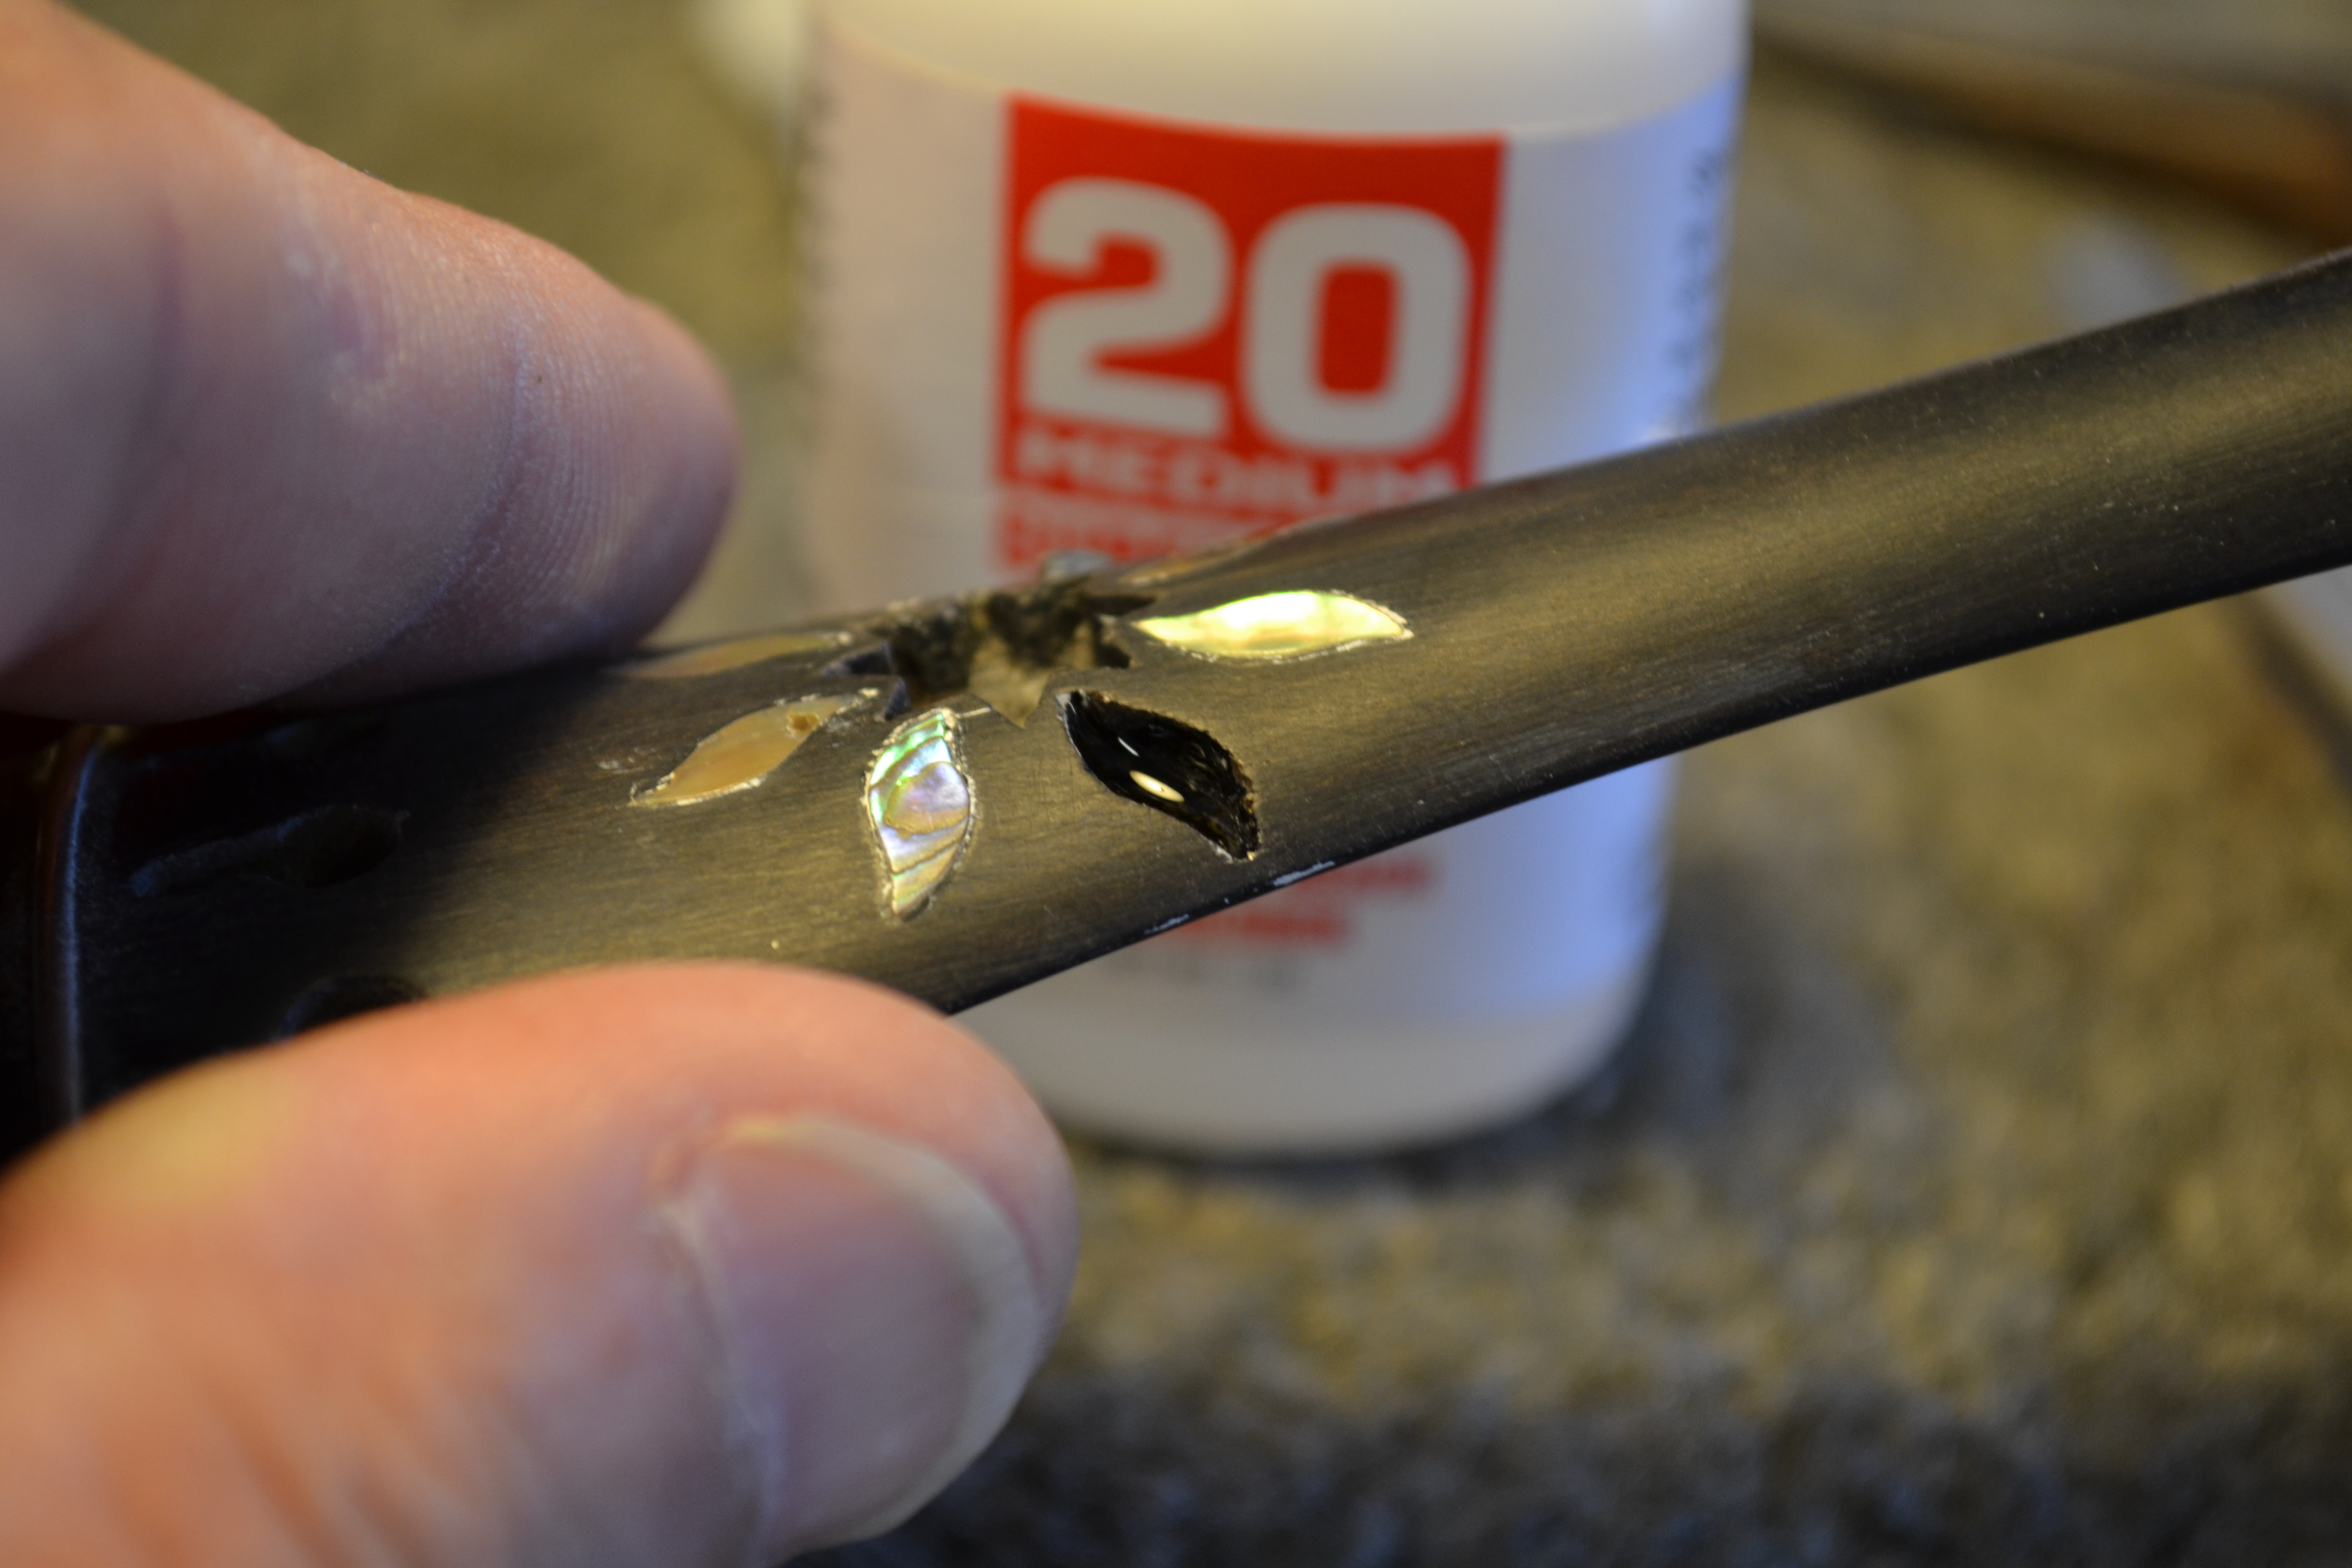
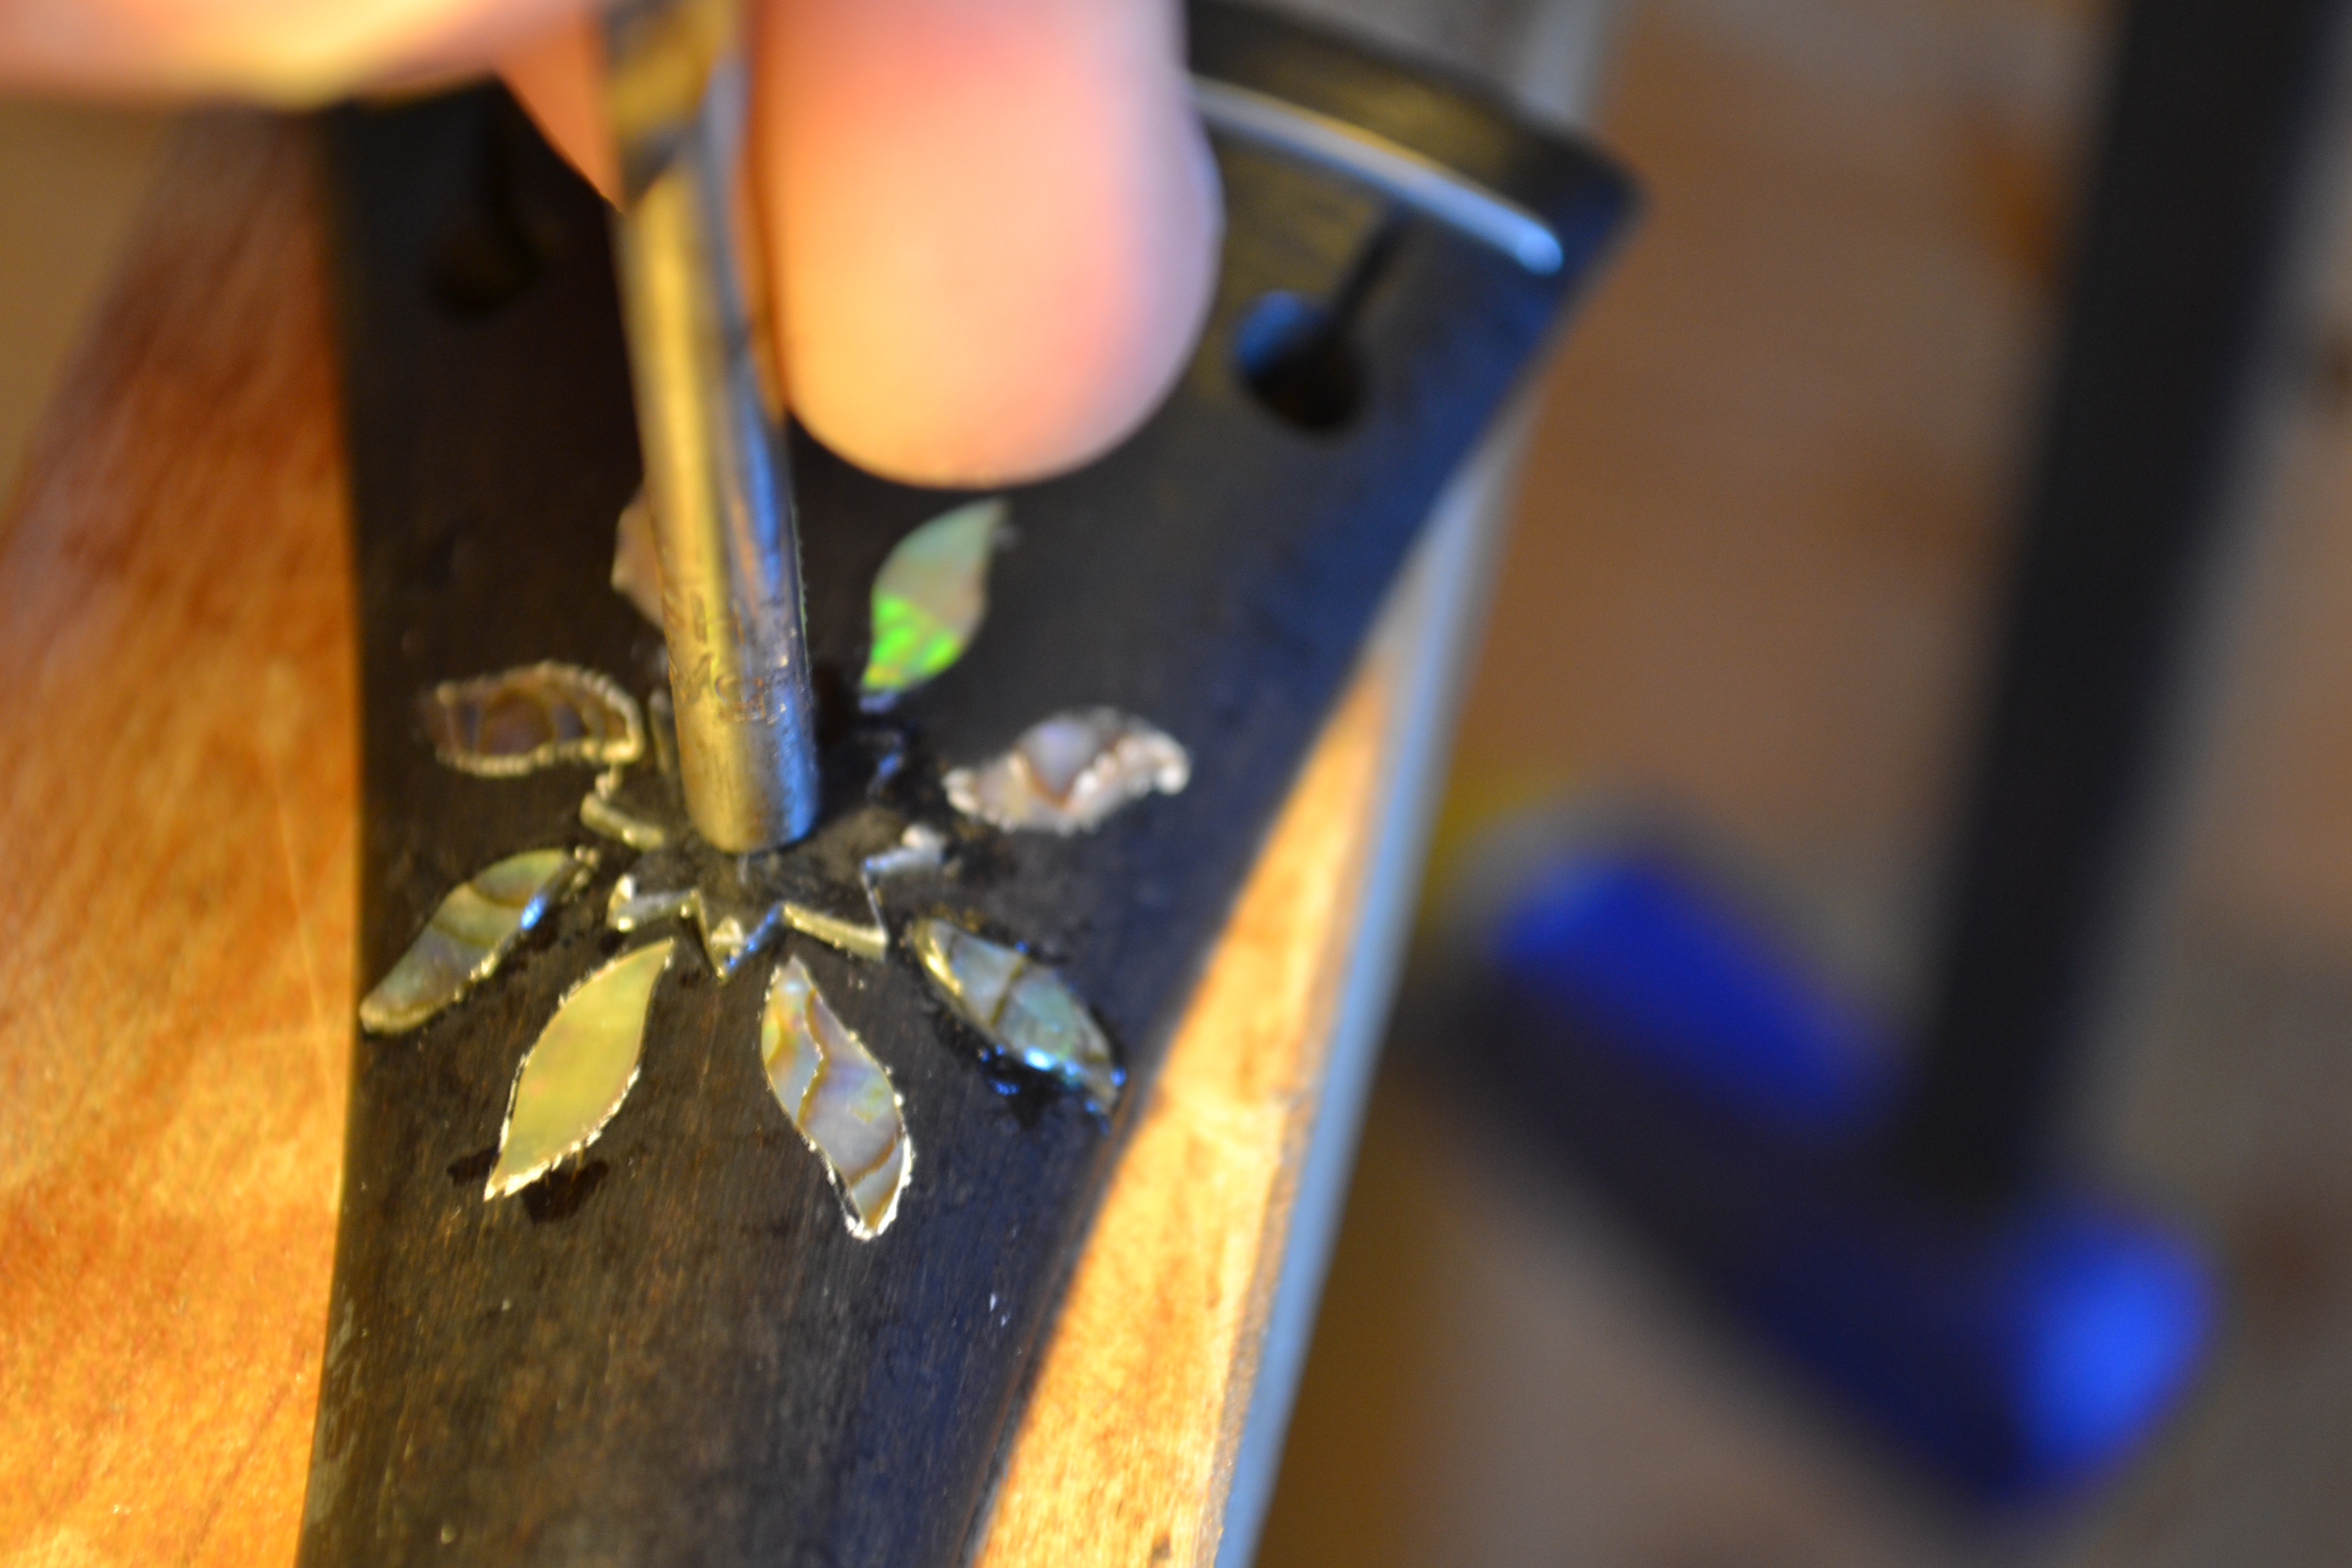
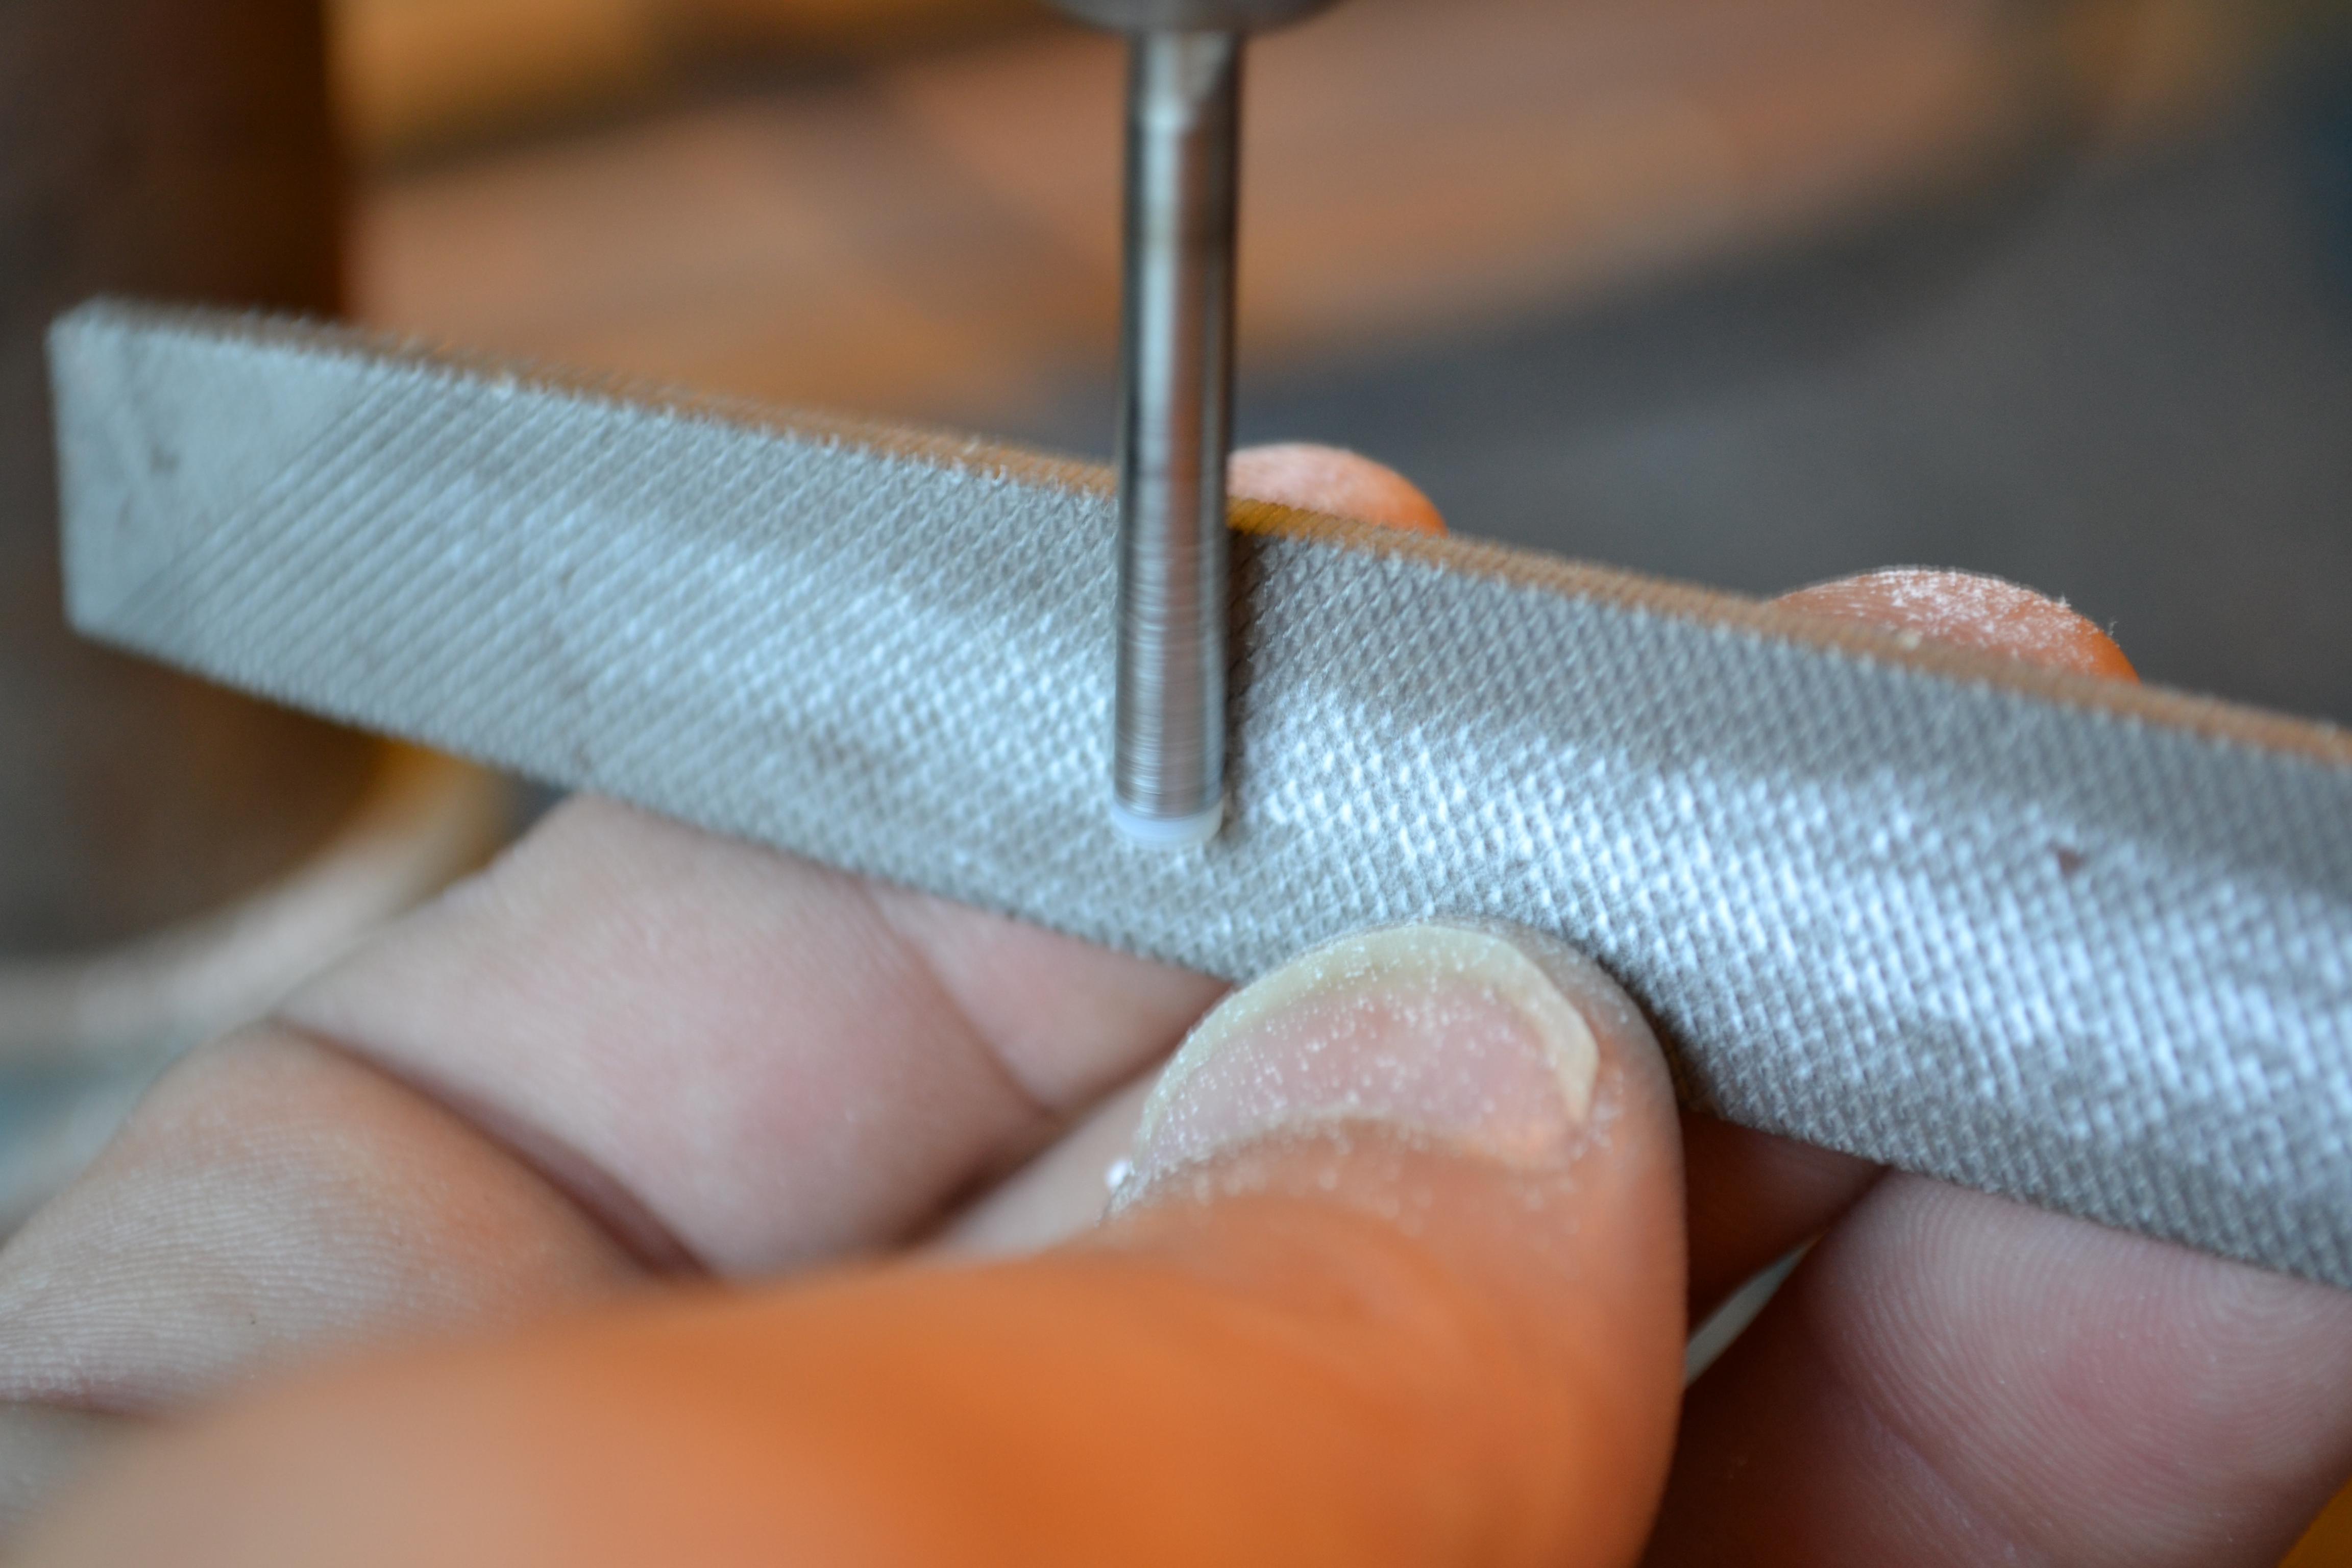
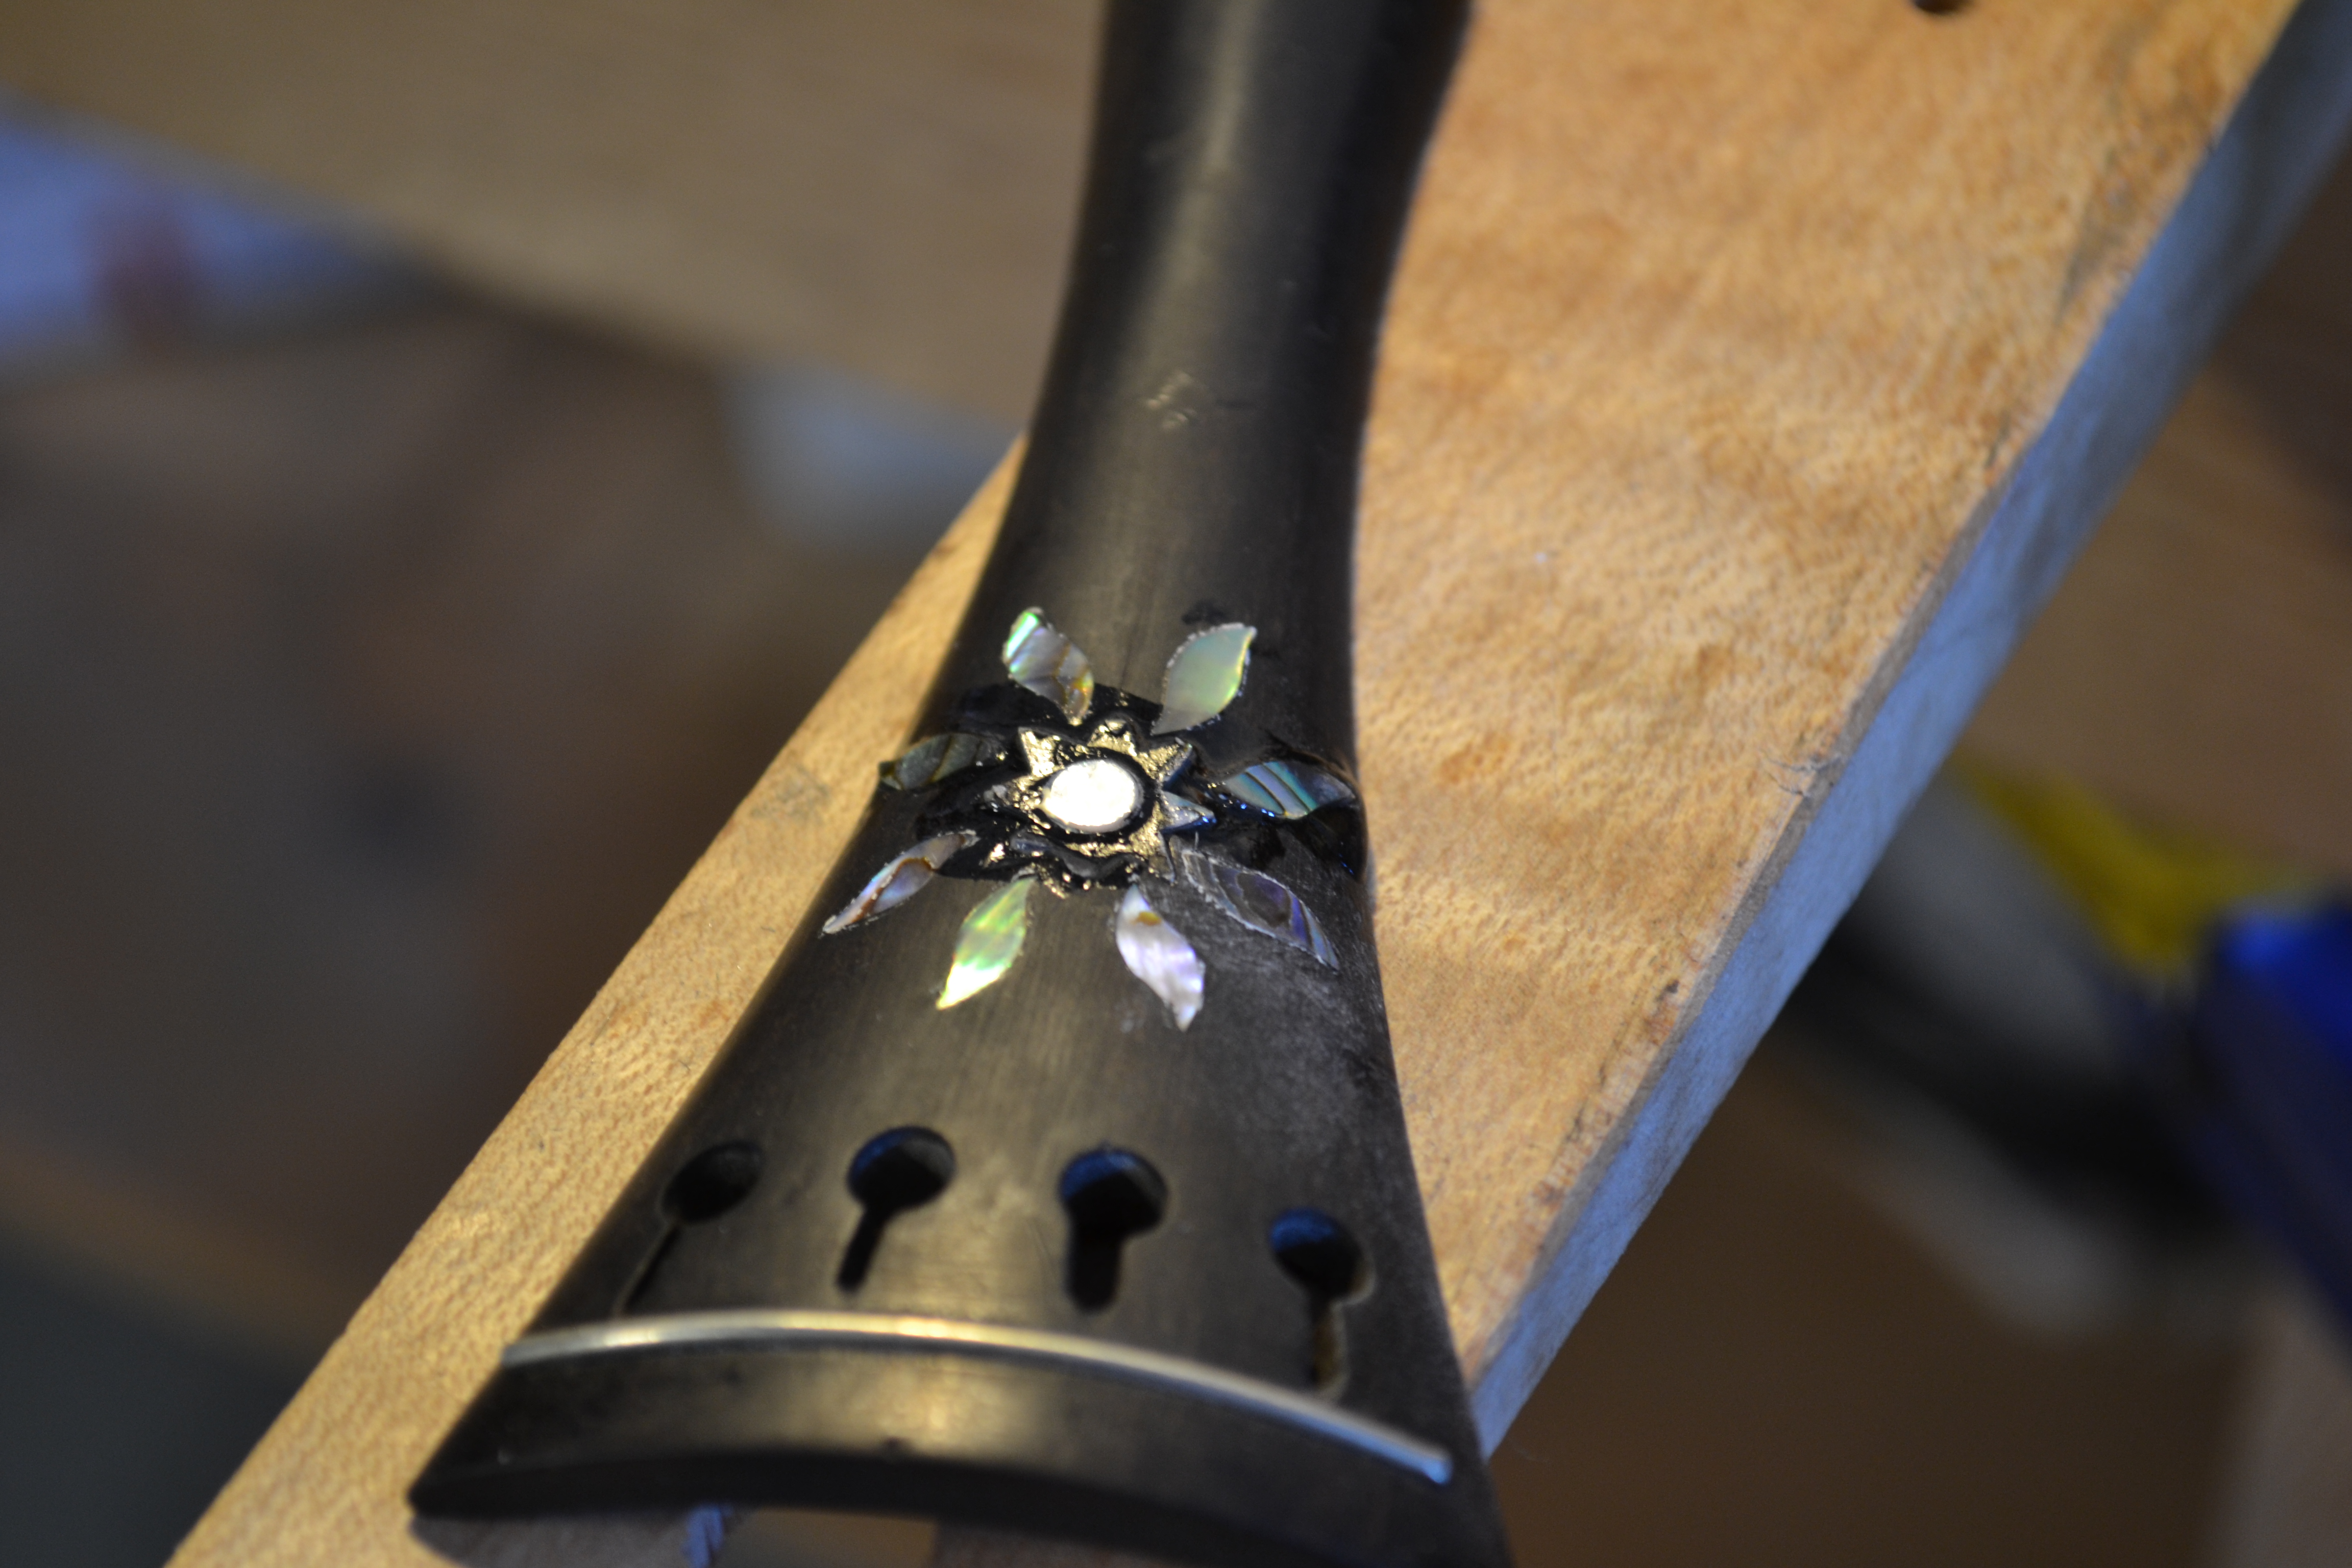
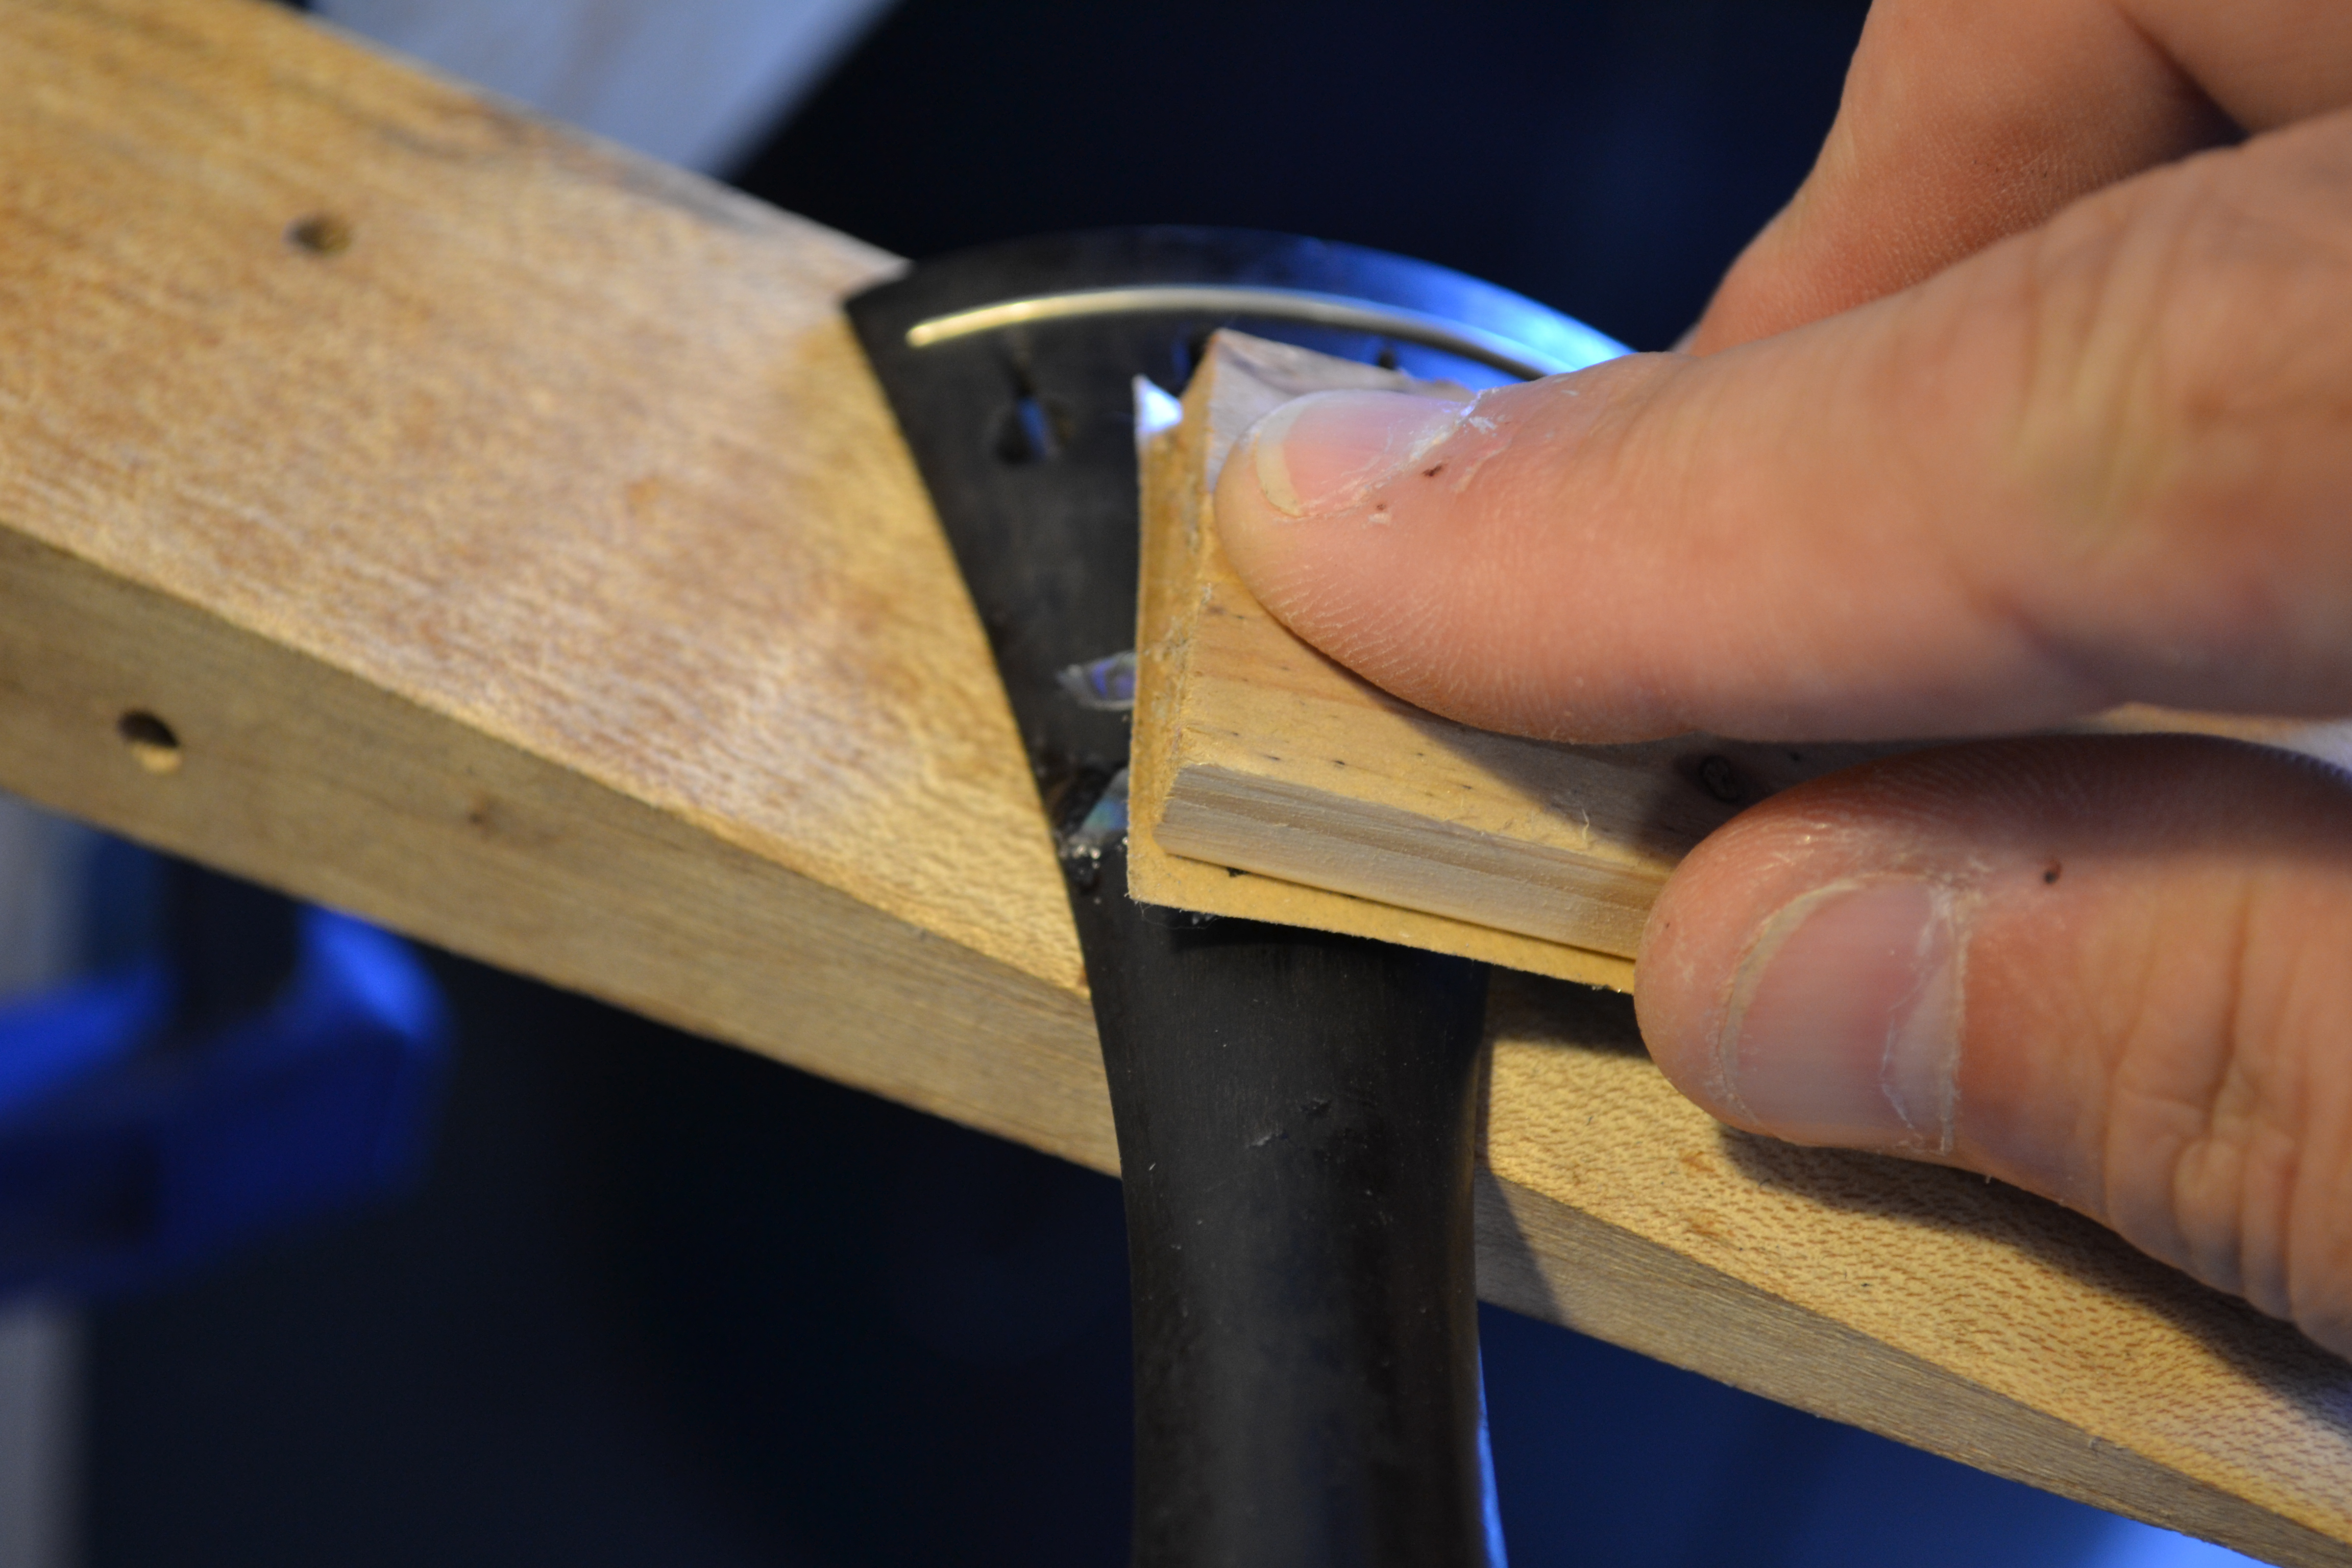
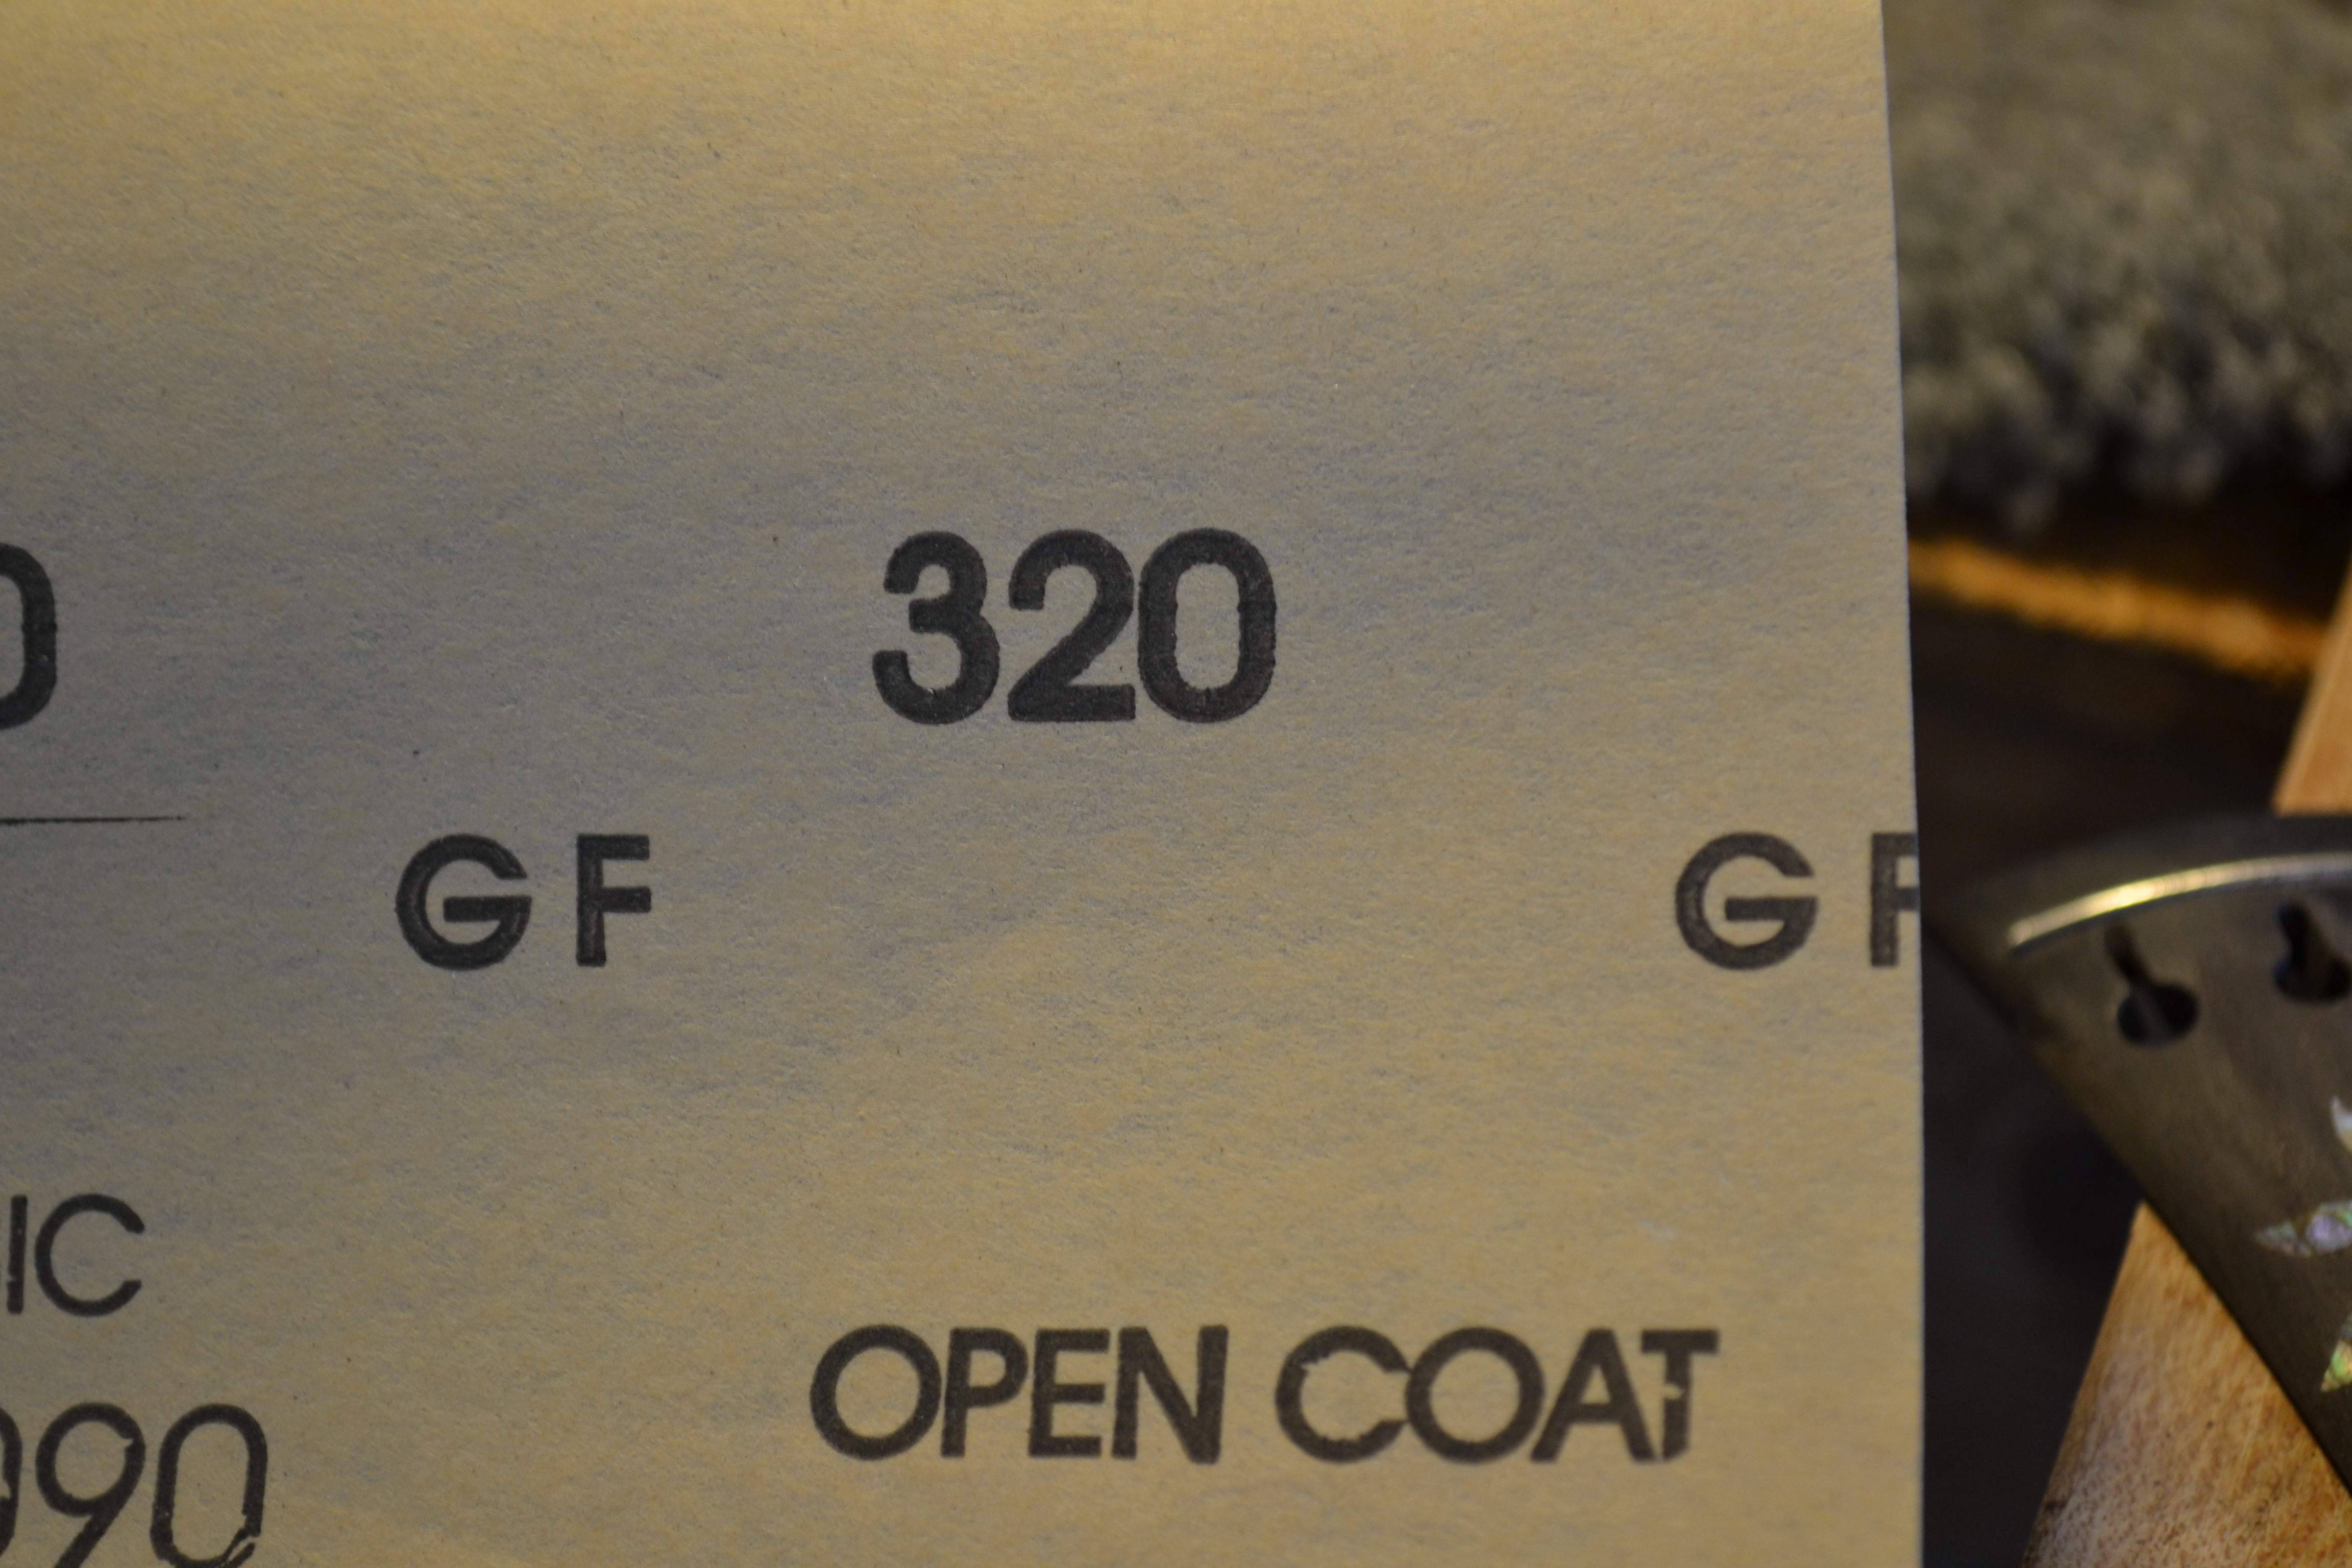
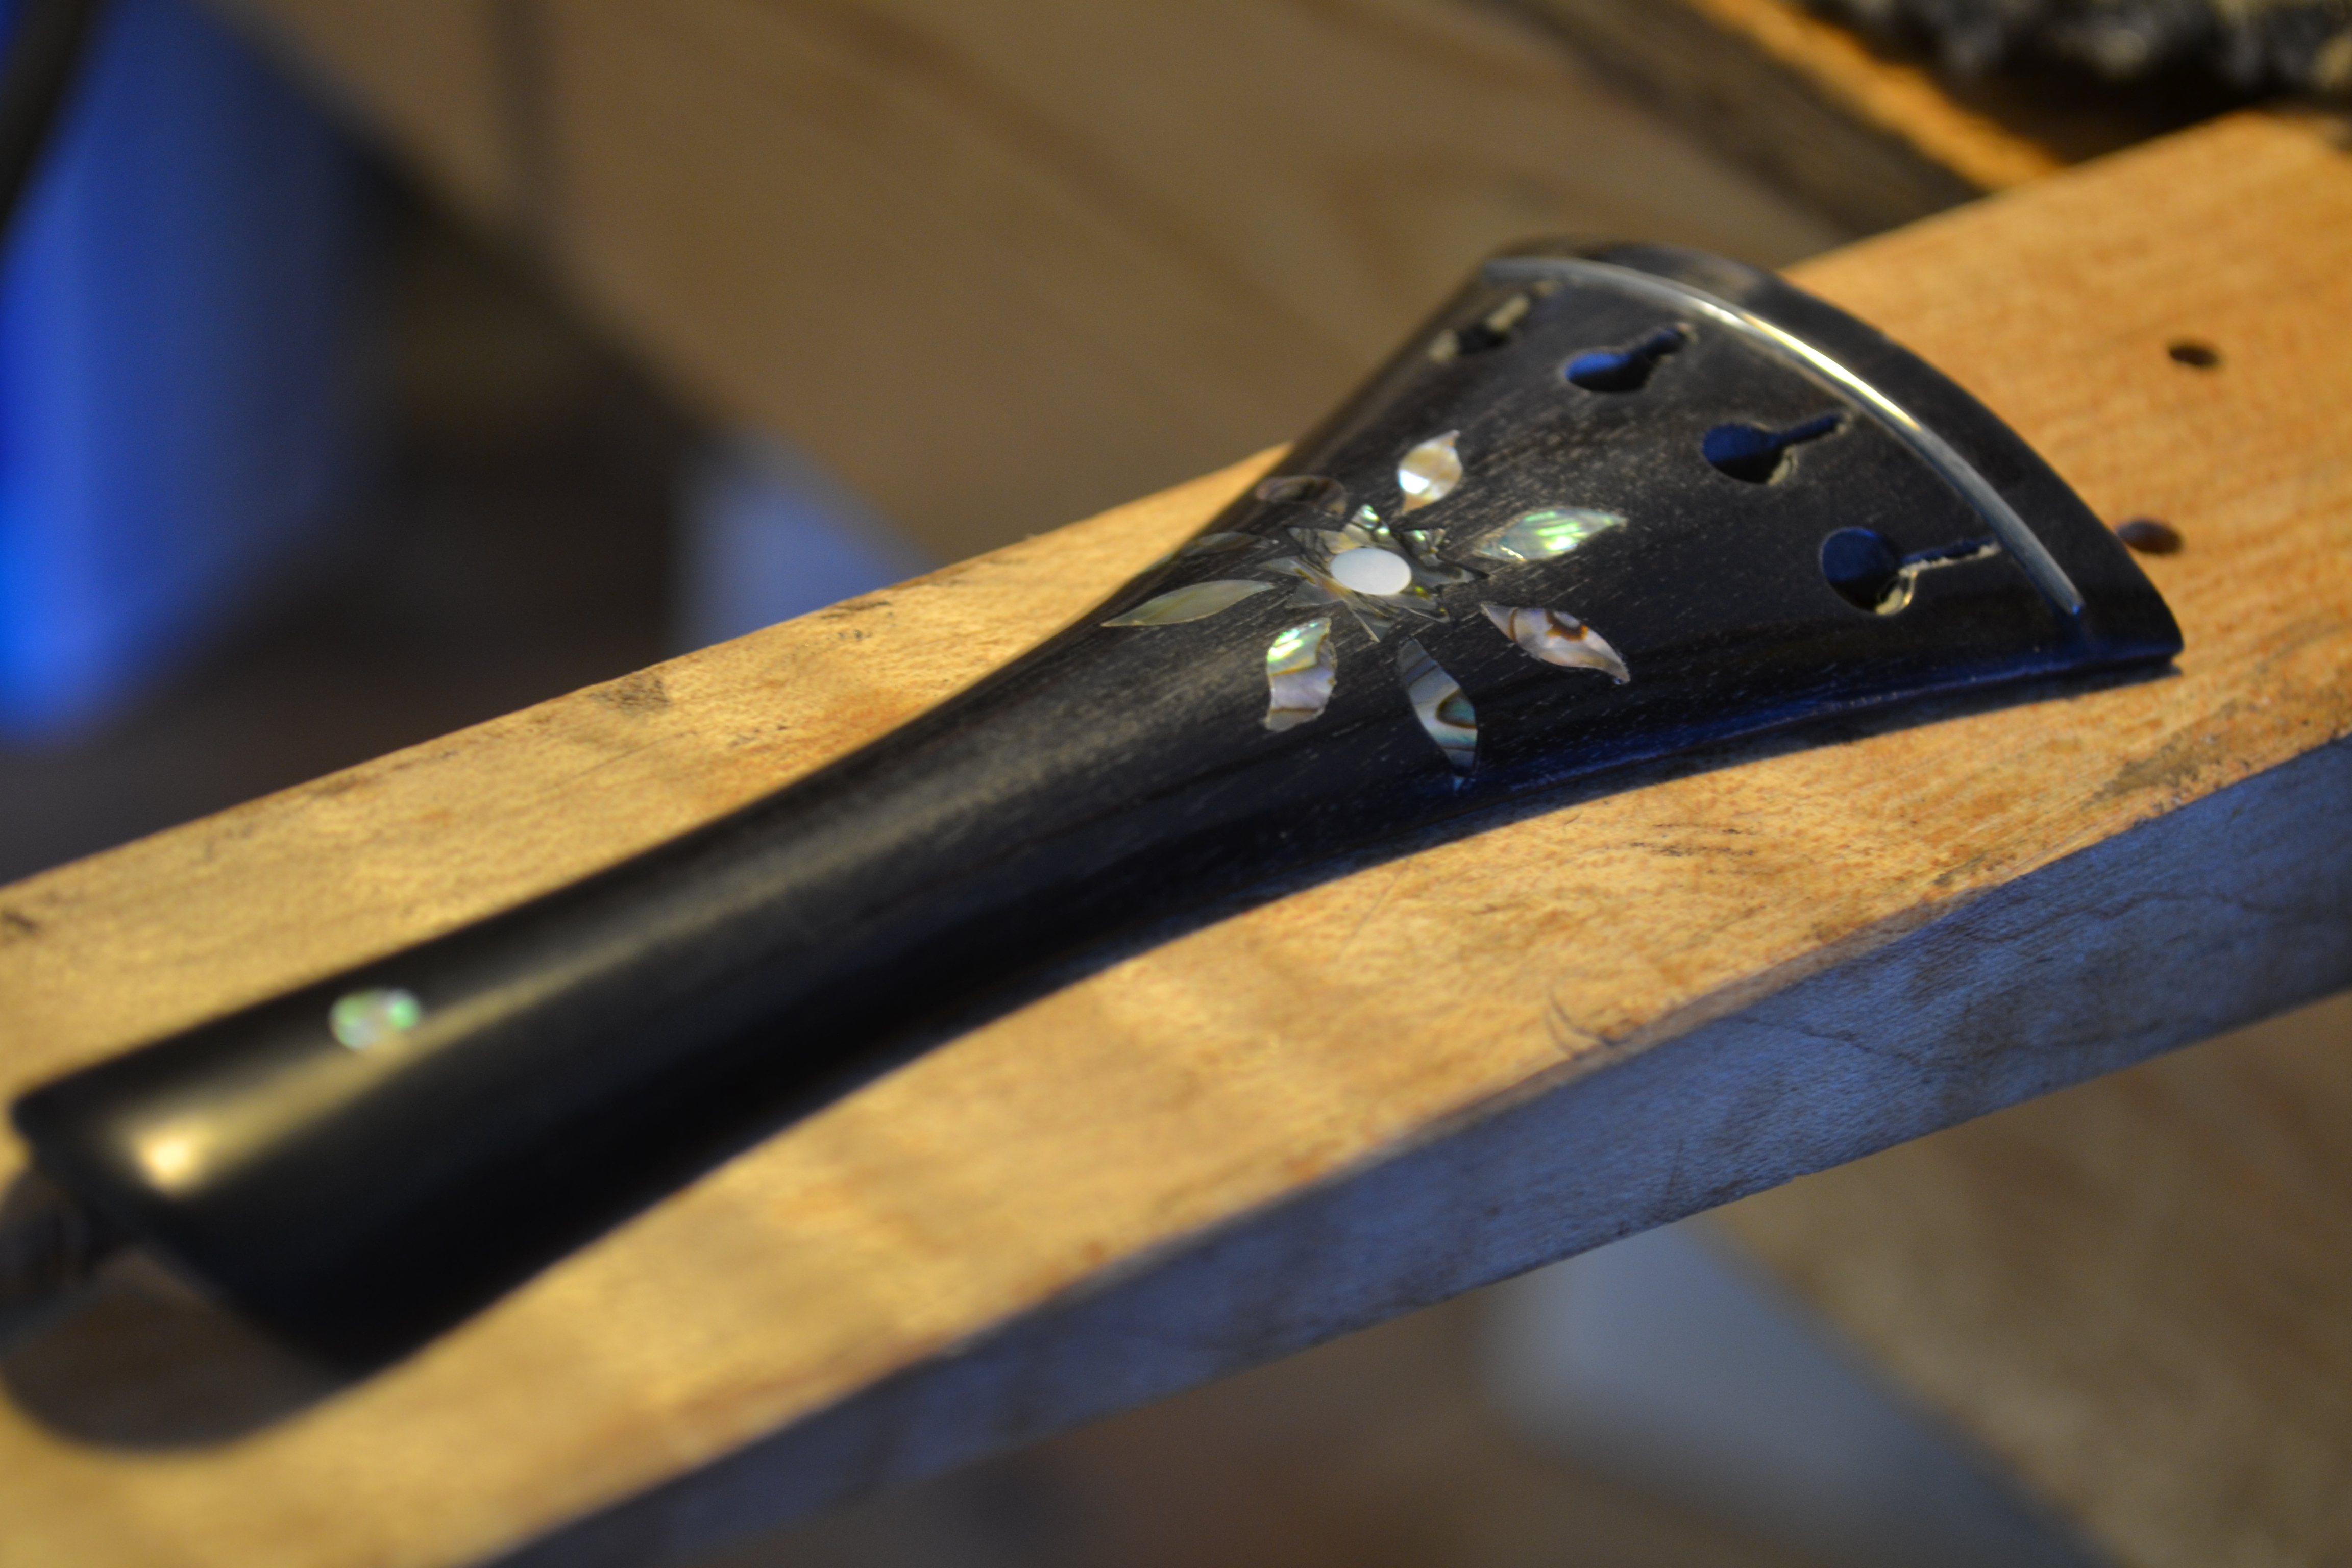
After all the glue that is holding the inlay has fully cured it is time to lever the inlay while not removing any more than a tiny shaving from the tailpiece. I start with 80 grit then after the inlay is level, I switch up to progressively finer paper. 100, 150, 180, 200 and finally, 320. The finer grits are only to remove the scratches from the piece as a result of leveling.
 |
 |
 |
 |
 |
 |
 |
 |
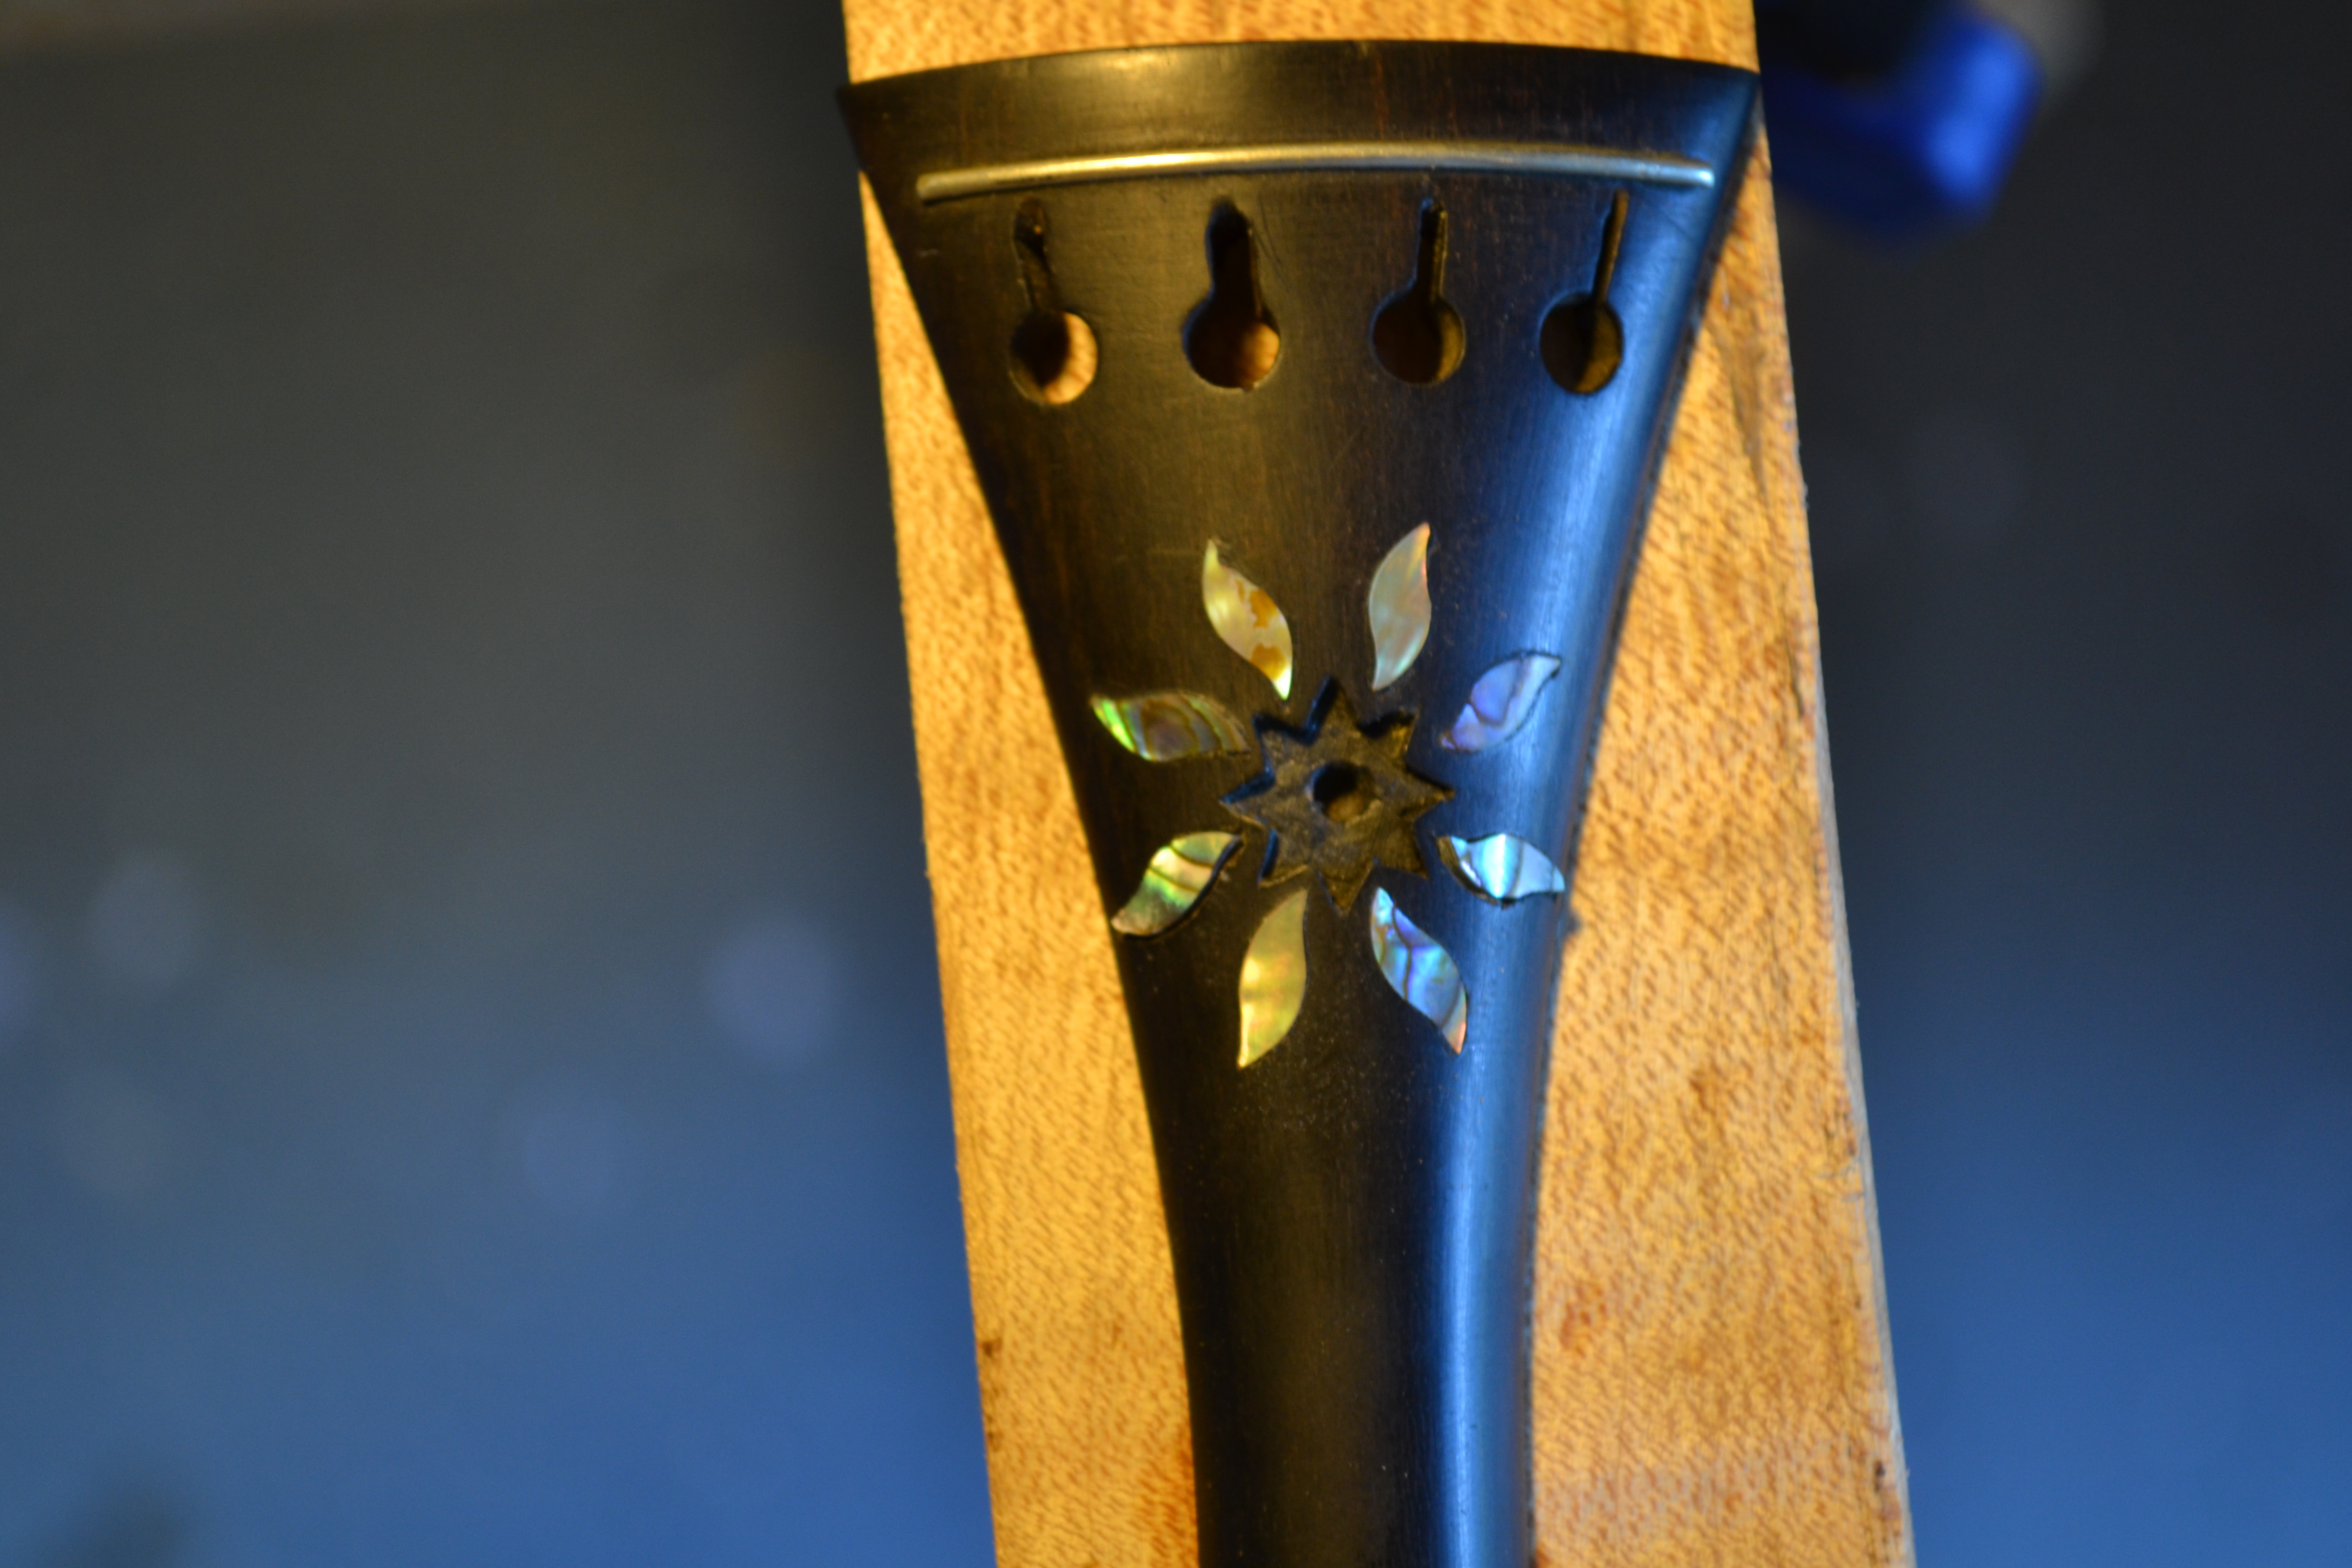
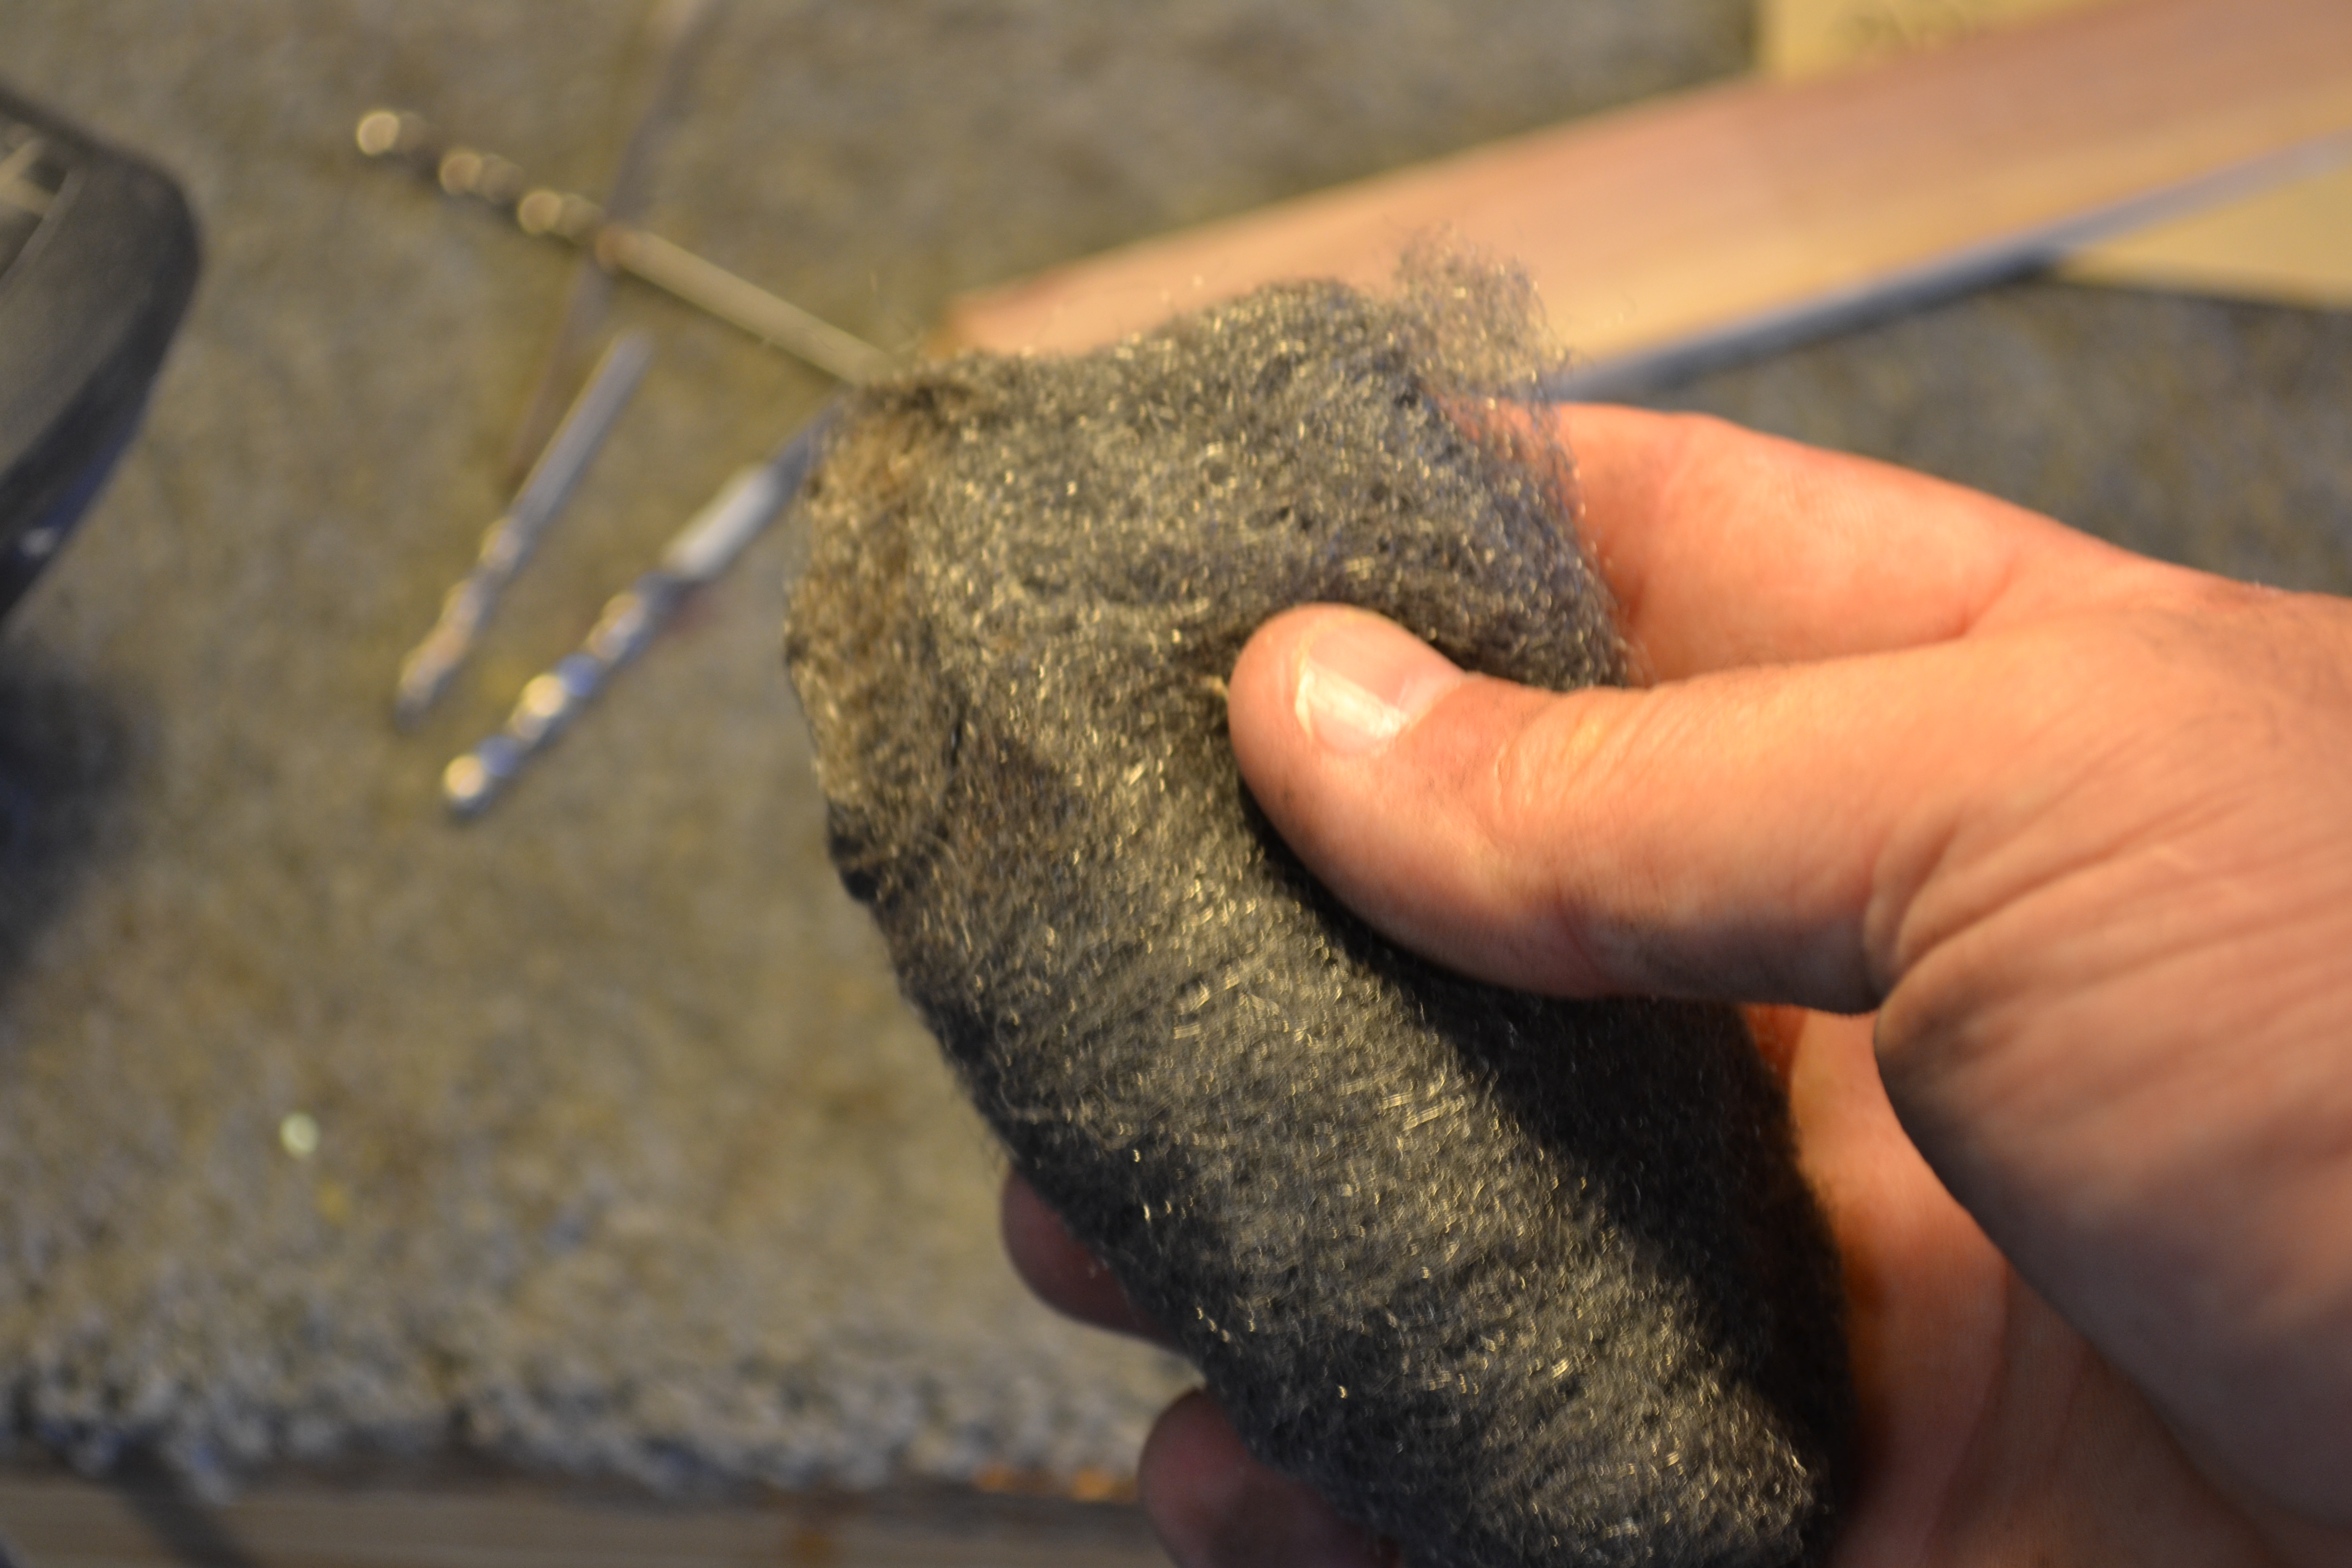
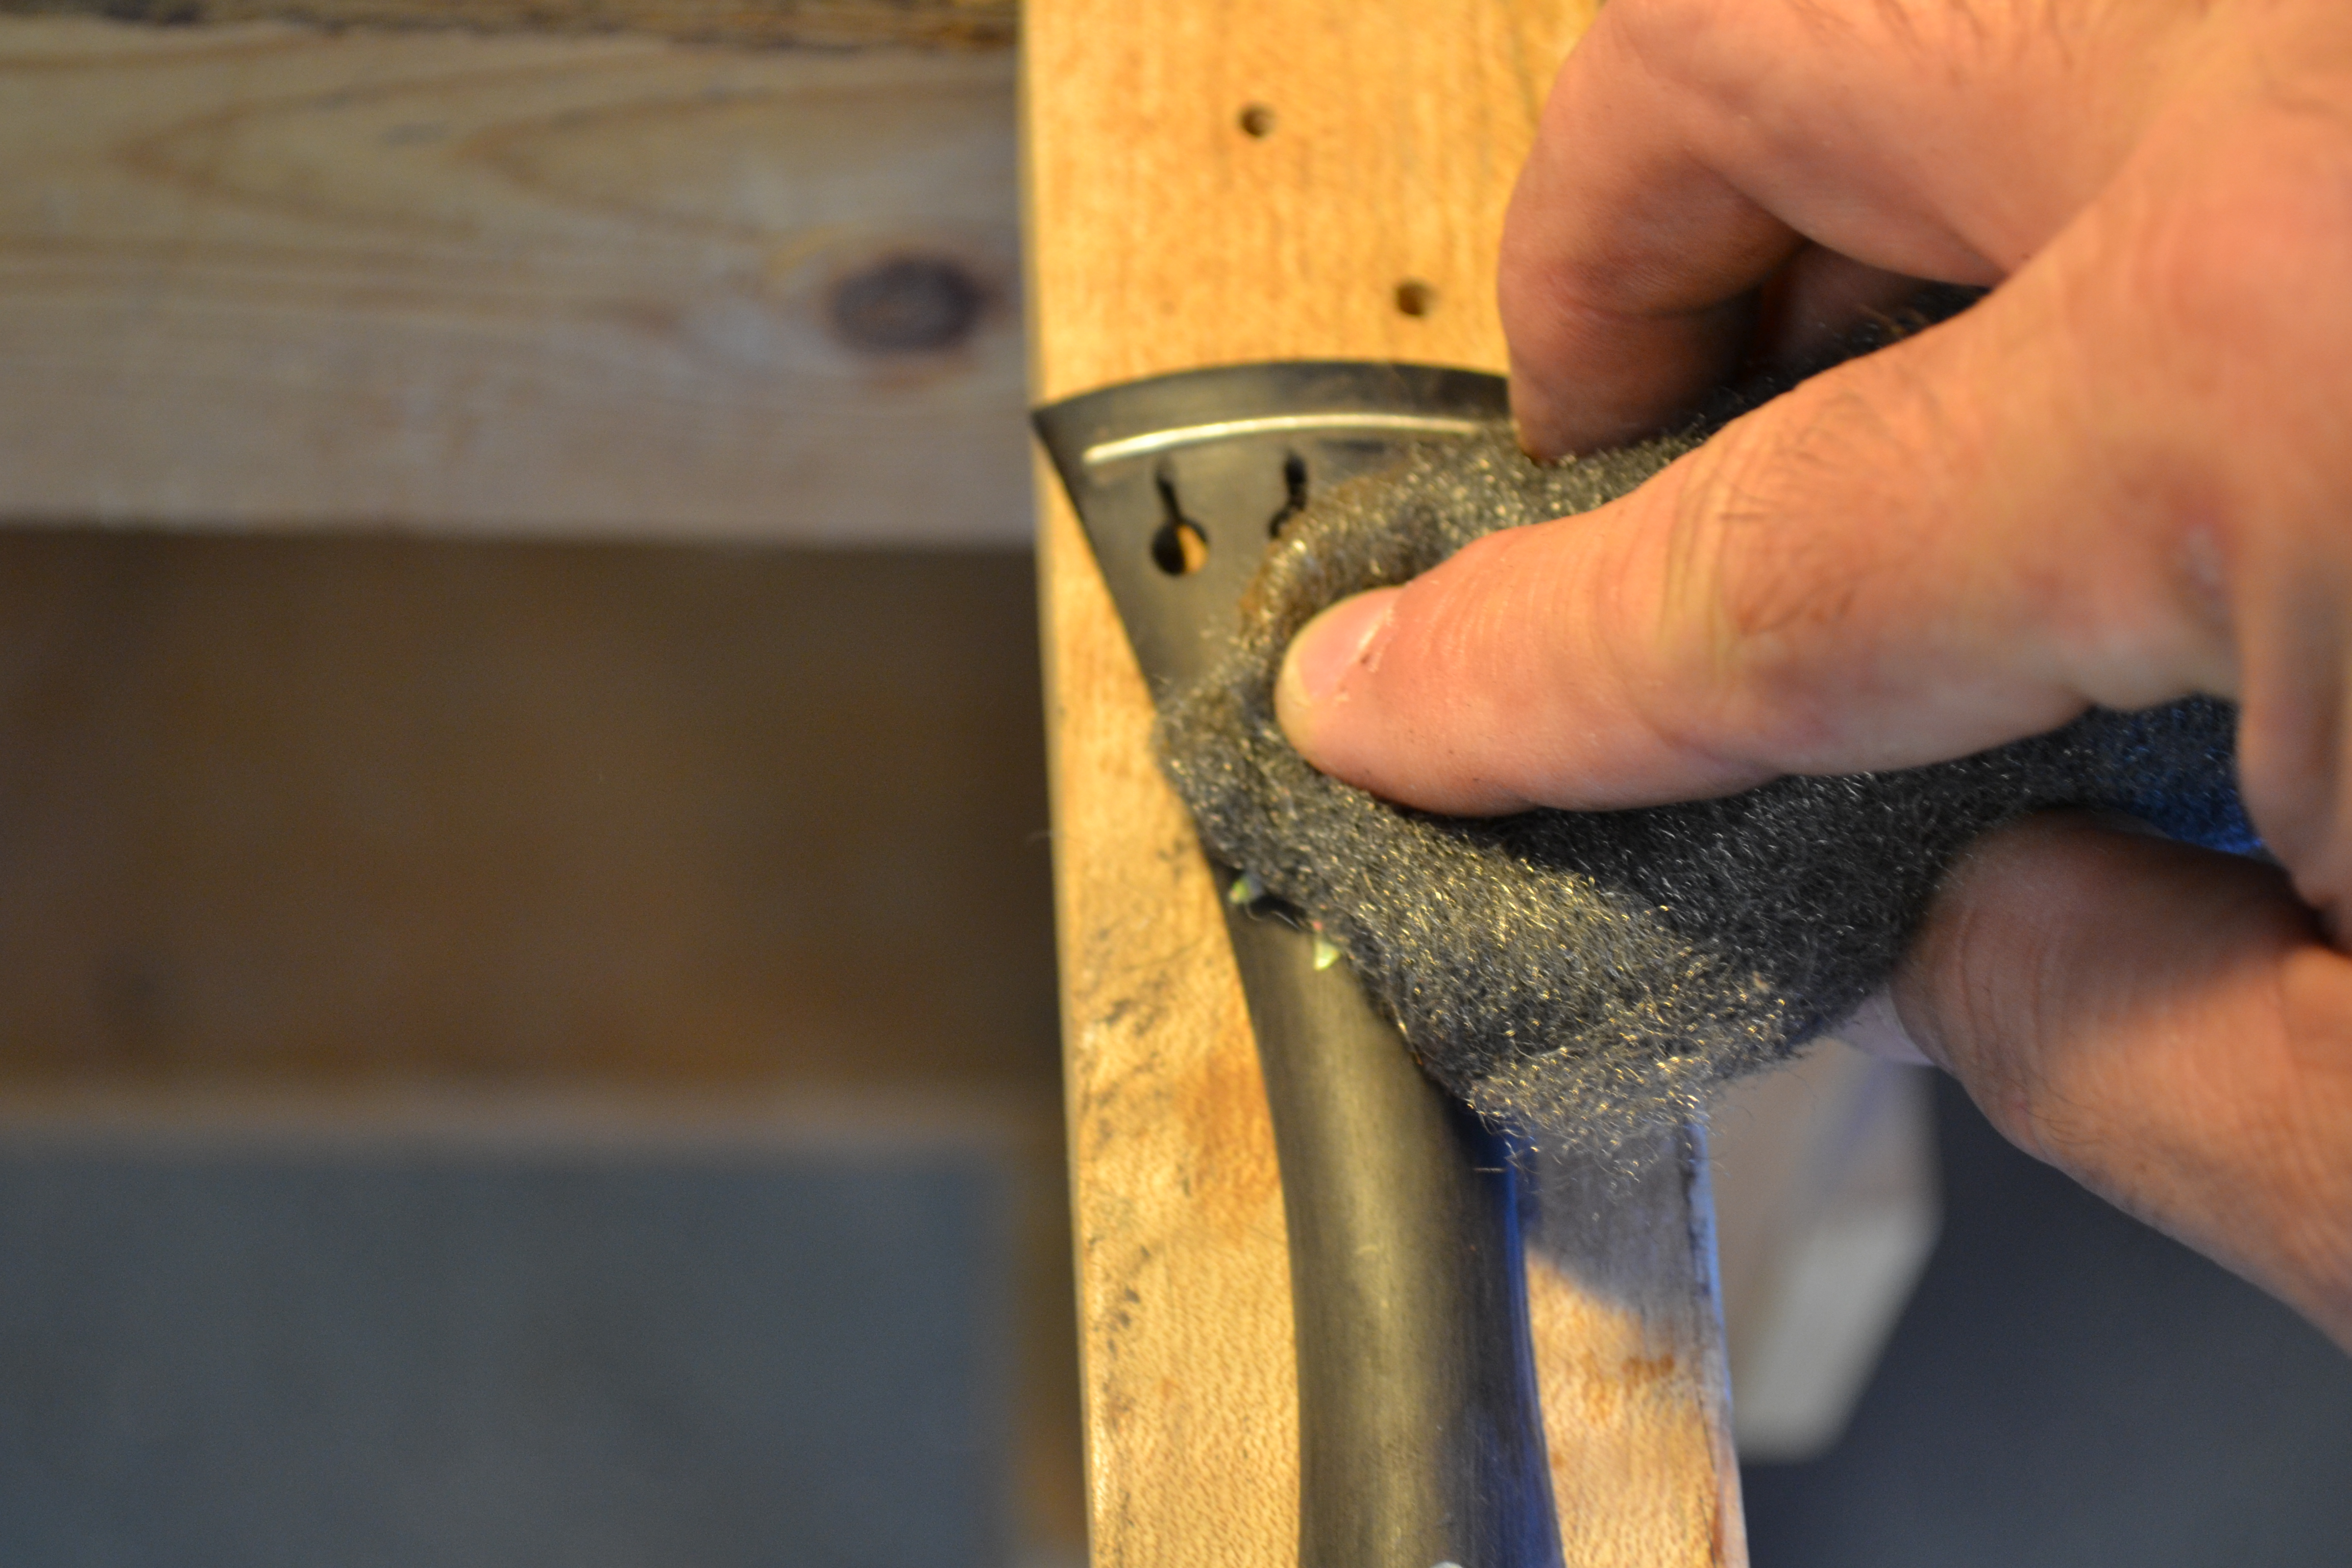
The final steps are to use .0000 steel wool then use the buffing wheel to make it all shine.
 |
 |
 |
 |
 |
 |
 |
 |
This violin tailpiece restoration is completed. I hope it will be useful to you.
 |
 |
 |
Richie Dotson
Acoustic Box LLC
11000 Long Branch Dr.
Chesterfield, VA 23832