
I see this kind of damage a lot here in the shop. Someone wants to plug in their acoustic guitar so they perform a self-install of a pickup. Nowadays this isn’t as big of a problem. We have better equipment; information and detailed instructions for properly installing pickups is easier to get, and there are a lot more qualified technicians now than ever before for performing routine tasks like this. The jacks are usually routed right through the butt block of guitars now, and even though it requires a special (pricy) reamer and some experience, it is worth having it installed professionally.
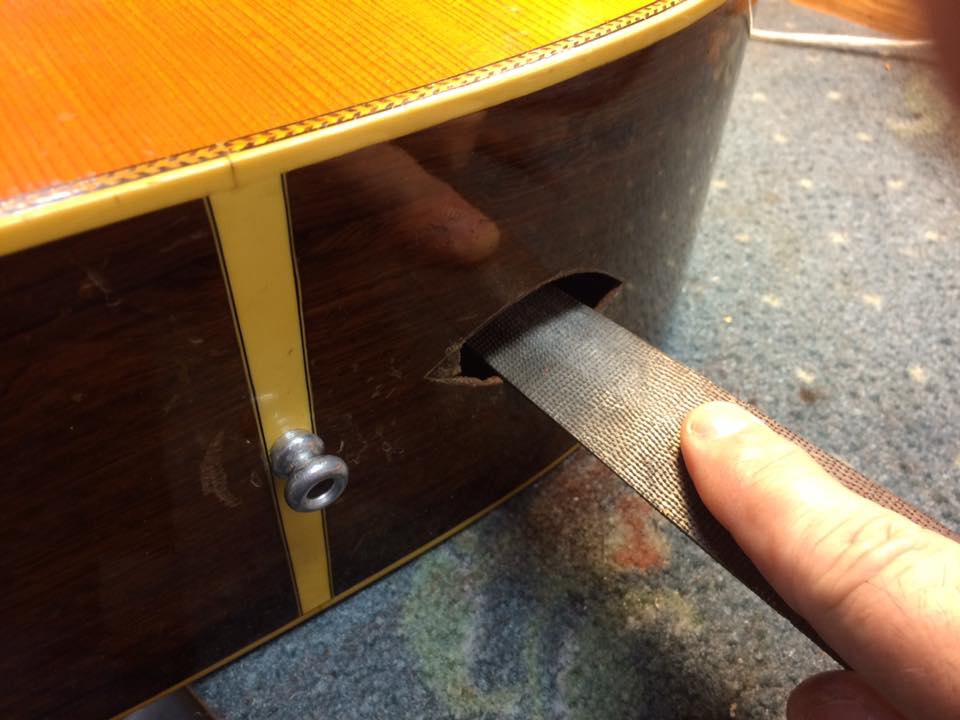
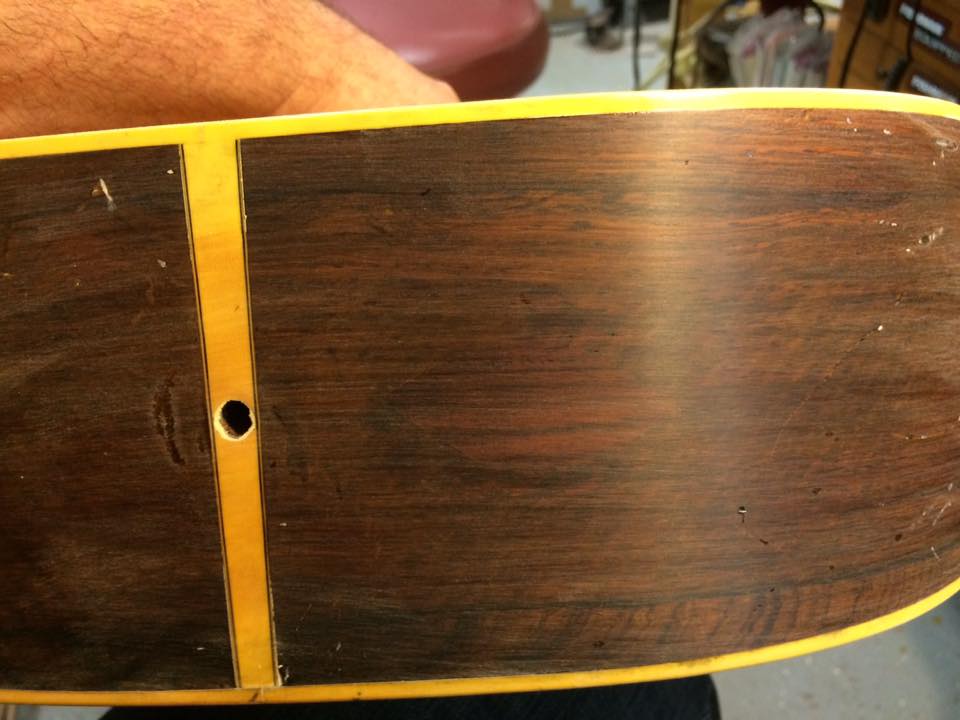
This guitar’s output jack was installed just to the right (treble side) of the butt block and into the side wood of the guitar. Not only is there a hole where it was installed, but there is peripheral damage on the butt block side. Because this is a 1945 D-28 Martin guitar, that means vintage and Brazilian Rosewood. I retain a nice stash of the stuff here in the shop, but no matter how chunky your hoard, you will never be able to exactly match the original wood. Hiring someone who does this type of work well is important. Please don’t take your vintage instrument to to the large chain guitar store and allow someone with inadequate experience, skill and machinery to touch it.
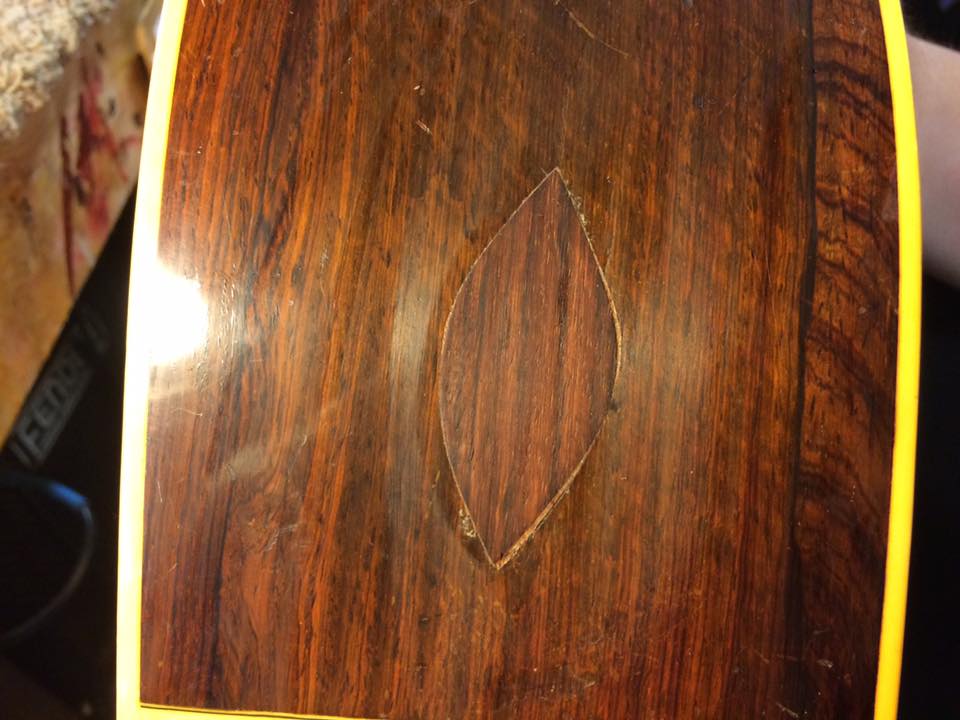
I am going to install a football shaped patch in this guitar and sort through my 40 or so pounds of Brazilian Rosewood until I have the grain as closely matched as possible. I would rather not have to sunburst or shade the patch in, so I will do all that I can to get as close as possible to matching the grain and runout and I will take my time with the fit to make it as perfect as possible.
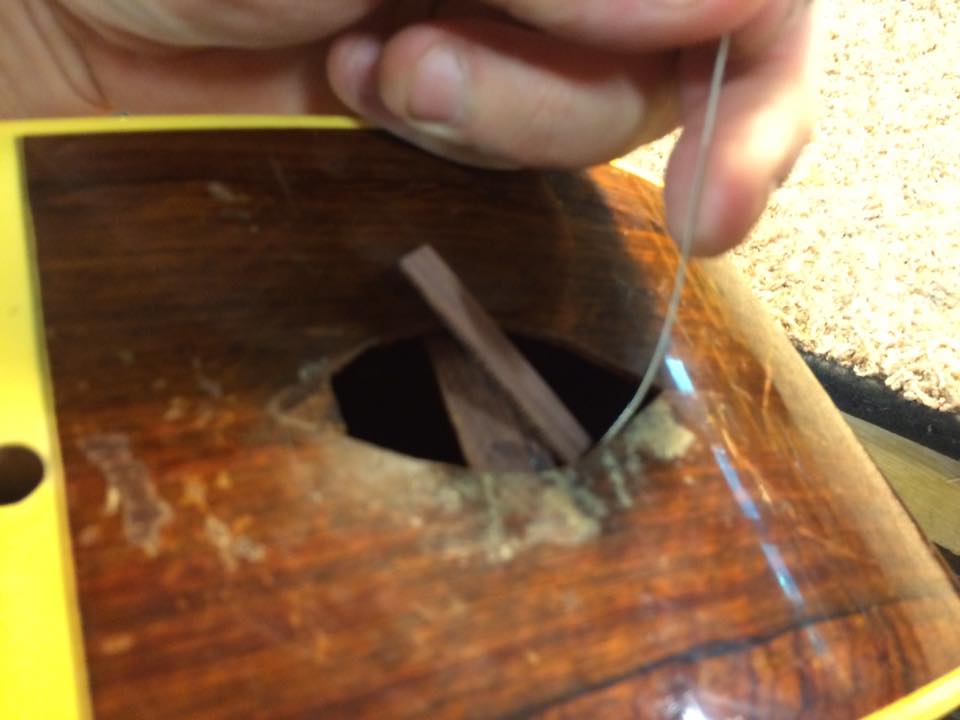
I begin by bending the piece of patch wood that I intend to use to the proper radius. I then trace the patch by scribing it, then cut out the patch’s shape and carefully file it to the exact size I need it to be.
Click on the photos below for a larger view in a new window


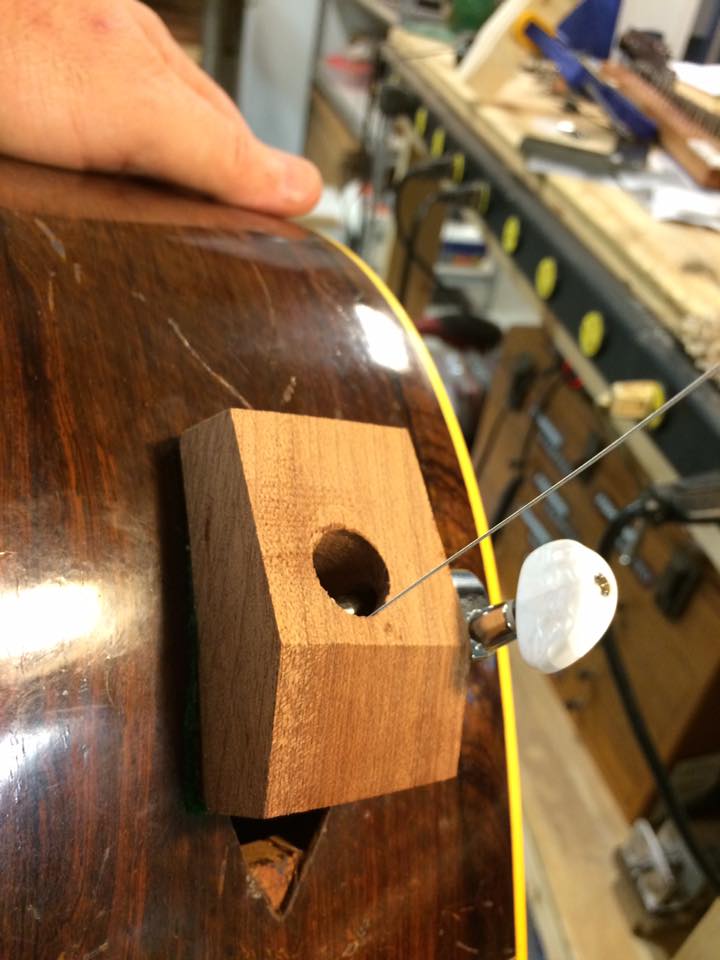
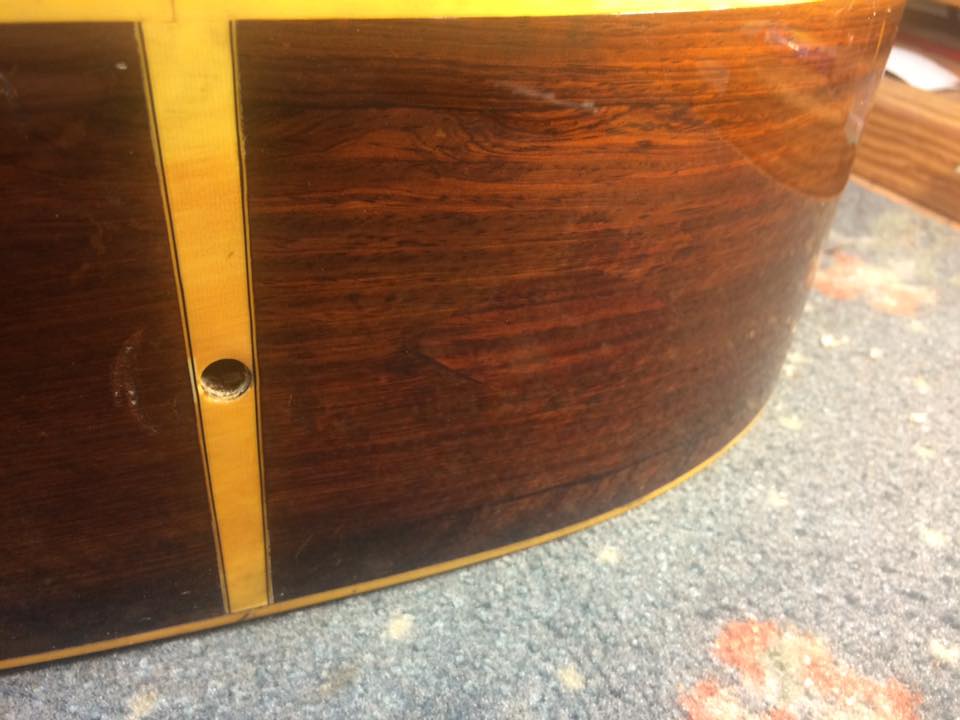
Once I am certain that the patch fits perfectly I start installing the framework that the patch will rest against. These are made of more of the same wood as the patch and are installed with hot animal hide glue. The funny looking clamp had to be custom made with the correct radius and a tiny hole was drilled in the backing piece through which a ball-end guitar string is threaded and is then passed through the eye of the guitar tuner and the machine is then used to clamp these in place one at a time. Each must dry overnight and these must be in place before the patch can be installed. The left hand side of the patch will be supported by the edge of the end or butt block and you can see it in the center photo below.


Once the backing supports have been installed properly the patch has something solid against which to glue. Once that is done the finish touchup can begin. The rosewood must be sanded flush to the surrounding surface. Most of that work can be helped along when you are preparing the patch. You’ll need to leave the patch proud of the surrounding area or you’ll have problems. The patch must be sprayed with the same type of finish (in this case, nitrocellulose lacquer) and the surrounding area (up to the center binding strip) will also be sanded to prepare it for some over-spray. The patch and everything else that got sanded during the patching process needs to have pour filler added of the appropriate color, then multiple coats of a really good quality lacquer applied.
The repair will need to sit for about 10 to 14 days depending on product and atmospheric conditions before it can be wet sanded and buffed.


Thank you for your visit and please check back often as this website gets updated and new information is added periodically.
Acoustic Box LLC